
How to use ARTstreet materials
2021-12-09
- Index -
You can use the brushes by adding them to your list of brushes in the Brush window.
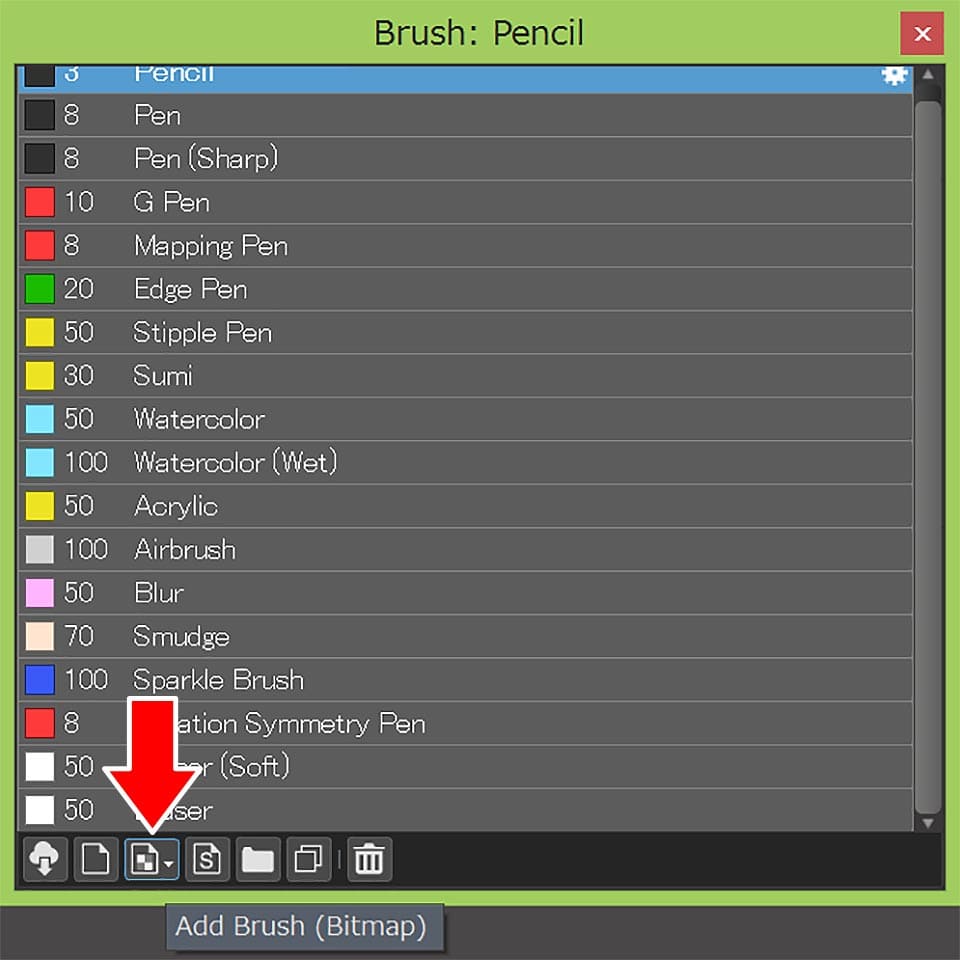
1.Select「Add Brush (Bitmap)」from the Brush window.
2.Click「From File」and select the file with the Brush data (in mdp format).

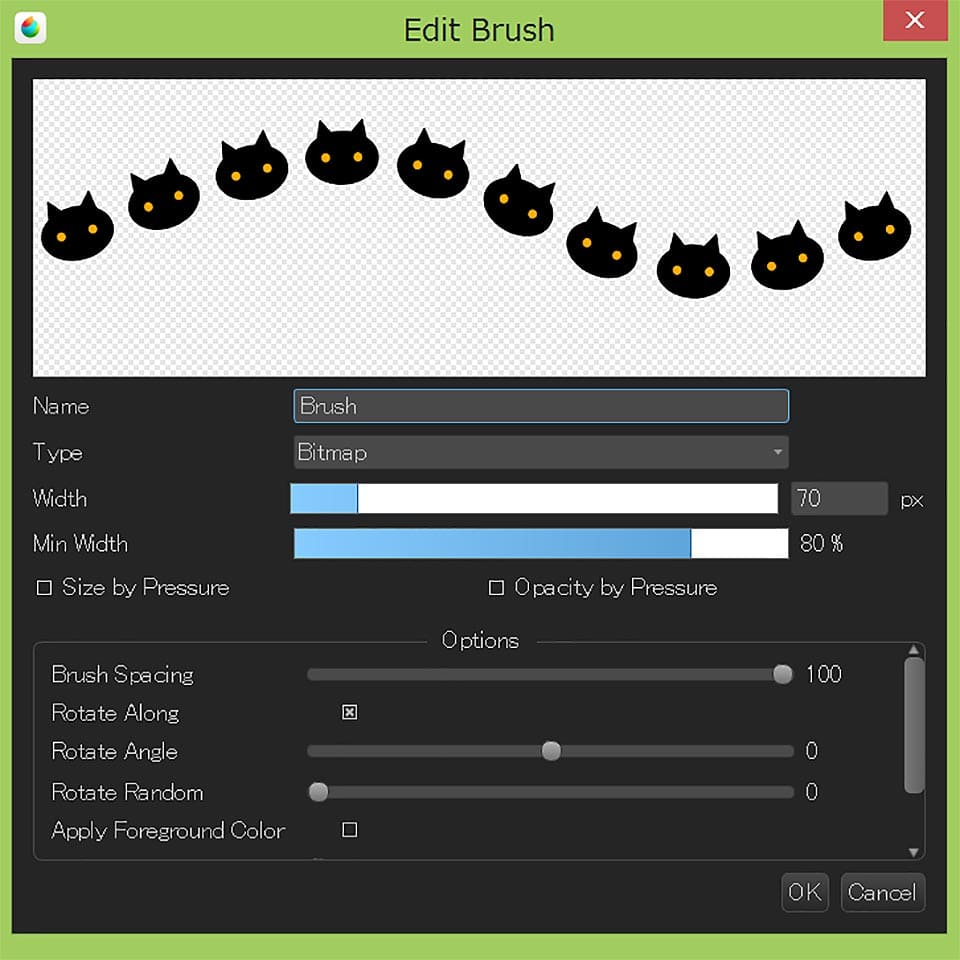
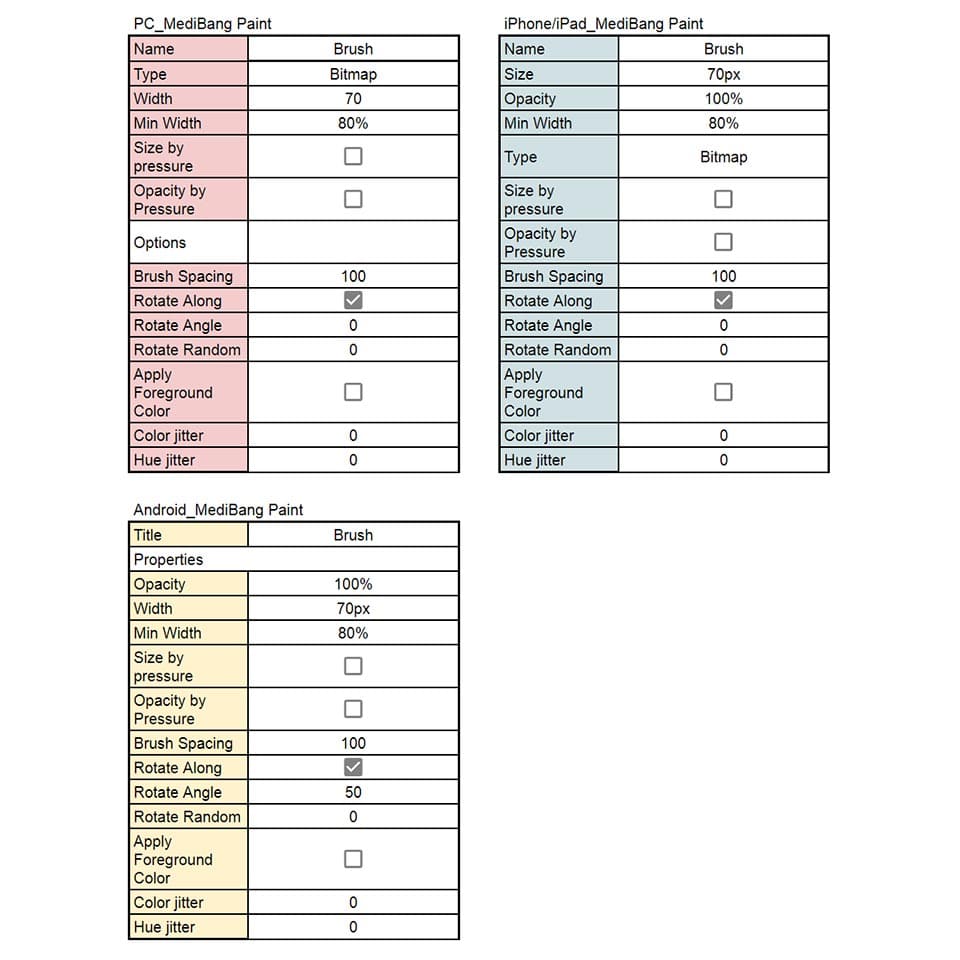
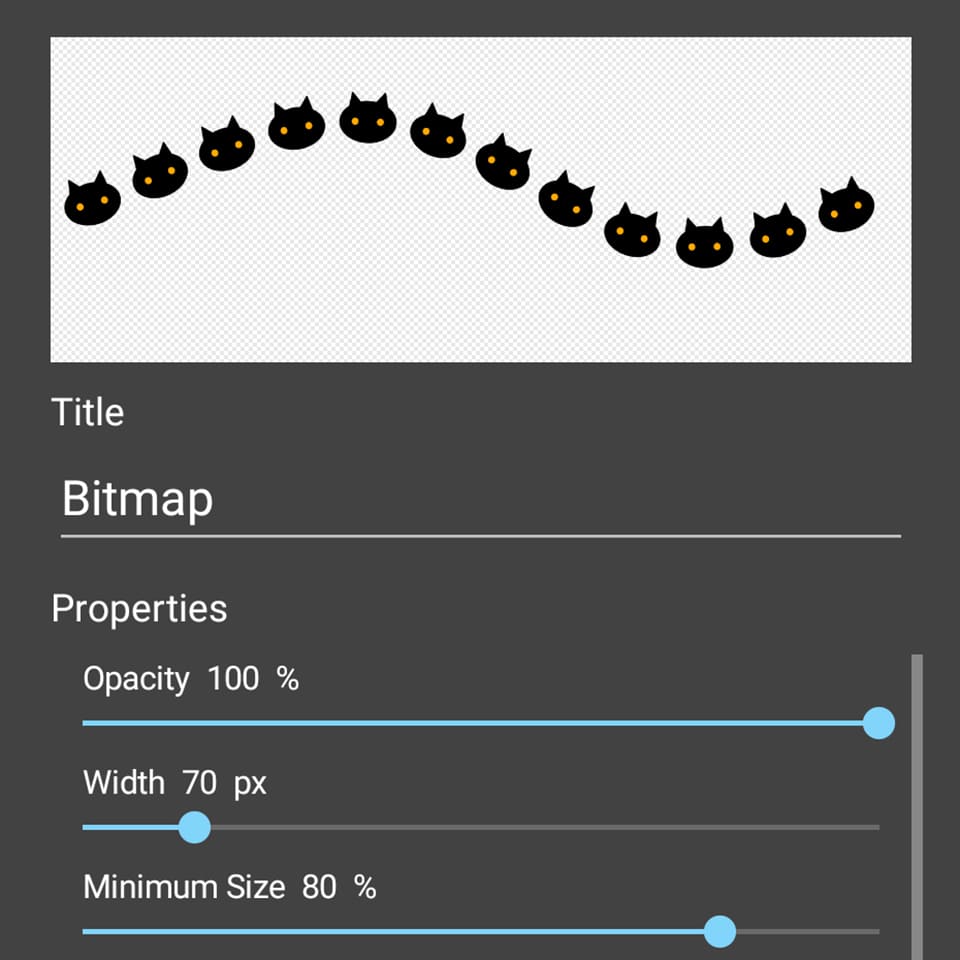
3.Once the dialogue of the brush details pops up, adjust and enter the numbers of each parameter accordingly to the「○○○_Parameters.png」file that is packed together inside the resources folder made when you purchased the brush. Click「OK」and you can start using the brush.
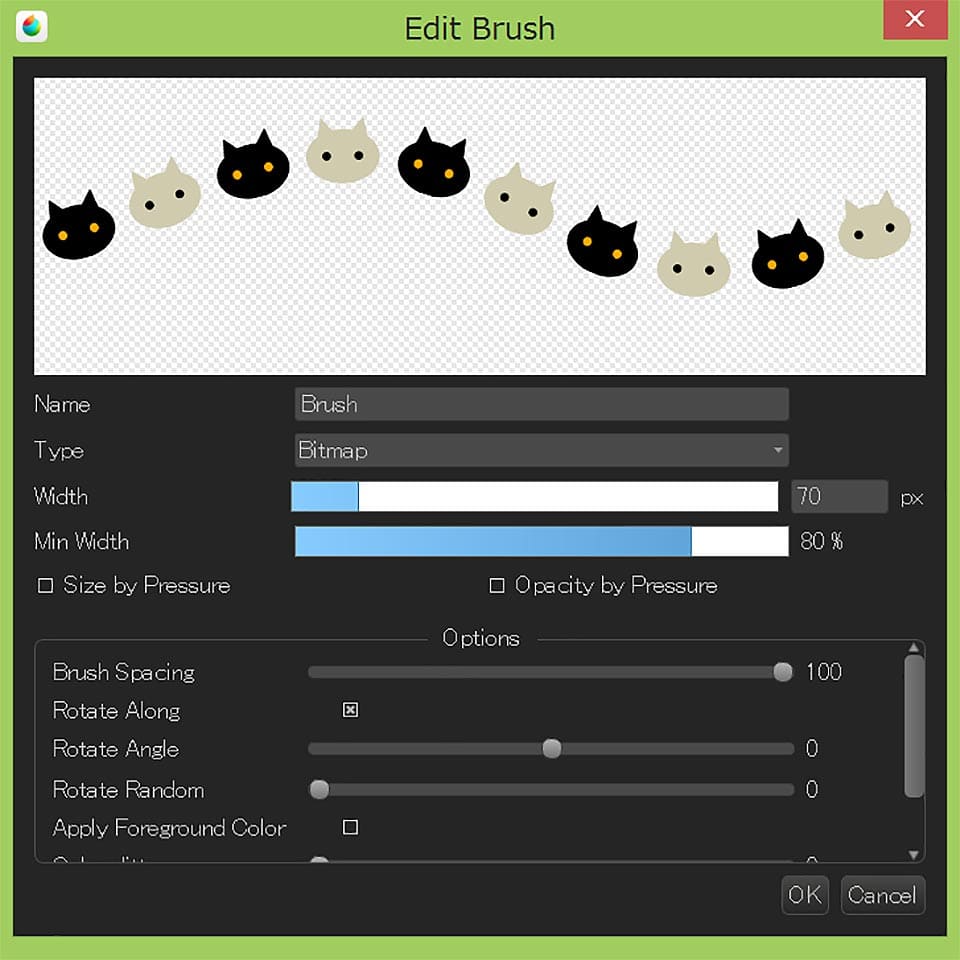

○○○_Parameters.png
※Before initiating the brush settings, please save your file with the Brush data (in mdp format) to the File app in your iPad.
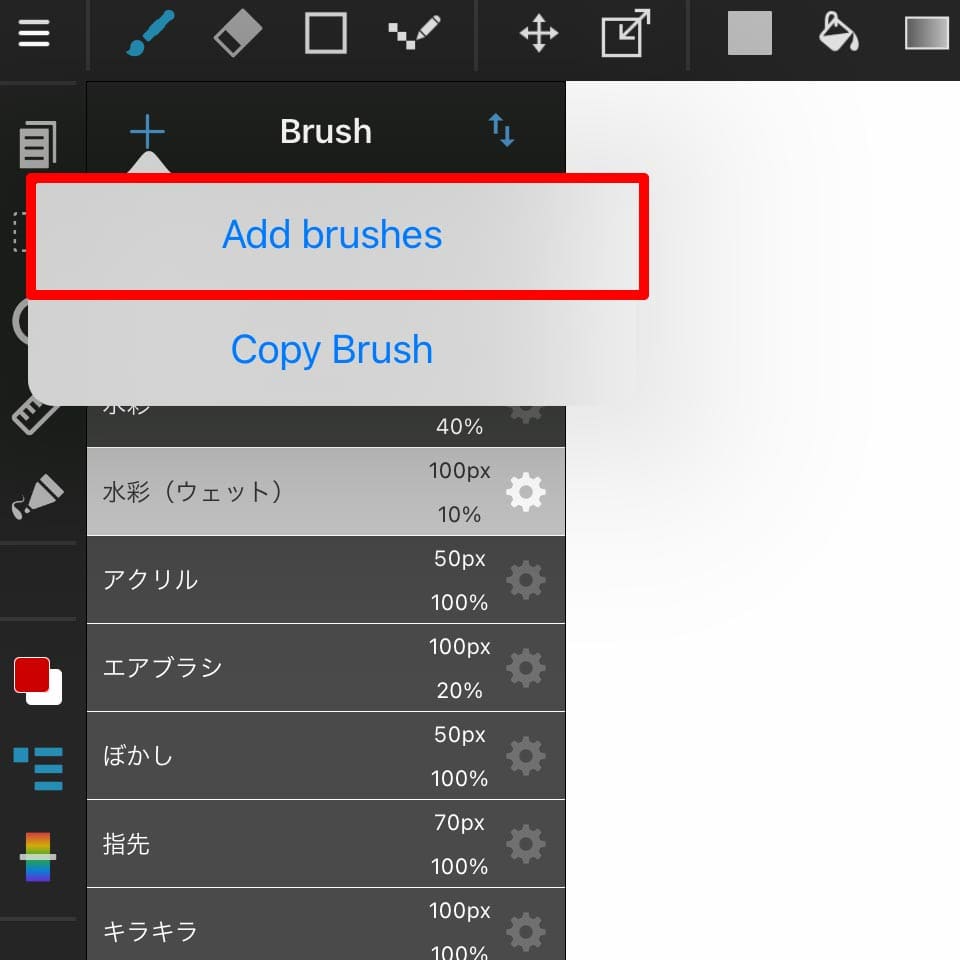
1.Click「+」inside the Brush panel and choose「Add brushes」.
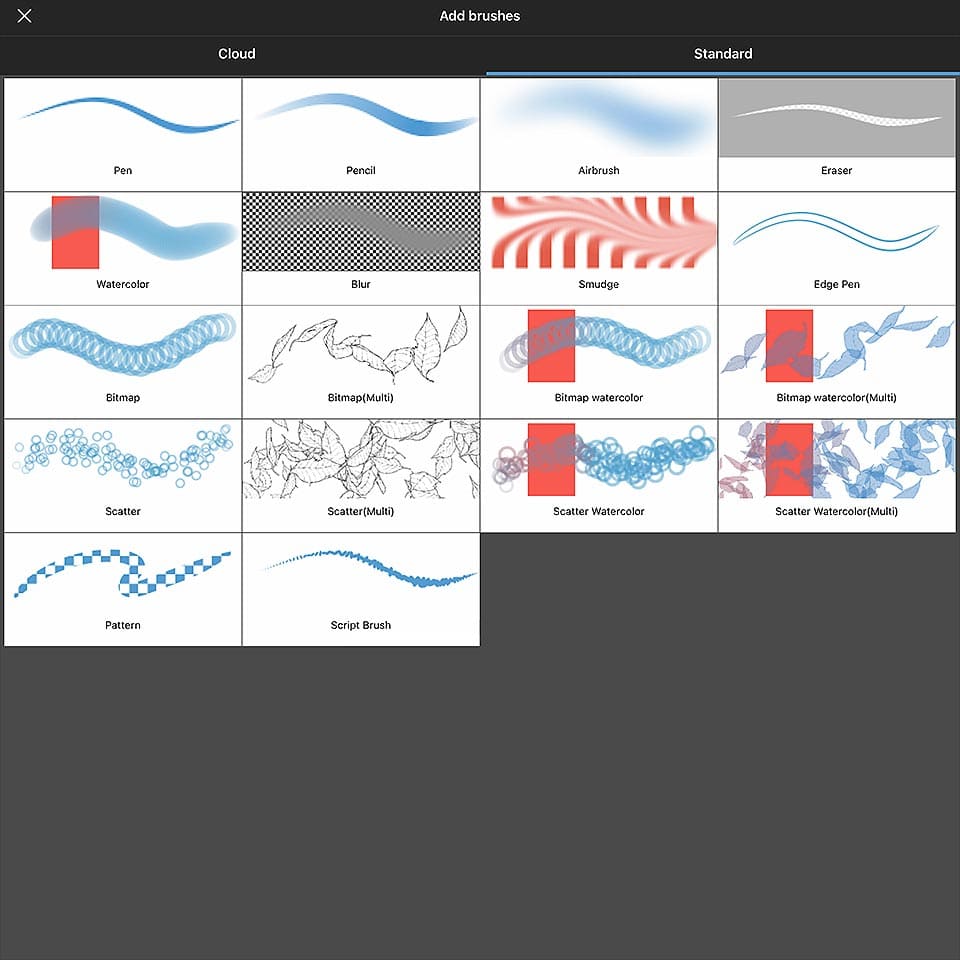
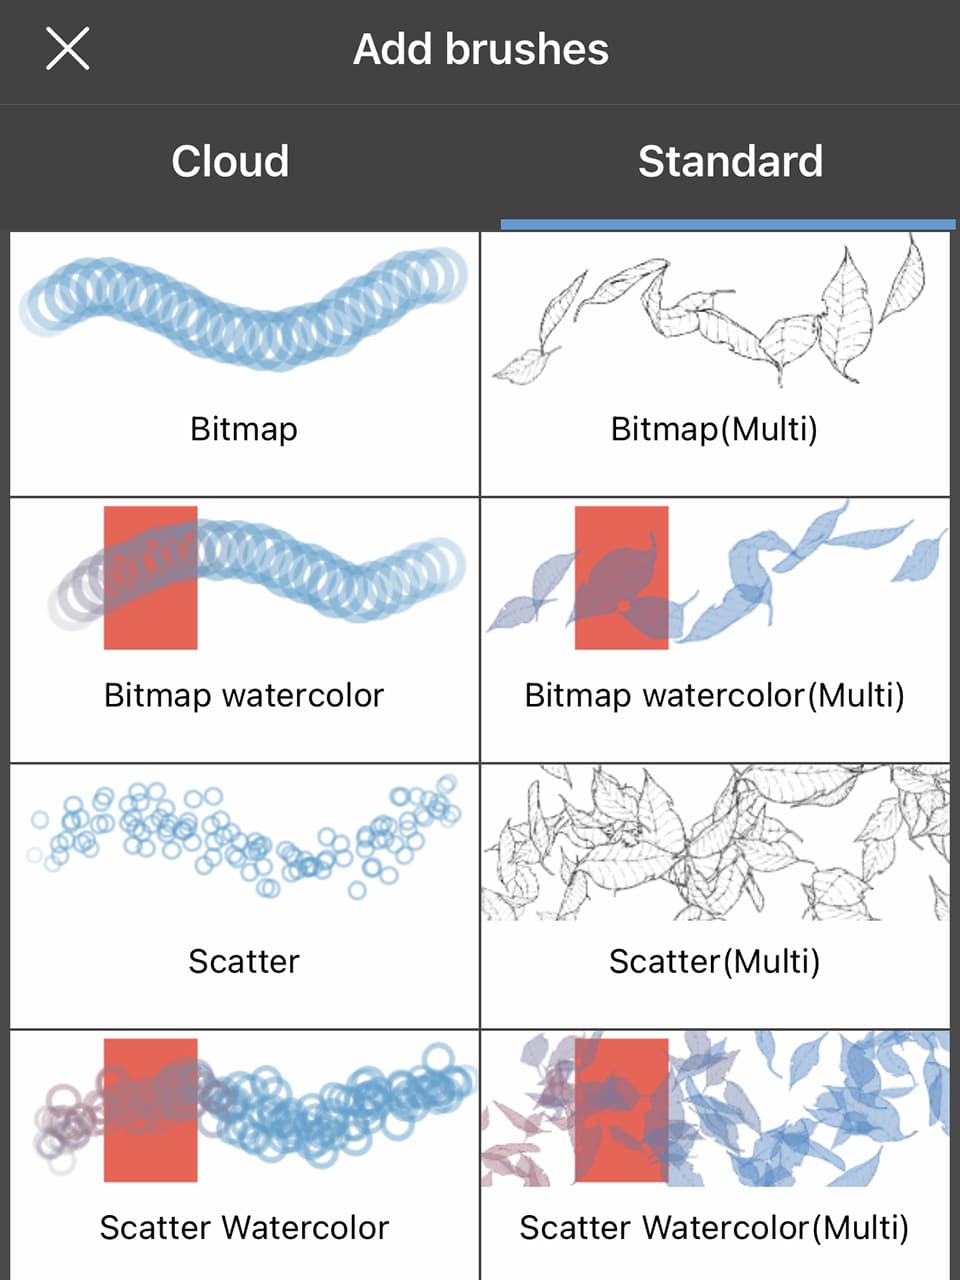
2.Choose the ”Standard” tab and confirm the brush type written in「○○○_Parameters.png」when selecting the type from Bitmap (Multi)・Bitmap Watercolor (Multi)・Scatter (Multi)・Scatter Watercolor (Multi).
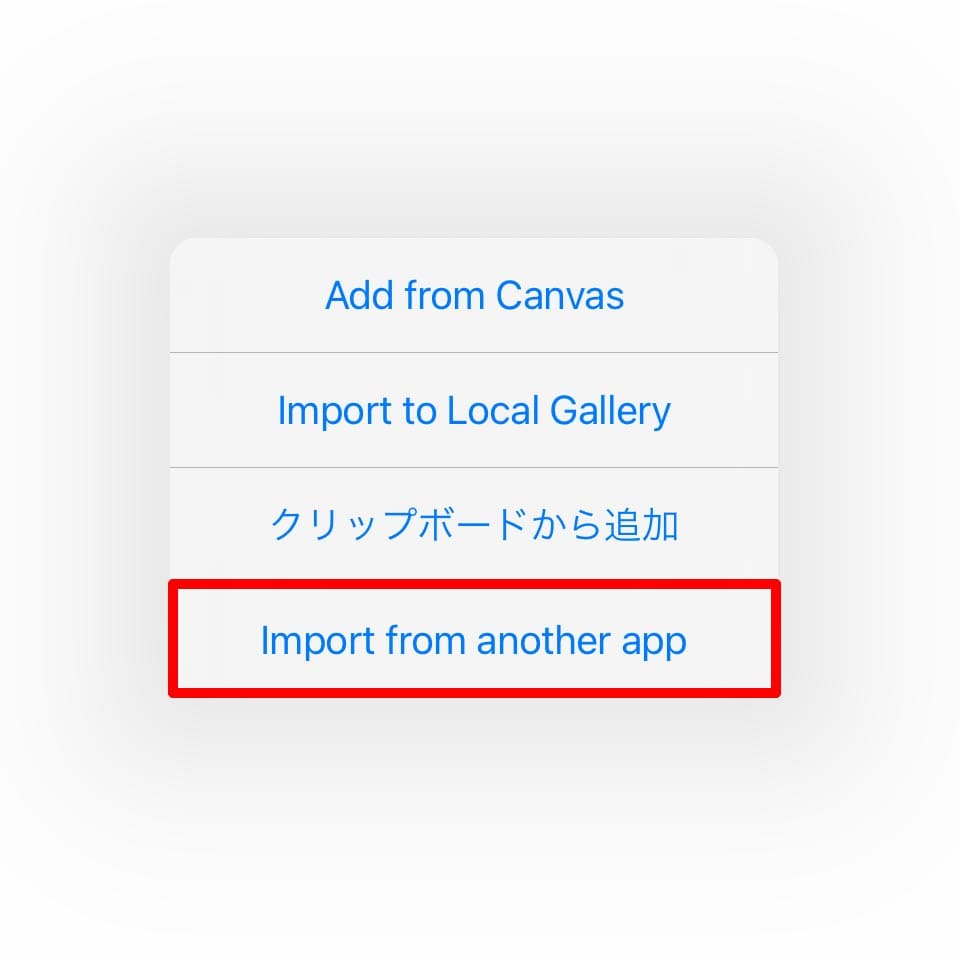
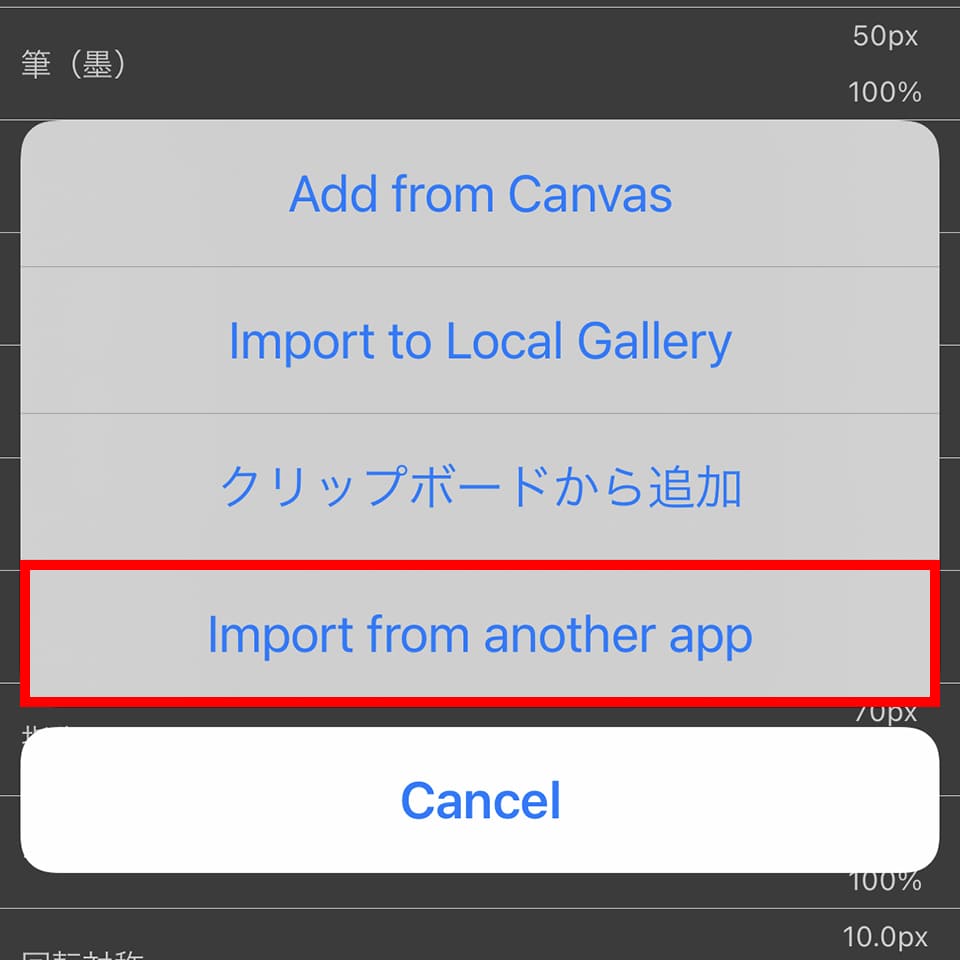
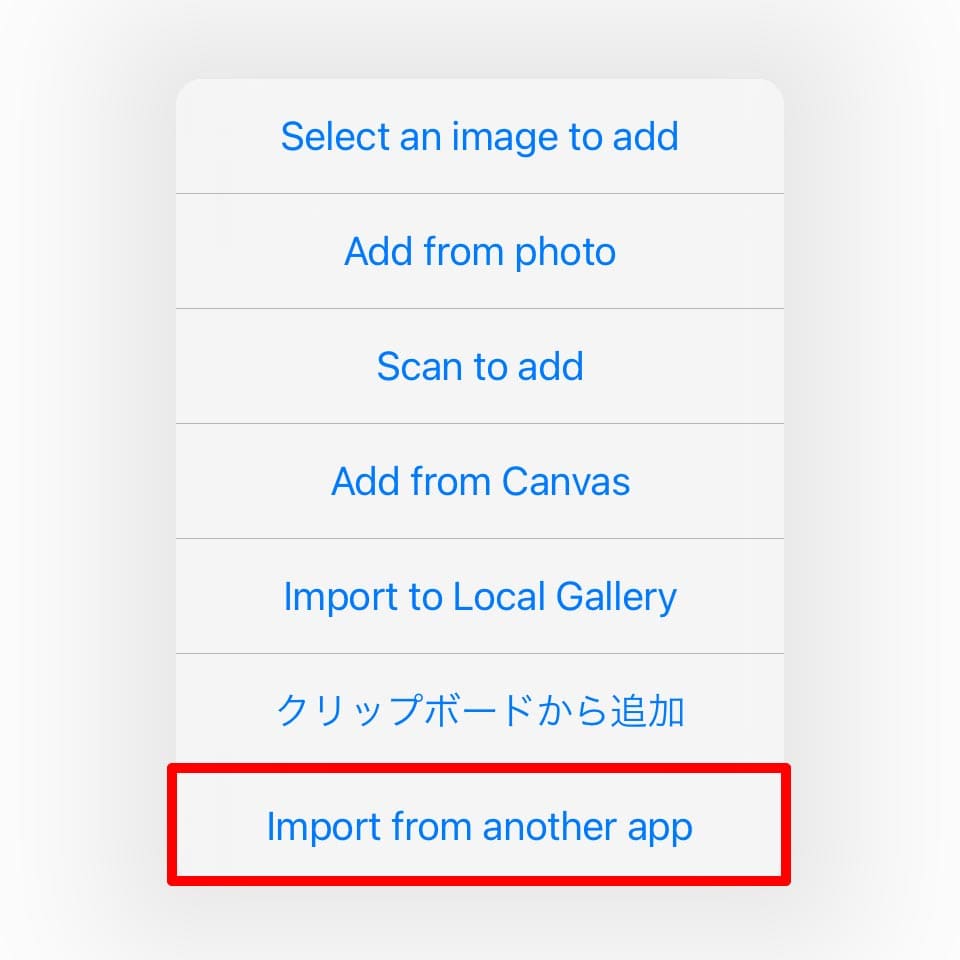
3.Select「Import from another app」and choose your file with the Brush data from your File app.
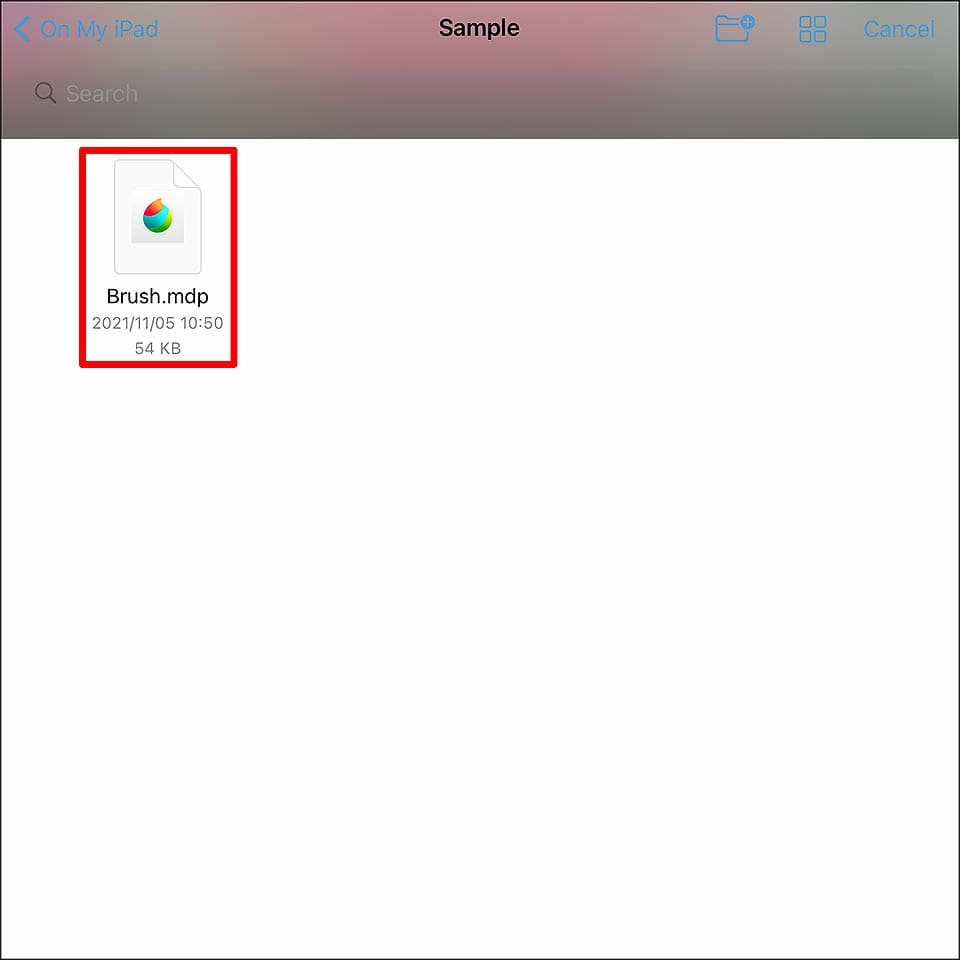
4.Select the file for the Brush data you want to add.
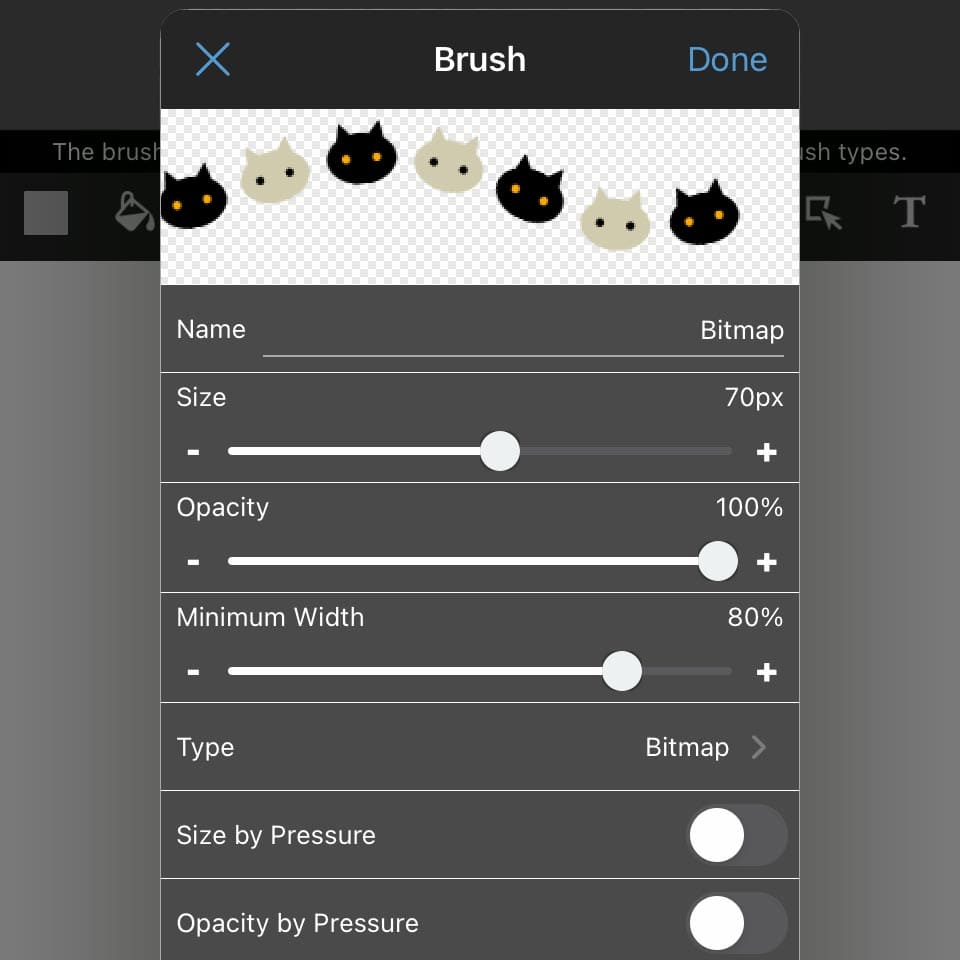
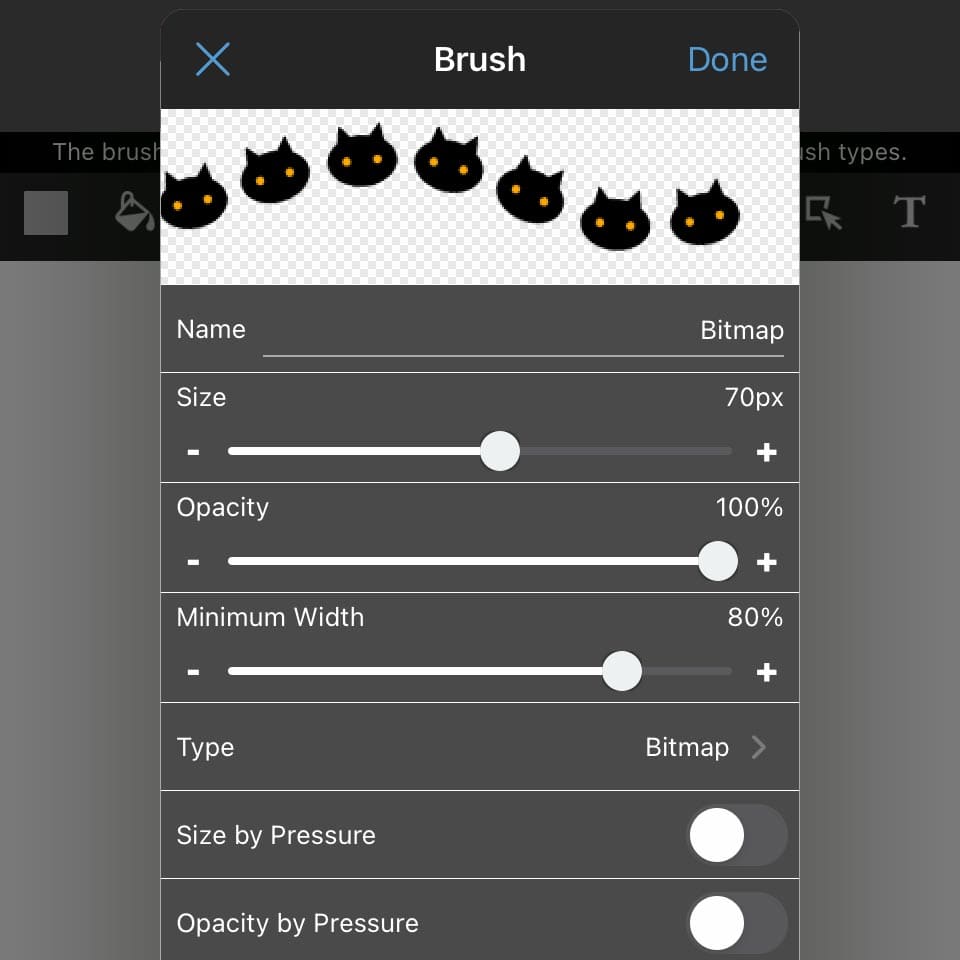
5.Once the dialogue of the brush details pops up, adjust and enter the numbers of each parameter accordingly to the「○○○_Parameters.png」file that is packed together inside the resources folder made when you purchased the brush. Tap「Finish」and you can start using the brush.
※Before initiating the brush settings, please save your file with the Brush data (in mdp format) to the File app in your iPhone.
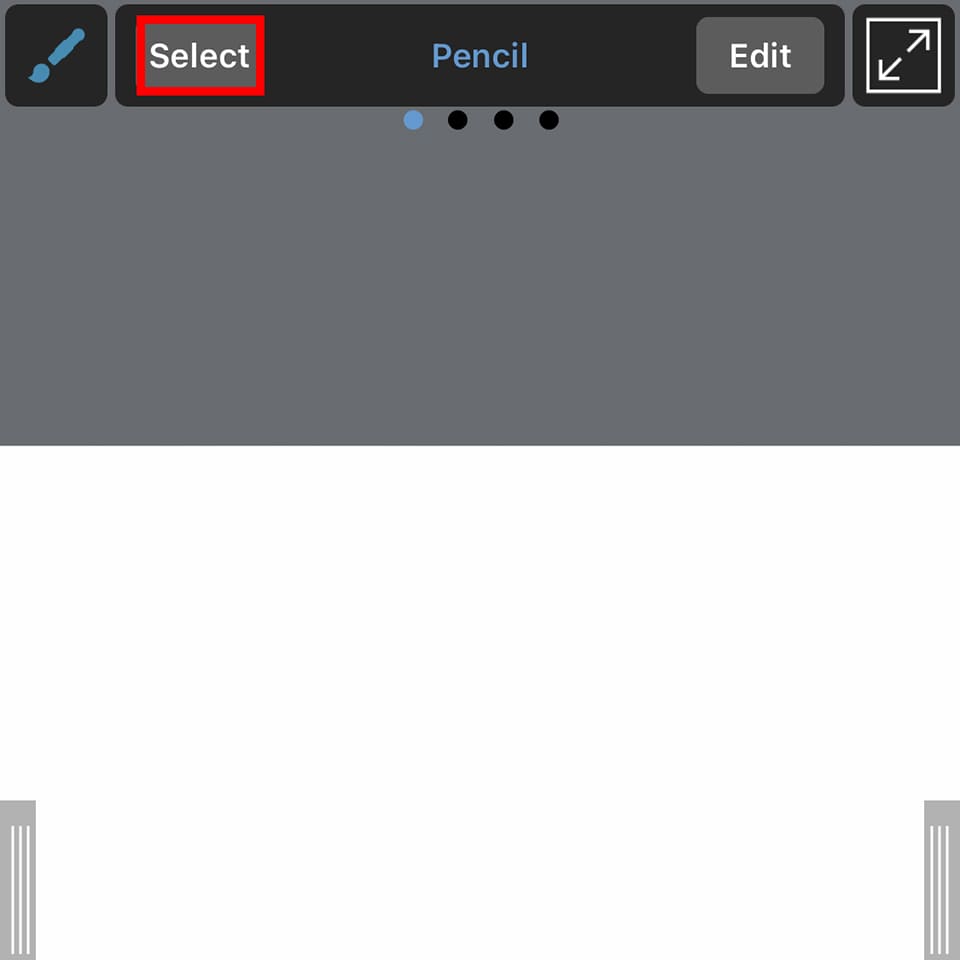
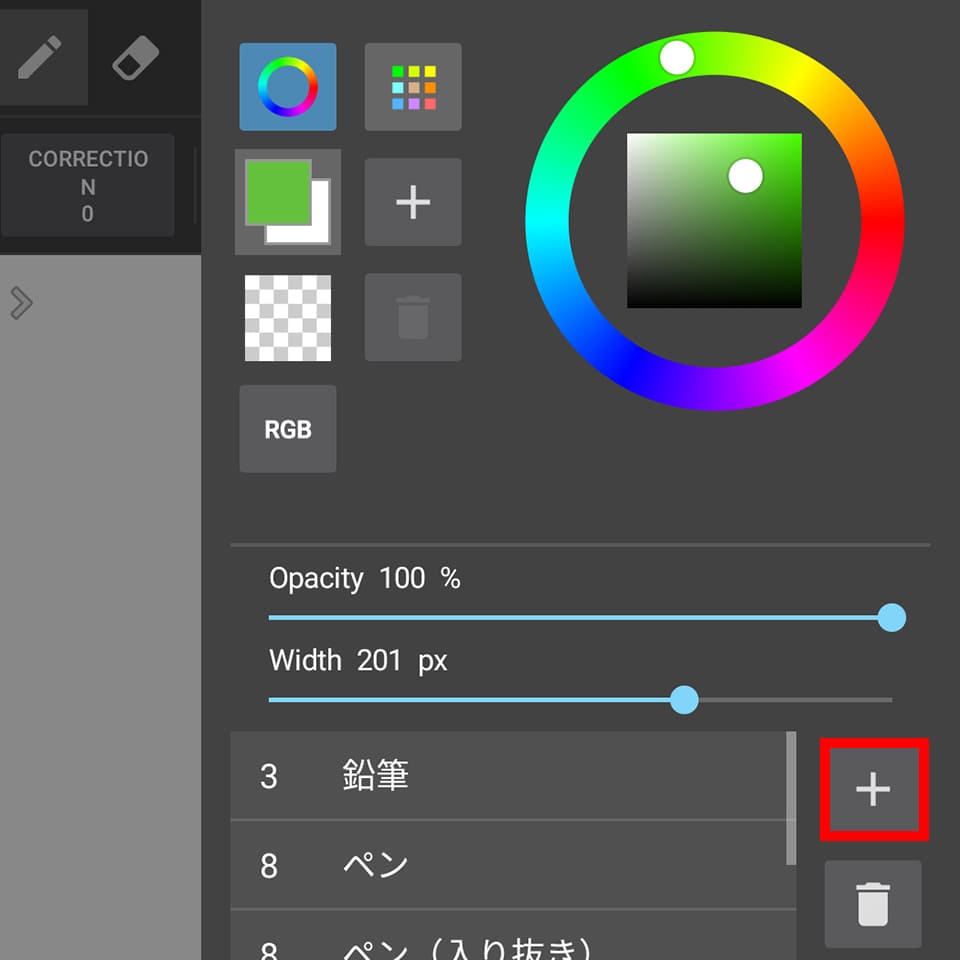
1.Tap the「Select」button inside the sub bar of Pen tool and from「+」choose「Add brushes」.

2.Inside the「Standard」tab, confirm the brush type written in「○○○_Parameters.png」and choose from from Bitmap (Multi)・Bitmap Watercolor (Multi)・Scatter (Multi)・Scatter Watercolor (Multi).

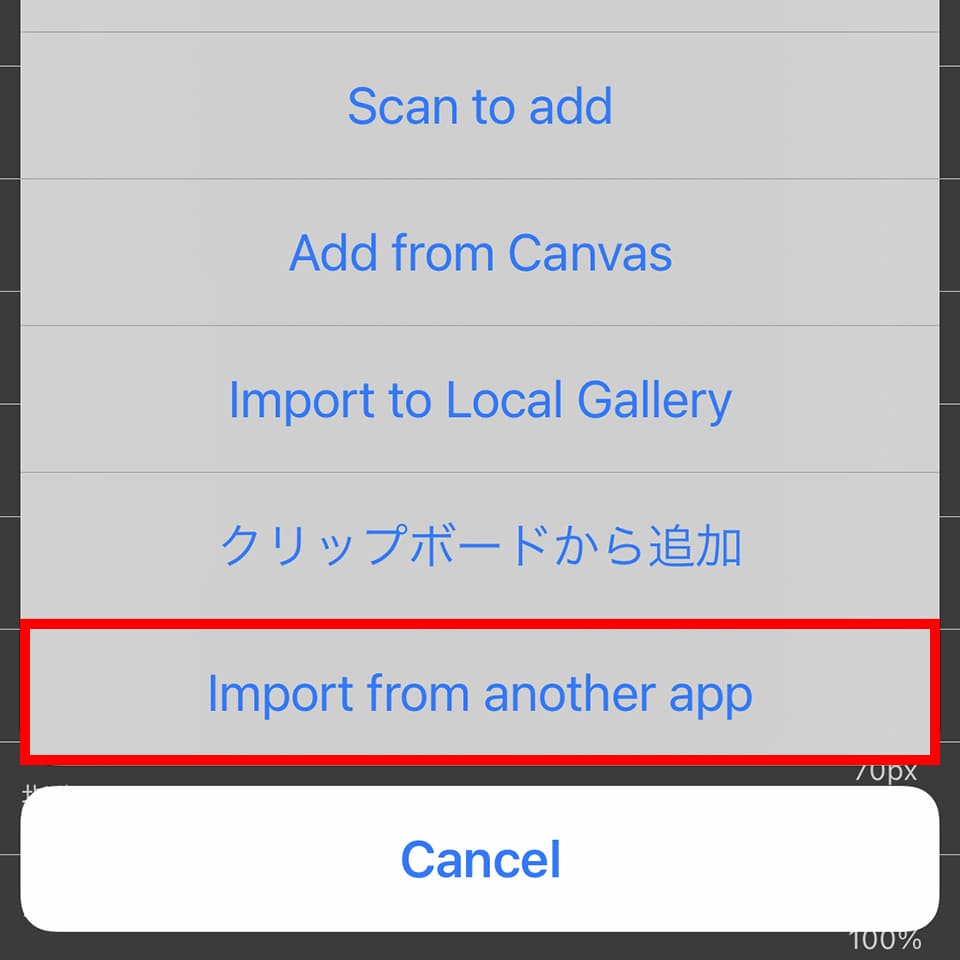
3.Choose「Import from another app」and select the file with your Brush data inside the File app.
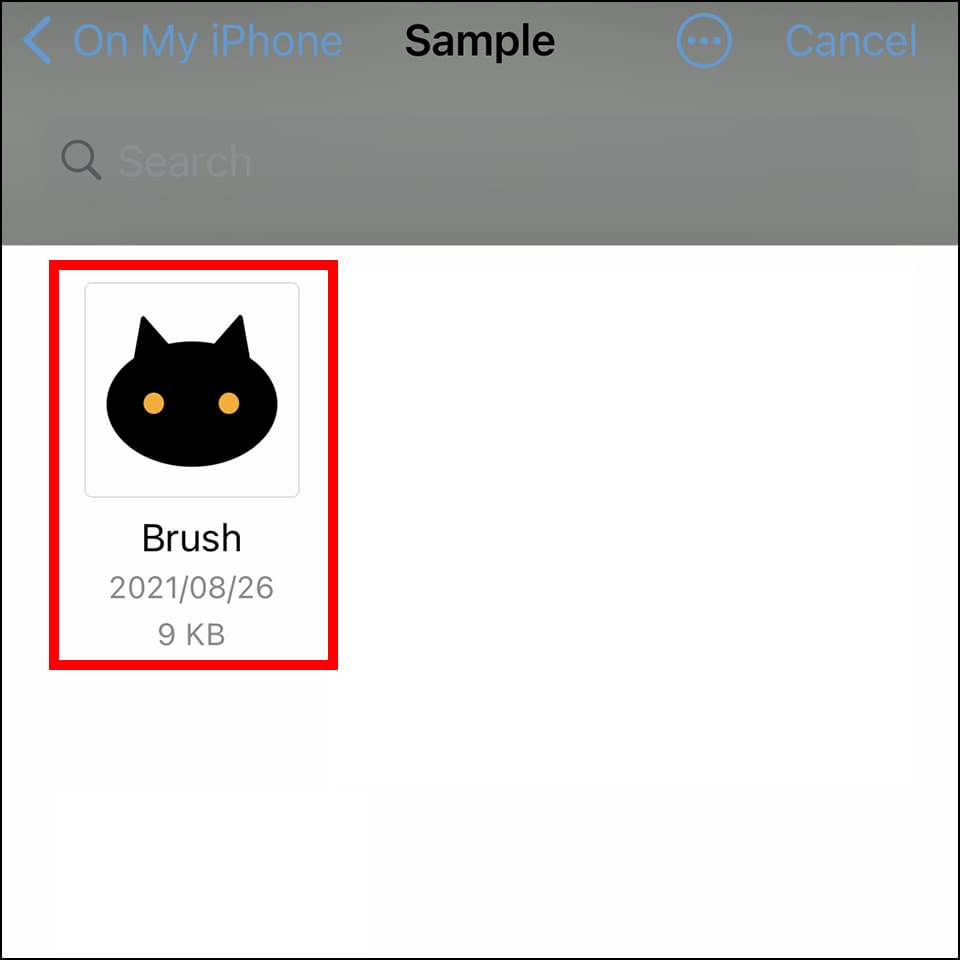
4.Choose the file with the Brush data you want to add.
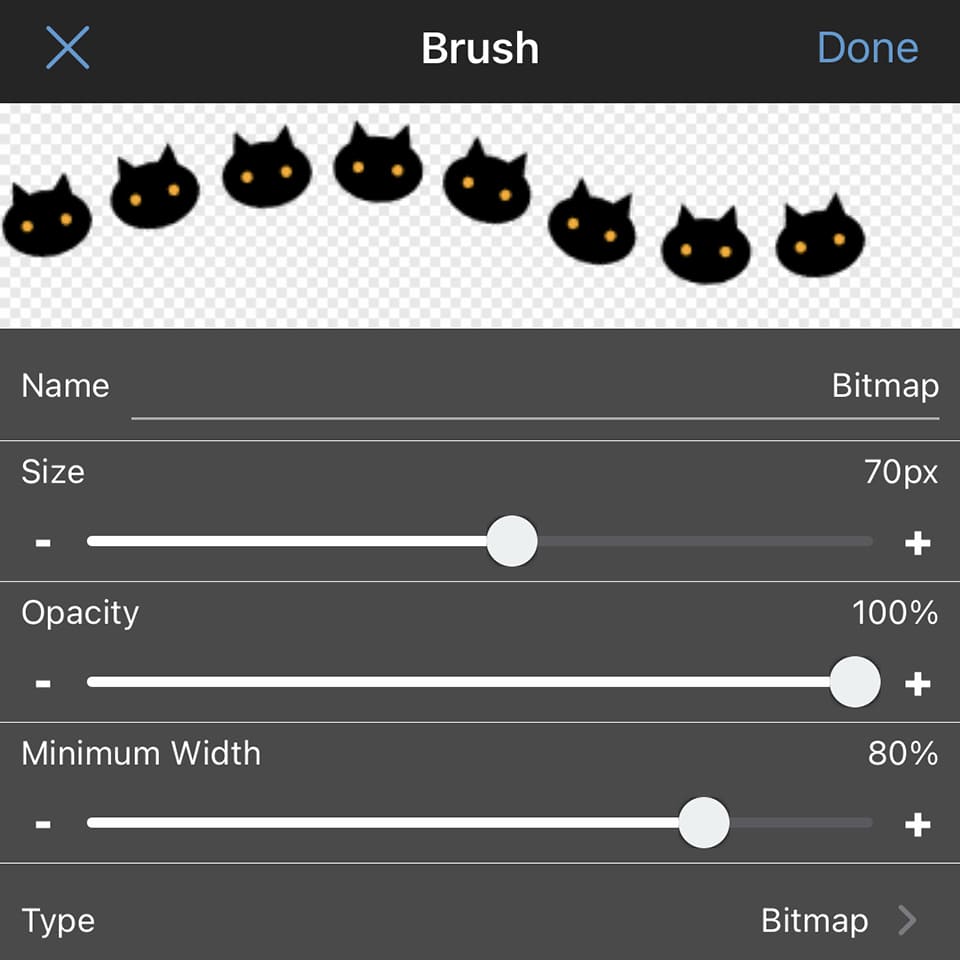
5.Once the dialogue of the brush details pops up, adjust and enter the numbers of each parameter accordingly to the「○○○_Parameters.png」file that is packed together inside the resources folder made when you purchased the brush. Tap「Finish」and you can start using the brush.
※Before initiating the brush settings, please save your file with the Brush data (in mdp format) to the Files app in your Android.
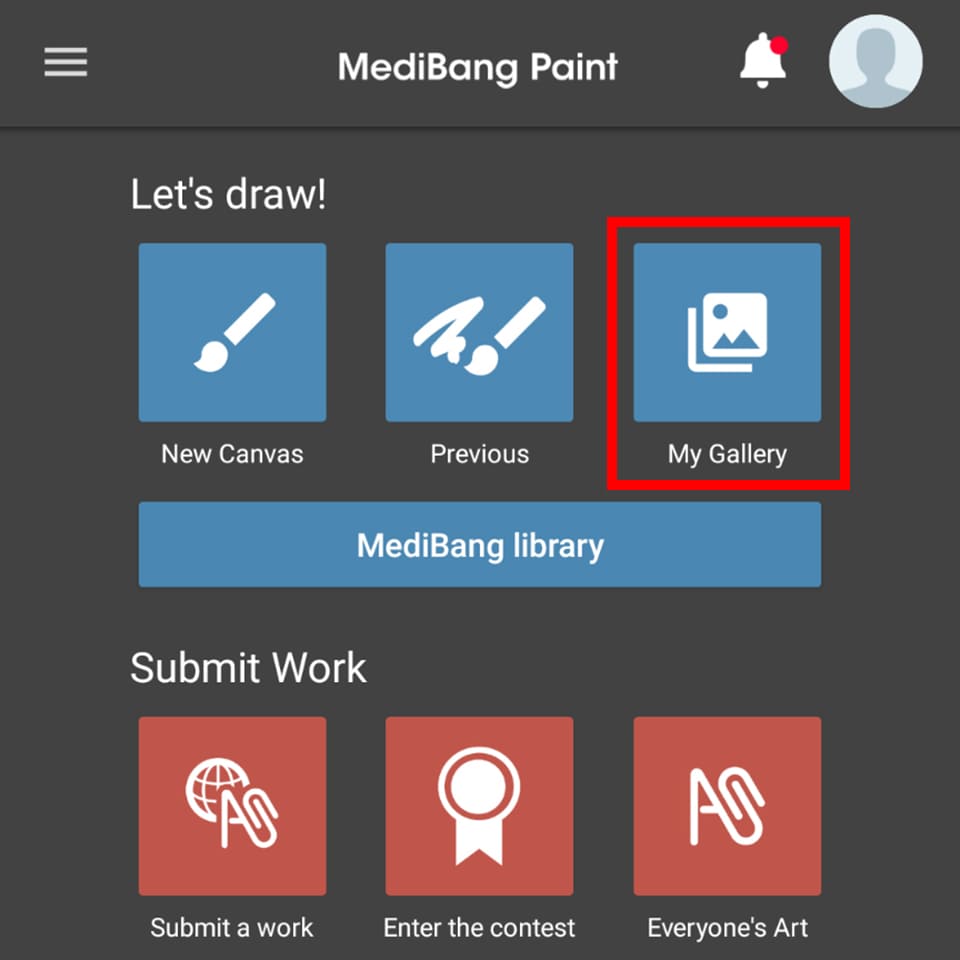
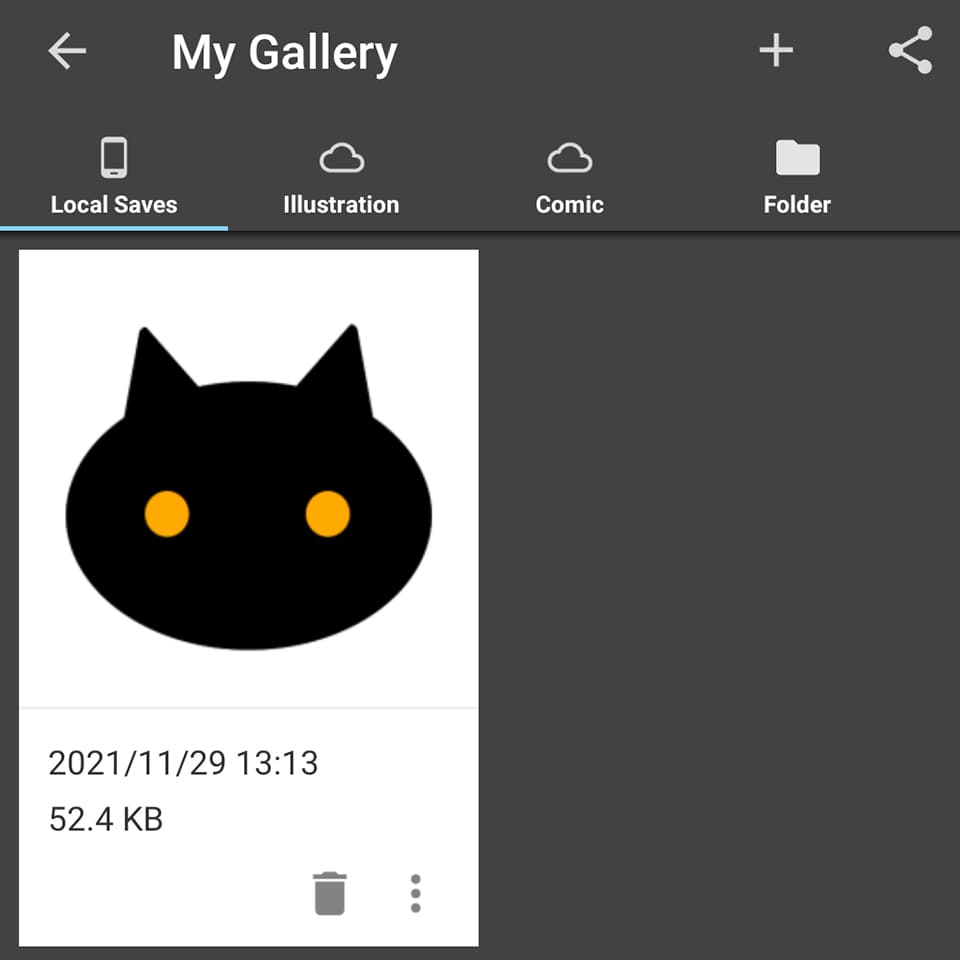
1.Tap「My Gallery」.
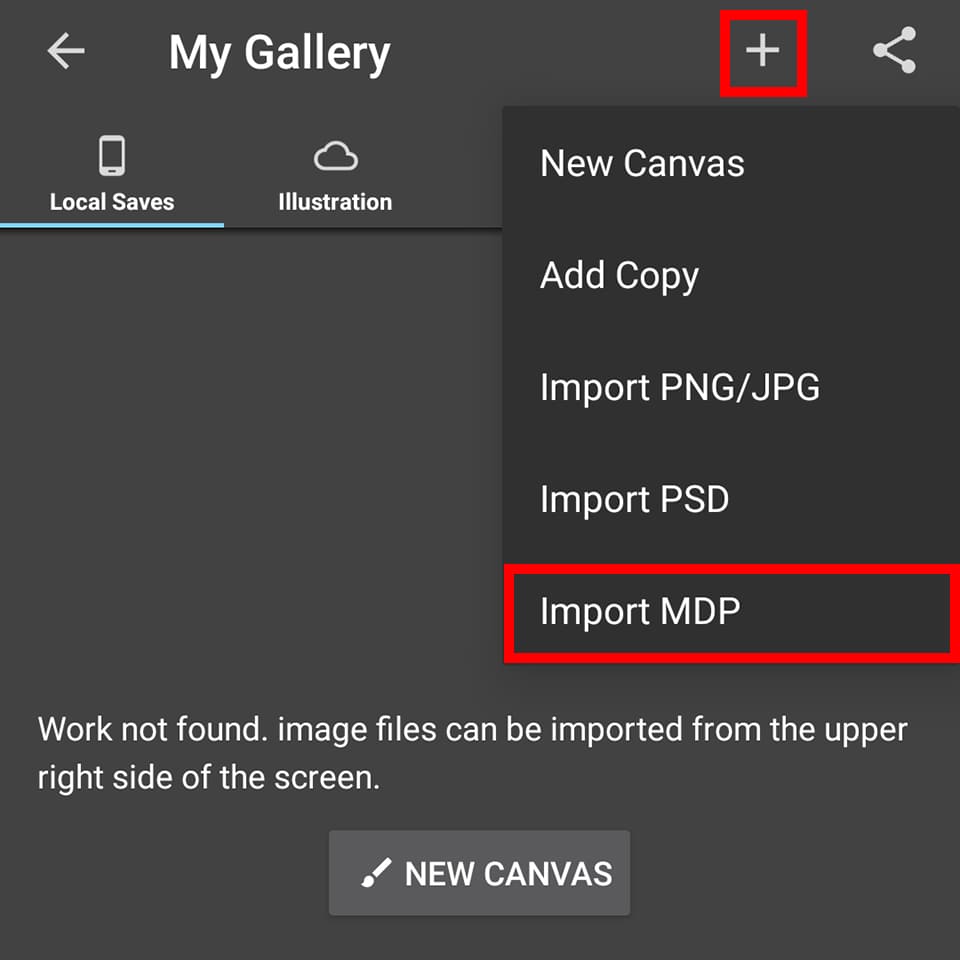
2.Inside the Local Saves tab, tap「+」on the top right and choose「Import MDP」.
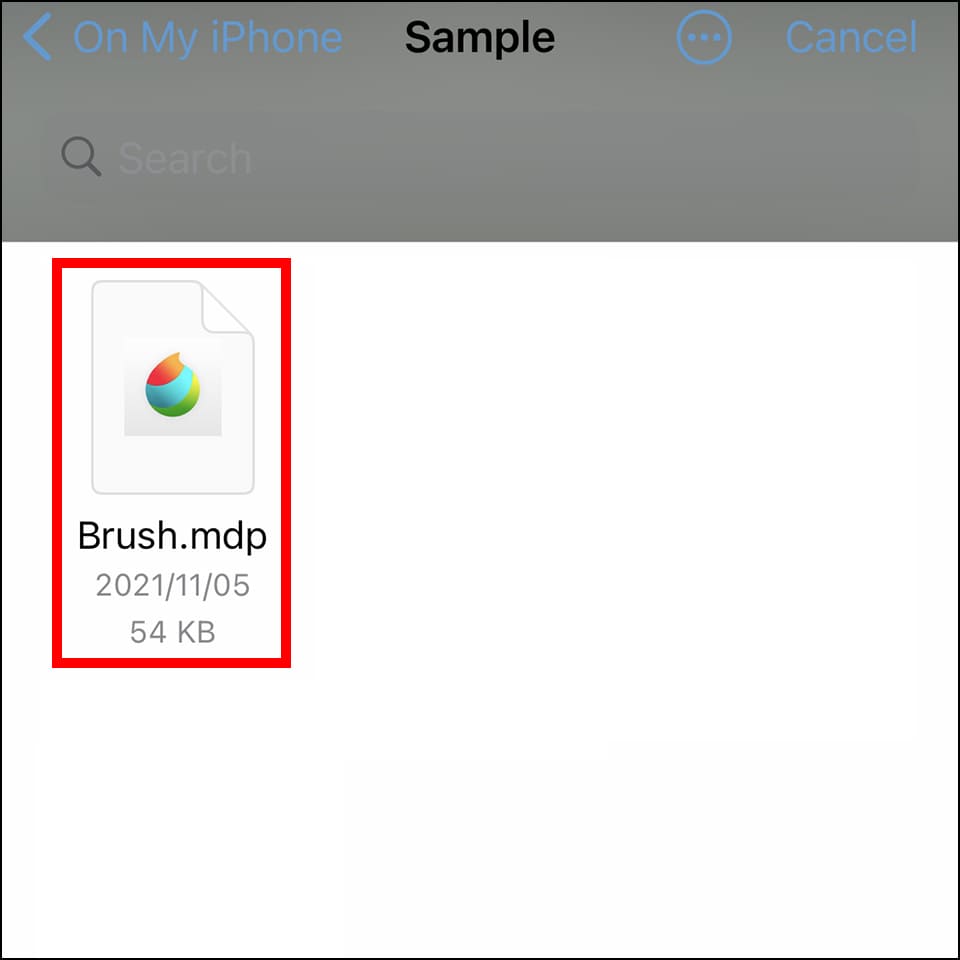
3.Once the Files app opens, choose the file with the Brush data (mdp) you want to use.
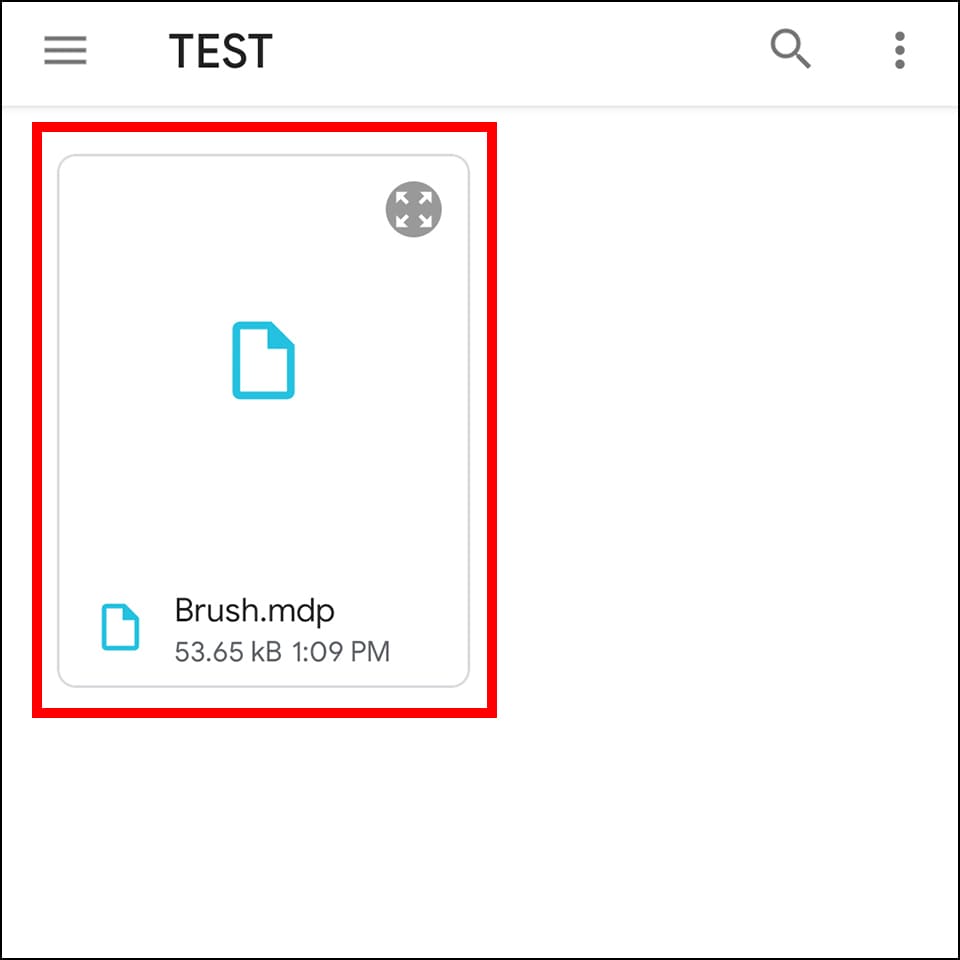
4.The file for your Brush data gets added to the Local Saves tab.
5.Open a new canvas and tap「+」inside the Brush Menu.

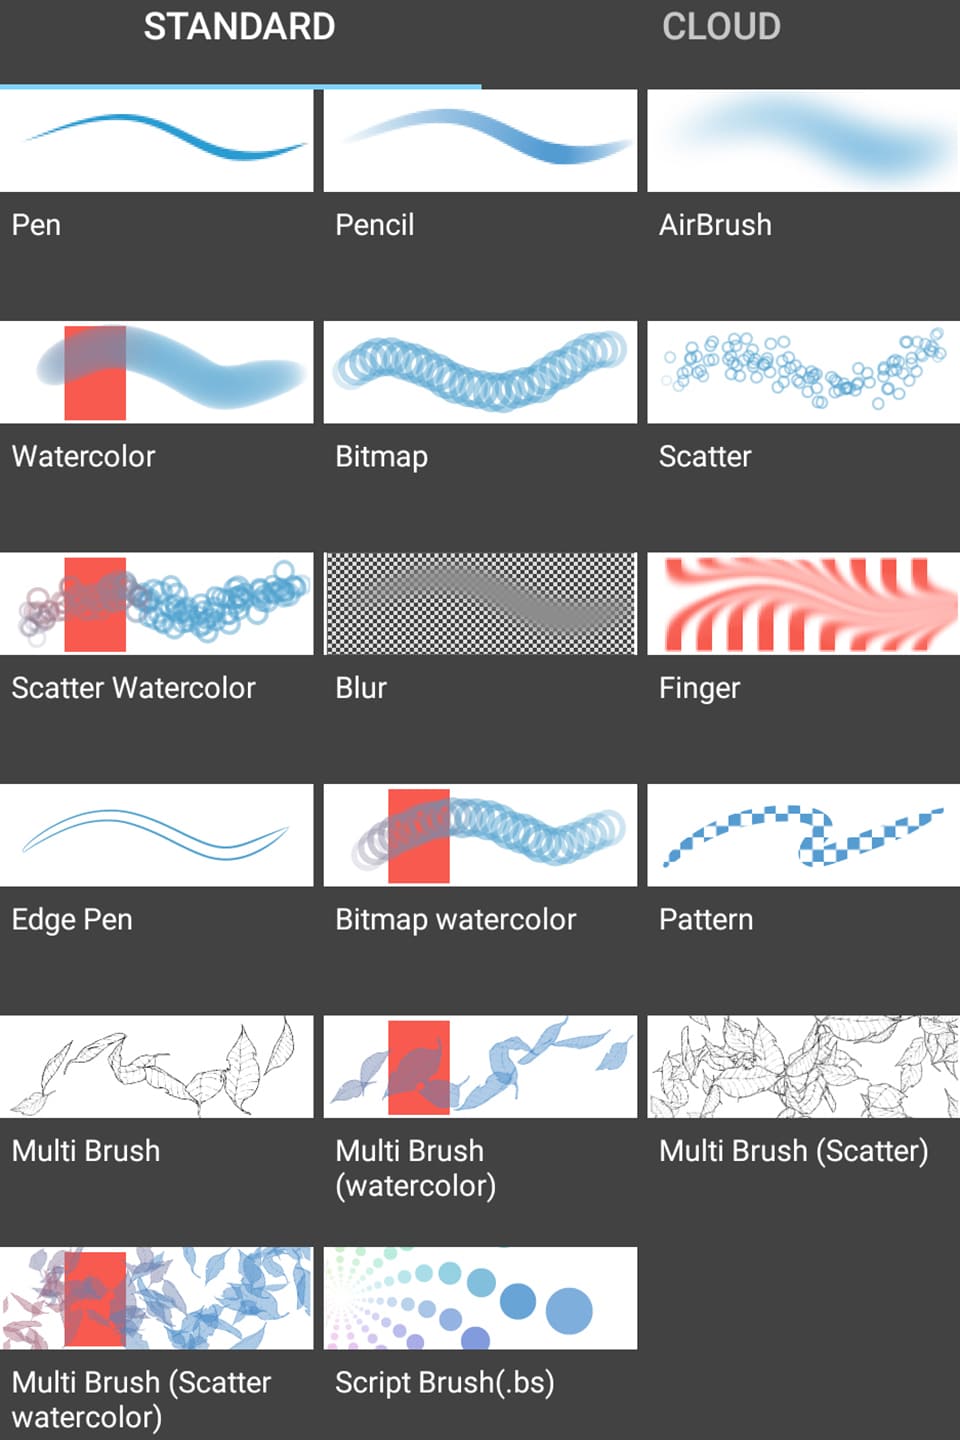
6.Inside the「Standard」tab, confirm the brush type written in「○○○_Parameters.png」and choose from Bitmap・Bitmap Watercolor・Scatter・Scatter Watercolor.
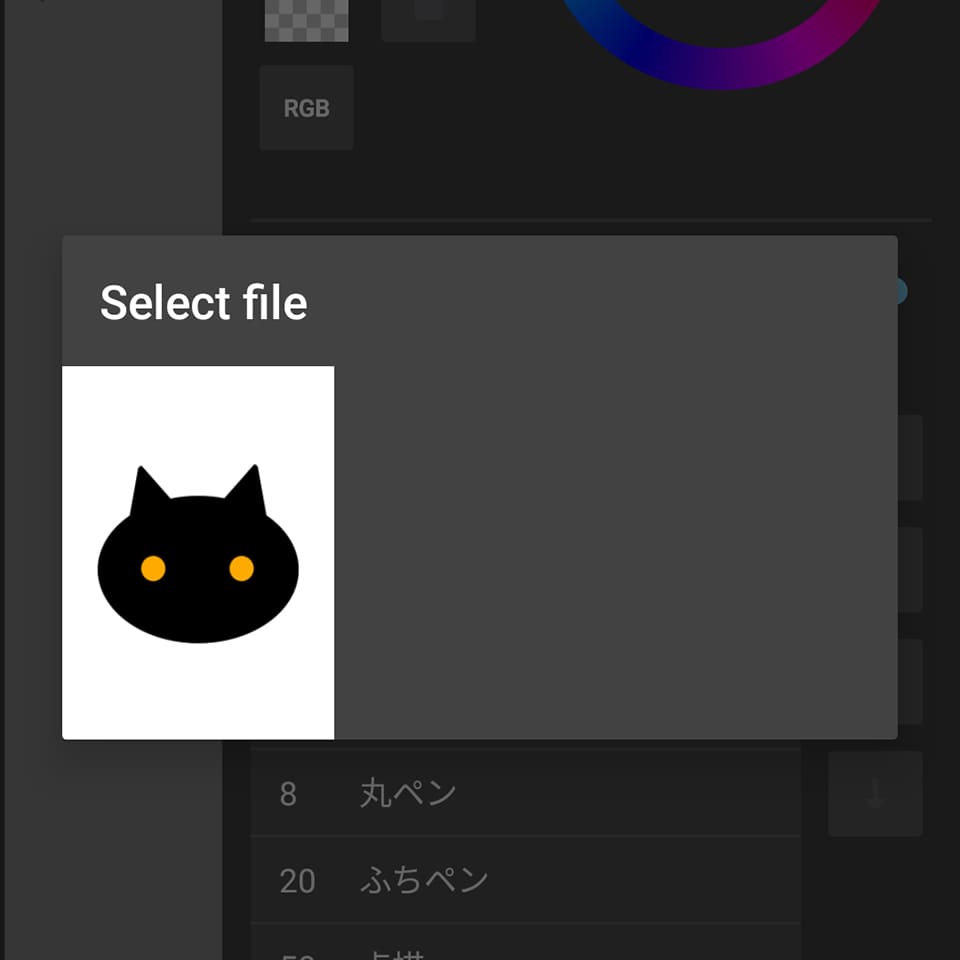
7.Choose「Select File」.
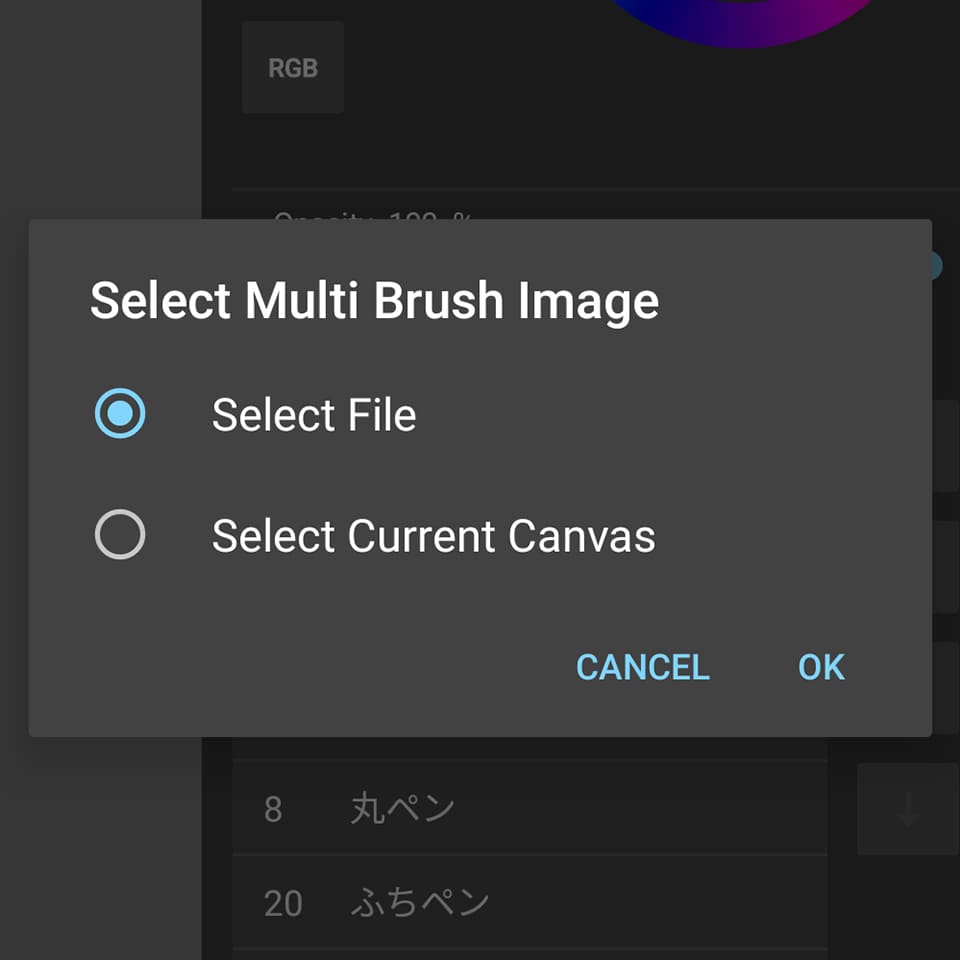
8.The Brushes you have added to your My Gallery will appear in a list, choose the one you want to use.
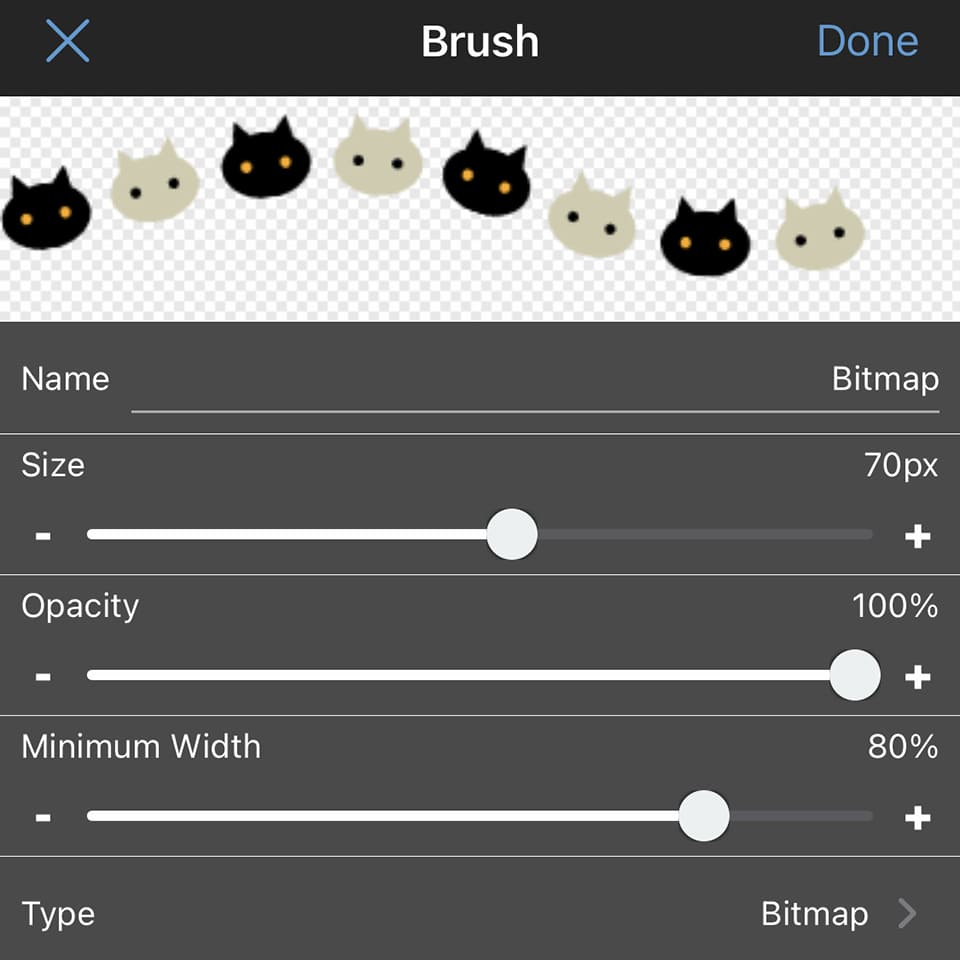
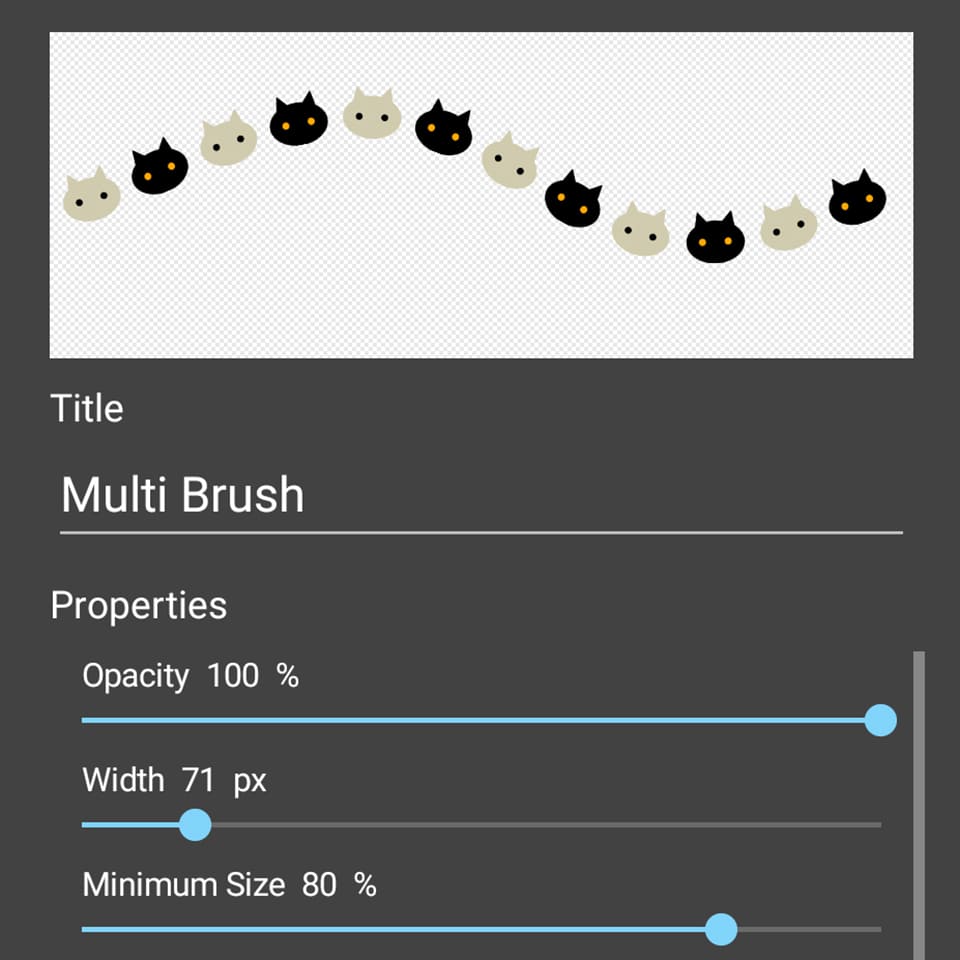
9.Once the dialogue of the brush details pops up, adjust and enter the numbers of each parameter accordingly to the「○○○_Parameters.png」file that is packed together inside the resources folder made when you purchased the brush. Tap「Set」and you can start using the brush.
As the brushes and brush samples are copyright free, you can use them inside any work created for commercial use, doujin, or adult content.
However, wedo not allow redistribution of the Brush data itself.
- Index -
You can use the brushes by adding them to your list of brushes in the Brush window.
1.Select「Add Brush (Bitmap)」from the Brush window.

2.Click「From File」and select the file with the Brush data (in png format).

3.Once the dialogue of the brush details pops up, adjust and enter the numbers of each parameter accordingly to the「○○○_Parameters.png」file that is packed together inside the resources folder made when you purchased the brush. Click「OK」and you can start using the brush.
○○○_Parameters.png
※Before initiating the brush settings, please save your file with the Brush data (in png format) to the File app in your iPad.
1.Click「+」inside the Brush panel and choose「Add brushes」.

2.Choose the ”Standard” tab and confirm the brush type written in「○○○_Parameters.png」when selecting the type from Bitmap・Bitmap Watercolor・Scatter・Scatter Watercolor.

3.Select「Import from another app」and choose your file with the Brush data from your File app.
4.Select the file for the Brush data you want to add.

5.Once the dialogue of the brush details pops up, adjust and enter the numbers of each parameter accordingly to the「○○○_Parameters.png」file that is packed together inside the resources folder made when you purchased the brush. Tap「Finish」and you can start using the brush.
※Before initiating the brush settings, please save your file with the Brush data (in png format) to the File app in your iPhone.
1.Tap the「Select」button inside the sub bar of Pen tool and from「+」choose「Add brushes」.
2.Inside the「Standard」tab, confirm the brush type written in「○○○_Parameters.png」and choose from Bitmap・Bitmap Watercolor・Scatter・Scatter Watercolor.
3.Choose「Import from another app」and select the file with your Brush data inside the File app.
4.Choose the file with the Brush data you want to add.
5.Once the dialogue of the brush details pops up, adjust and enter the numbers of each parameter accordingly to the「○○○_Parameters.png」file that is packed together inside the resources folder made when you purchased the brush. Tap「Finish」and you can start using the brush.
※Before initiating the brush settings, please save your file with the Brush data (in png format) to the Files app in your Android.
1.Select「+」inside the Brush Menu
2.Inside the「Standard」tab, confirm the brush type written in「○○○_Parameters.png」and choose from Bitmap・Bitmap Watercolor・Scatter・Scatter Watercolor.

3.Once the Files app opens, choose the file with the Brush data you want to use.
4.Once the dialogue of the brush details pops up, adjust and enter the numbers of each parameter accordingly to the「○○○_Parameters.png」file that is packed together inside the resources folder made when you purchased the brush. Tap「Set」and you can start using the brush.
As the brushes and brush samples are copyright free, you can use them inside any work created for commercial use, doujin, or adult content.
However, we do not allow redistribution of the Brush data itself.
- Index -
※How to register “Material Panel” recommended for pattern, tile, item type of materials
※For materials with complicated shapes or psd materials with multiple layers (line drawing, coloring etc.), it may be more practical to open the data file every time instead of registering.
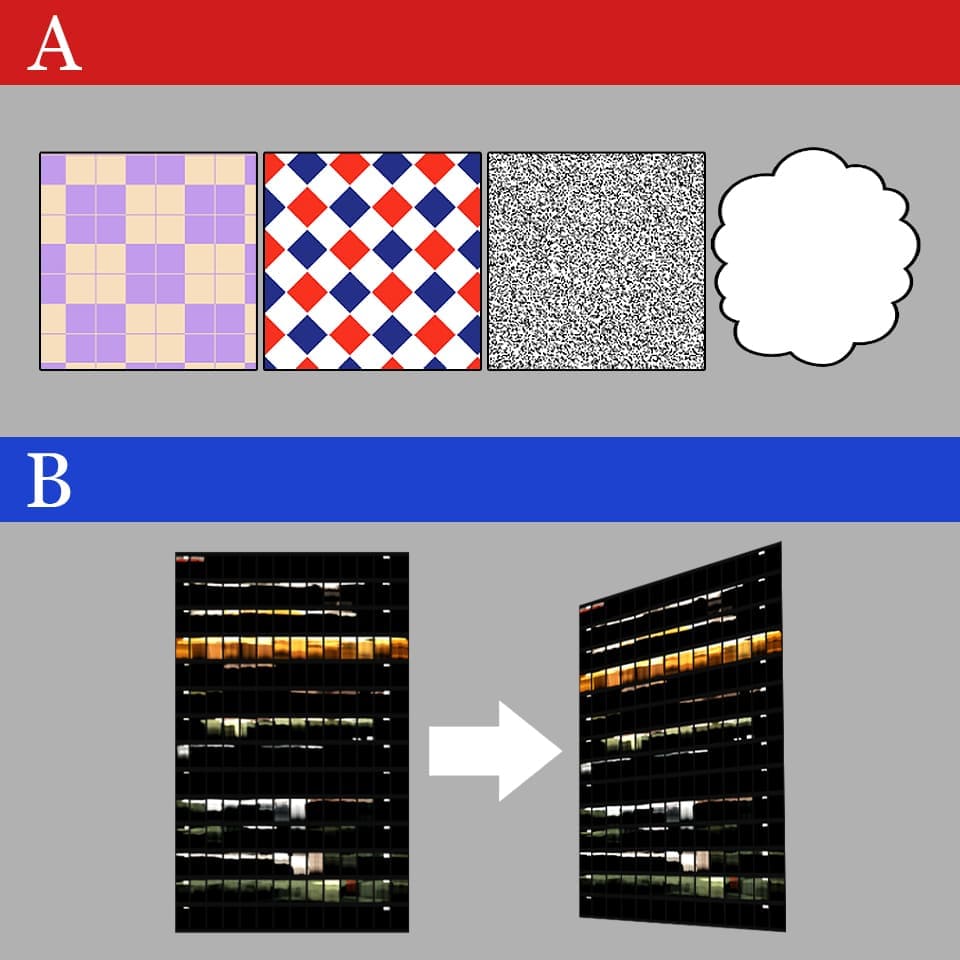
A…Materials with pattern, tile, item types
B…Complicated materials
With PSD Data
1.Open the PSD data file in MediBang Paint.
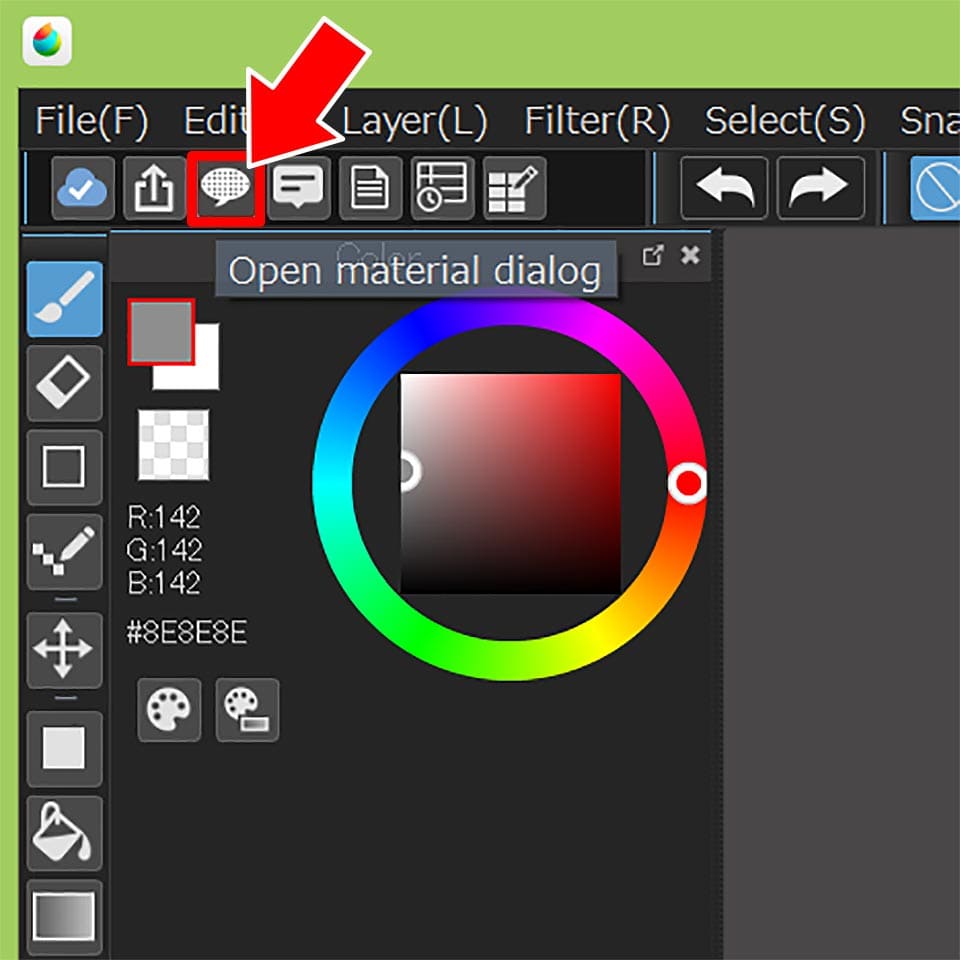
2.Open the Material dialog from top left corner.
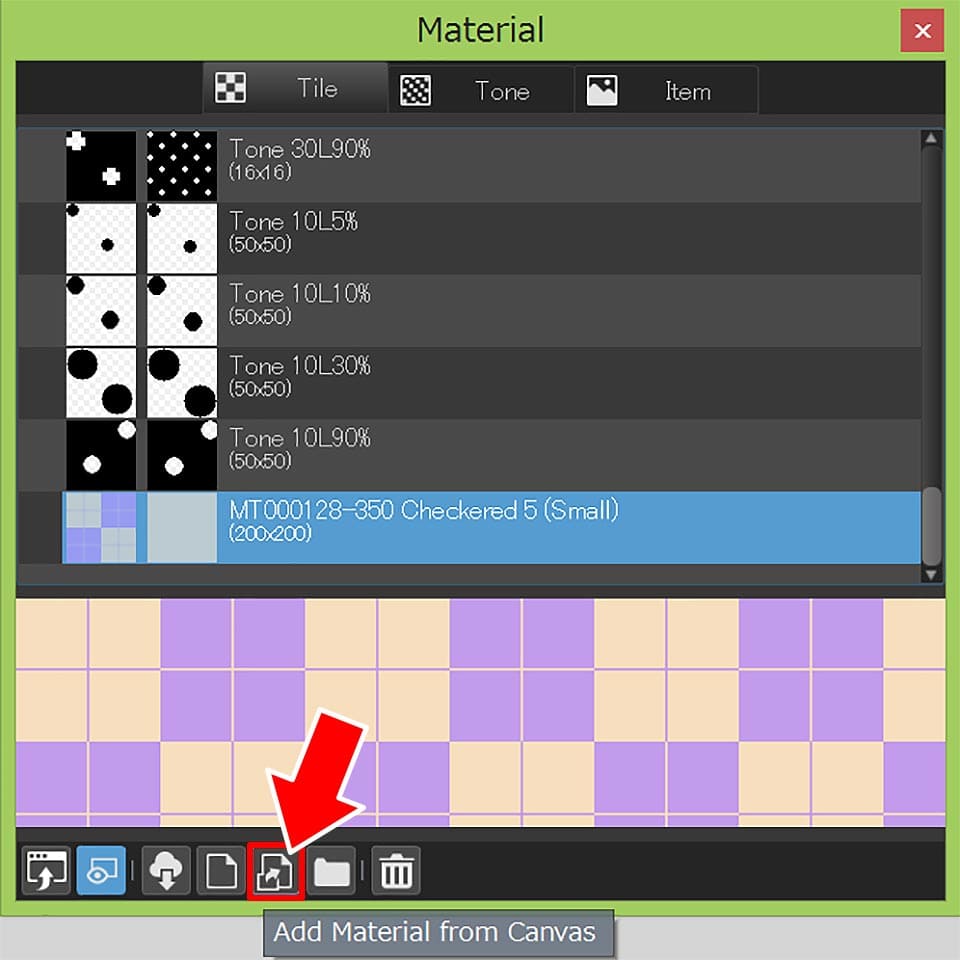
3.Select one of the three tabs「Tile」「Tone」「Item」and select「Add Material from Canvas」from the bottom bar of the panel.
※There will be a warning if the size of the material file is above recommended value of 512 pixels.
You will still be able to register the large data files but please be aware that depending on your PC environment, the MediBang Paint application might slow down or quit unexpectedly.
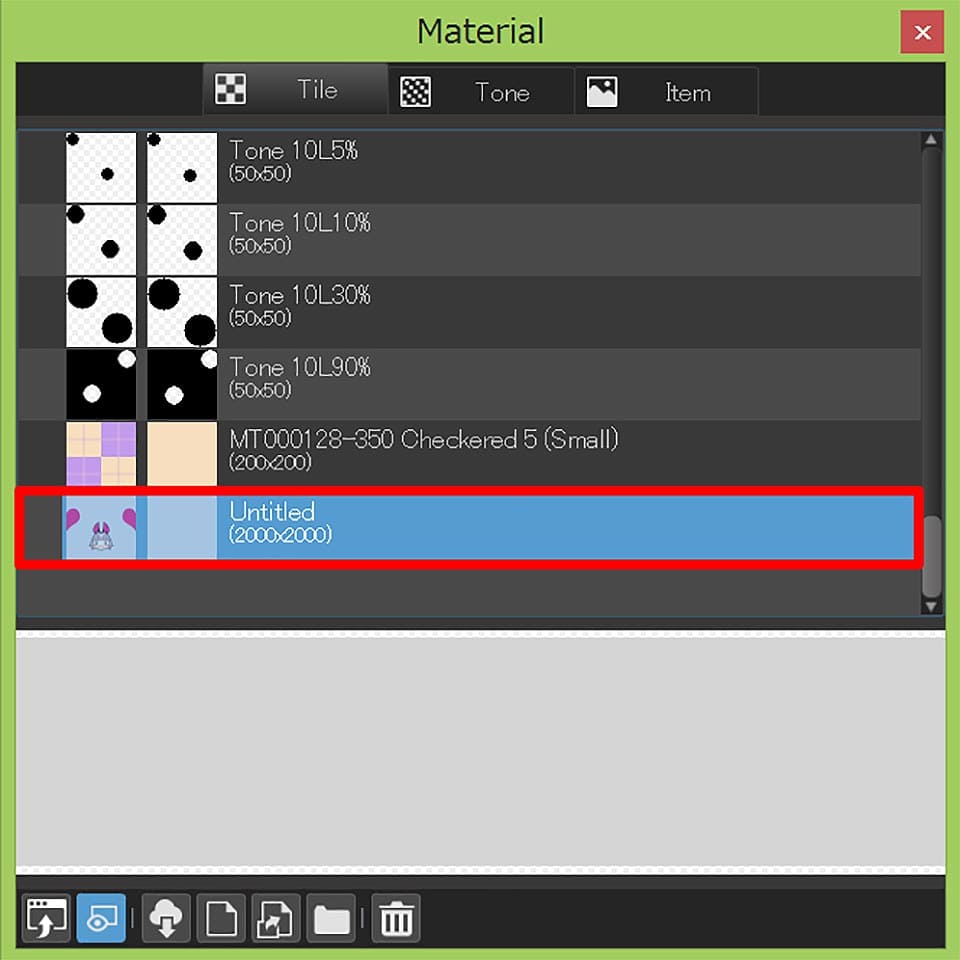
4.The material will be added to your list on the Material panel.
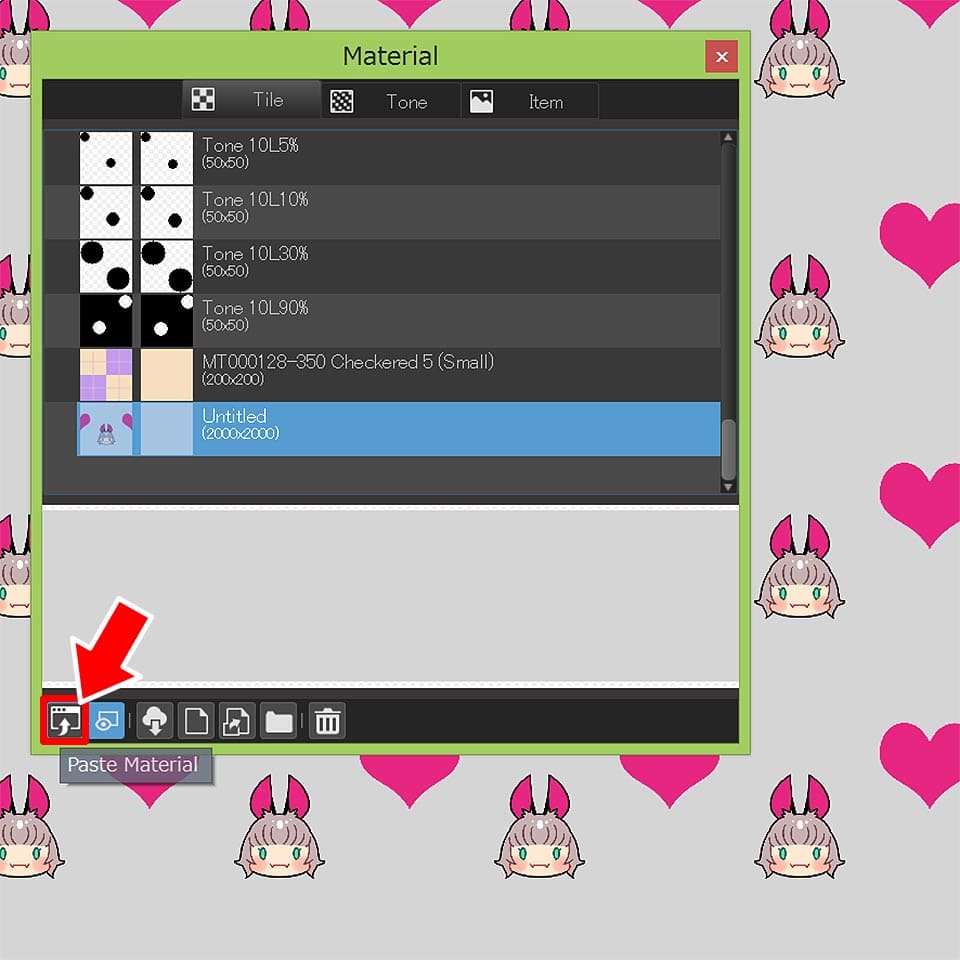
5.You can use the material by clicking on「Paste Material」placed at the lower left corner or by dragging and dropping the material from the list to your canvas.
With PNG Data
1.Open the Material dialog from top left corner.
2.Select one of the three tabs「Tile」「Tone」「Item」and select your image data (in png) after choosing「Add Material from Canvas」from the bottom bar of the panel, or drag and drop your png image data to the list on Material panel.
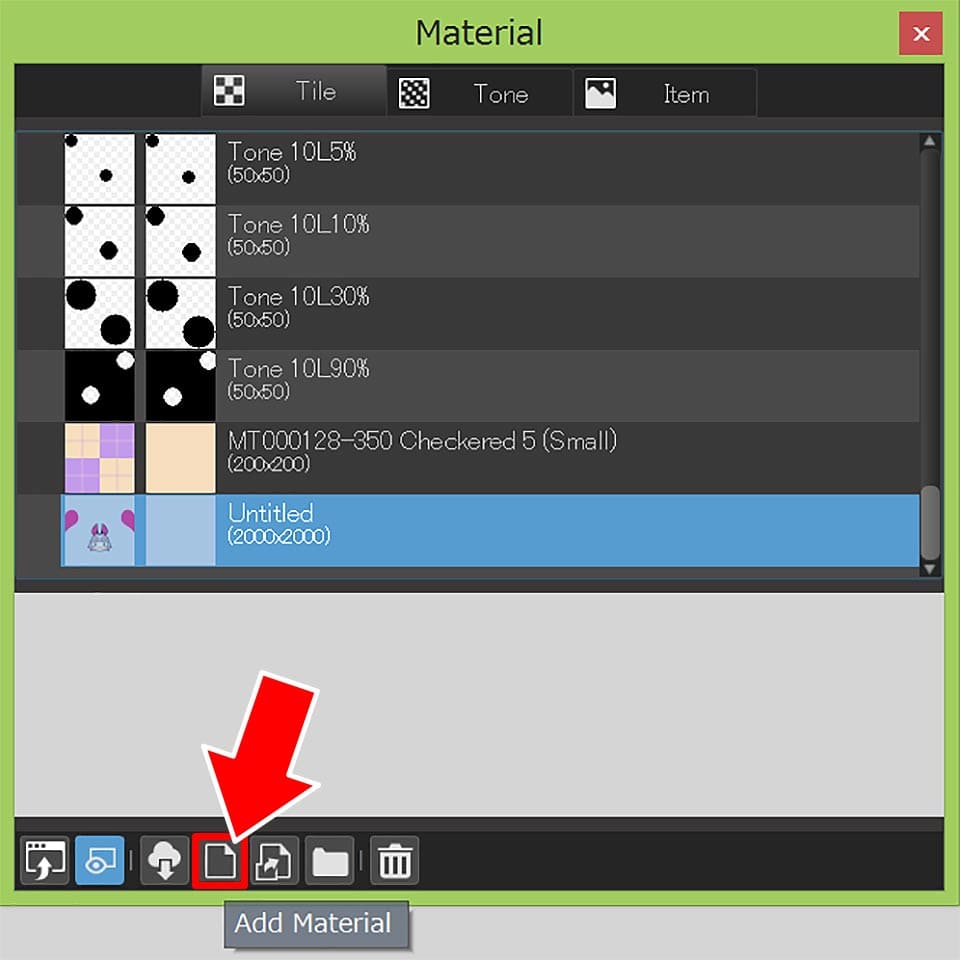
3.The material will be added to your list on the Material panel.
4.You can use the material by clicking on「Paste Material」placed at the lower left corner or by dragging and dropping the material from the list to your canvas.
※You can follow the steps for PSD material to add your PNG material
※Before initiating the image material settings, please save your file with the image data (in psd/png) to the File app in your iPad.
1.Create a new canvas and open the Materials panel.
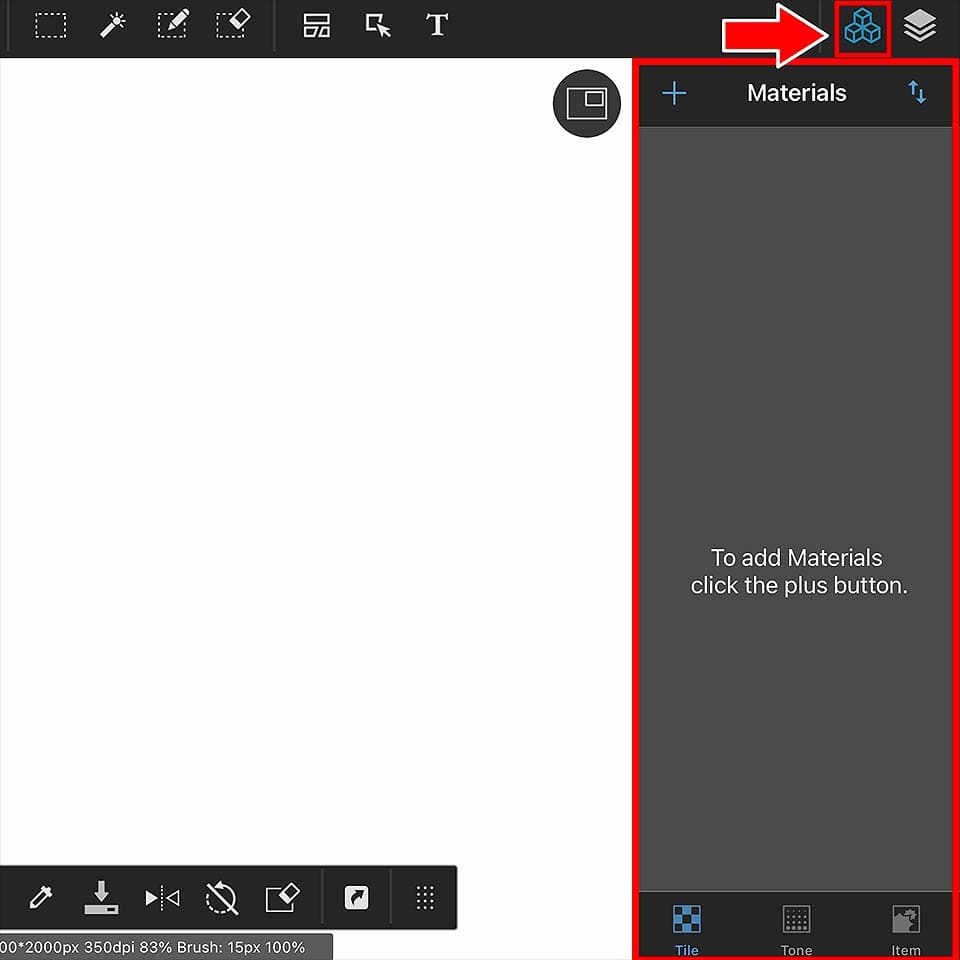
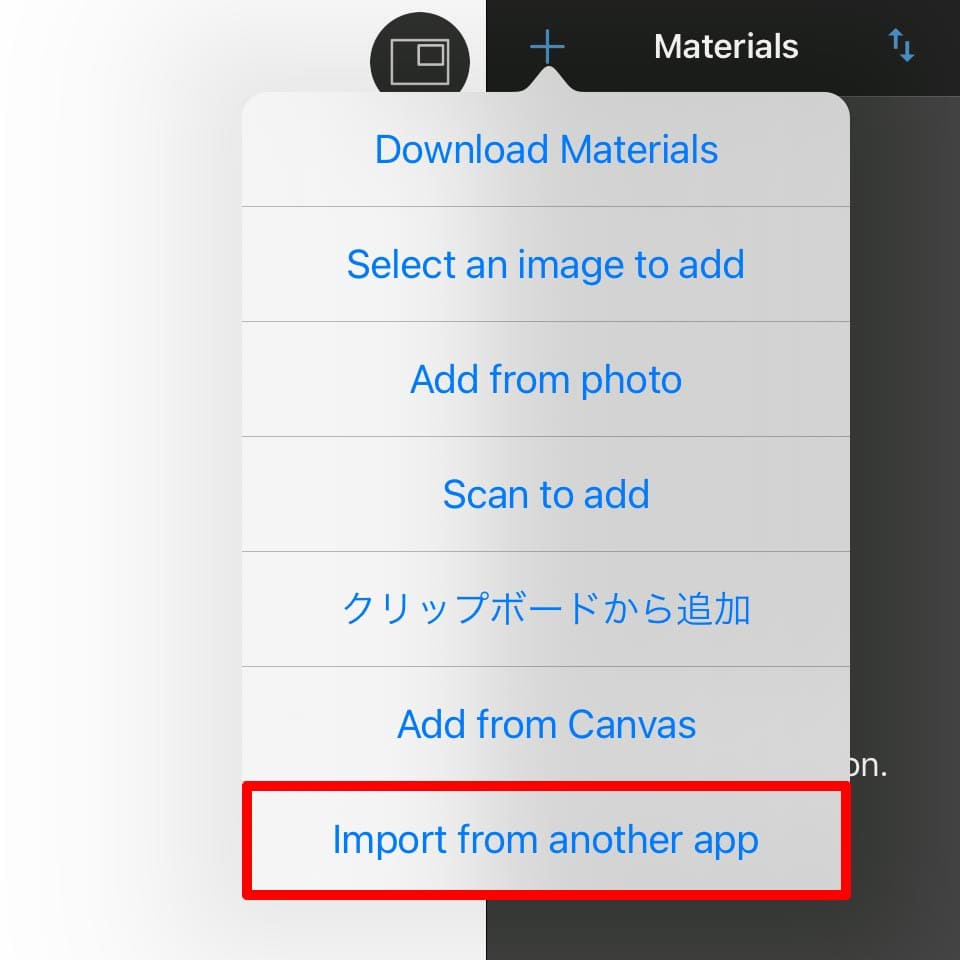
2.Choose one of the three tabs「Tile」「Tone」「Item」and tap「+」at the top left corner of the Materials panel to choose「Import from another app」.
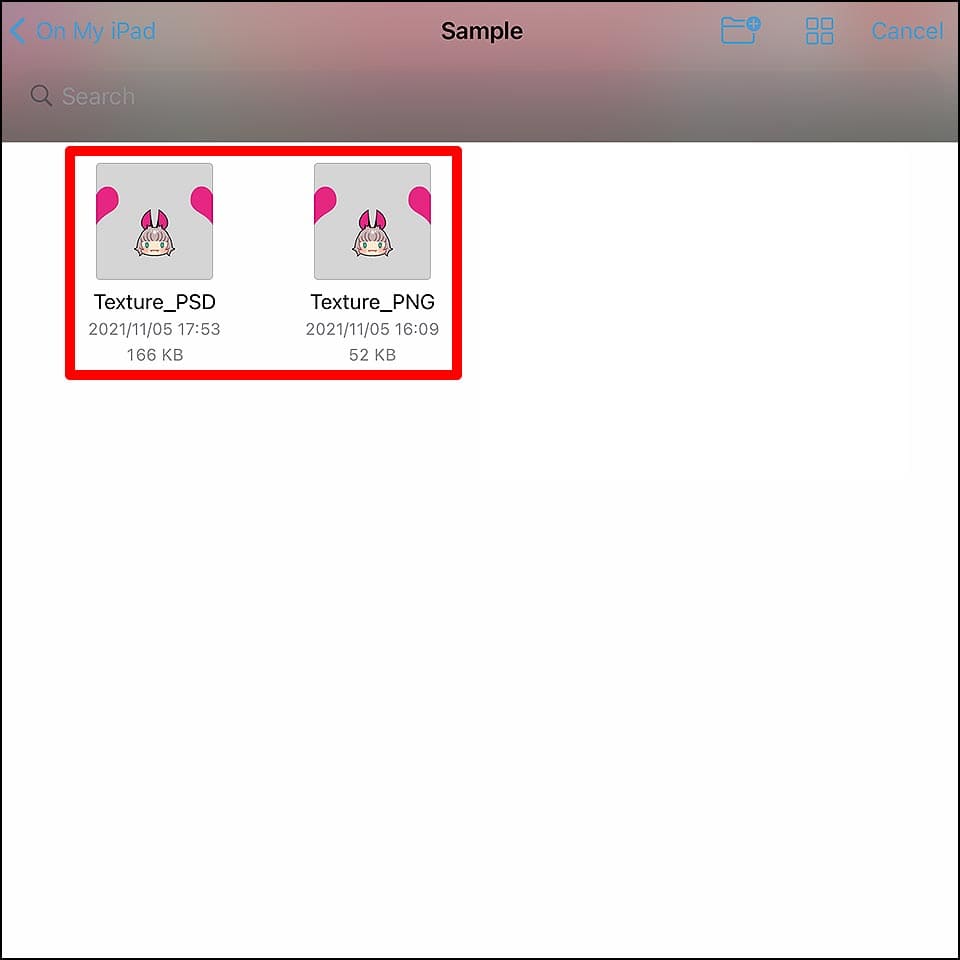
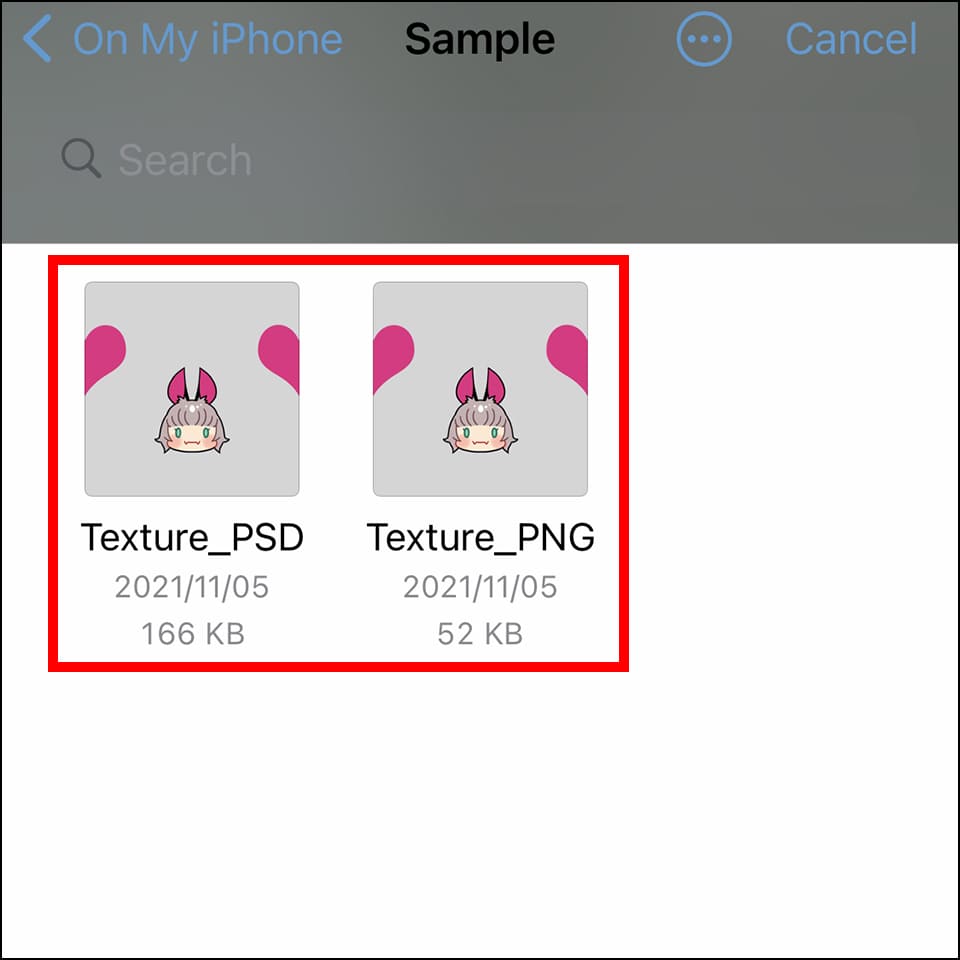
3.Choose your image data (in psd or png) from the File app.
※If the size of your material file is above the recommended value (512 pixels), you will still be able to register the file but please be aware that depending on your device environment, the MediBang Paint app might slow down or quit unexpectedly.
4.The material will be added to your list on the Materials panel.

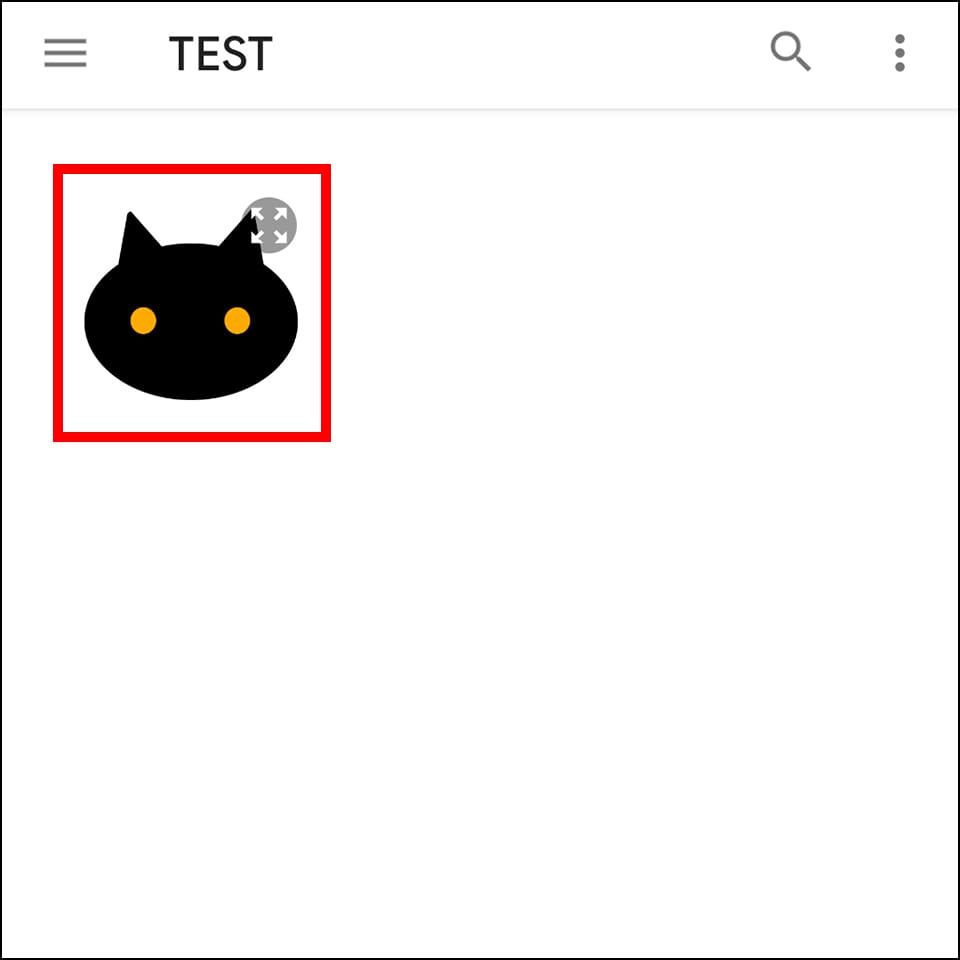
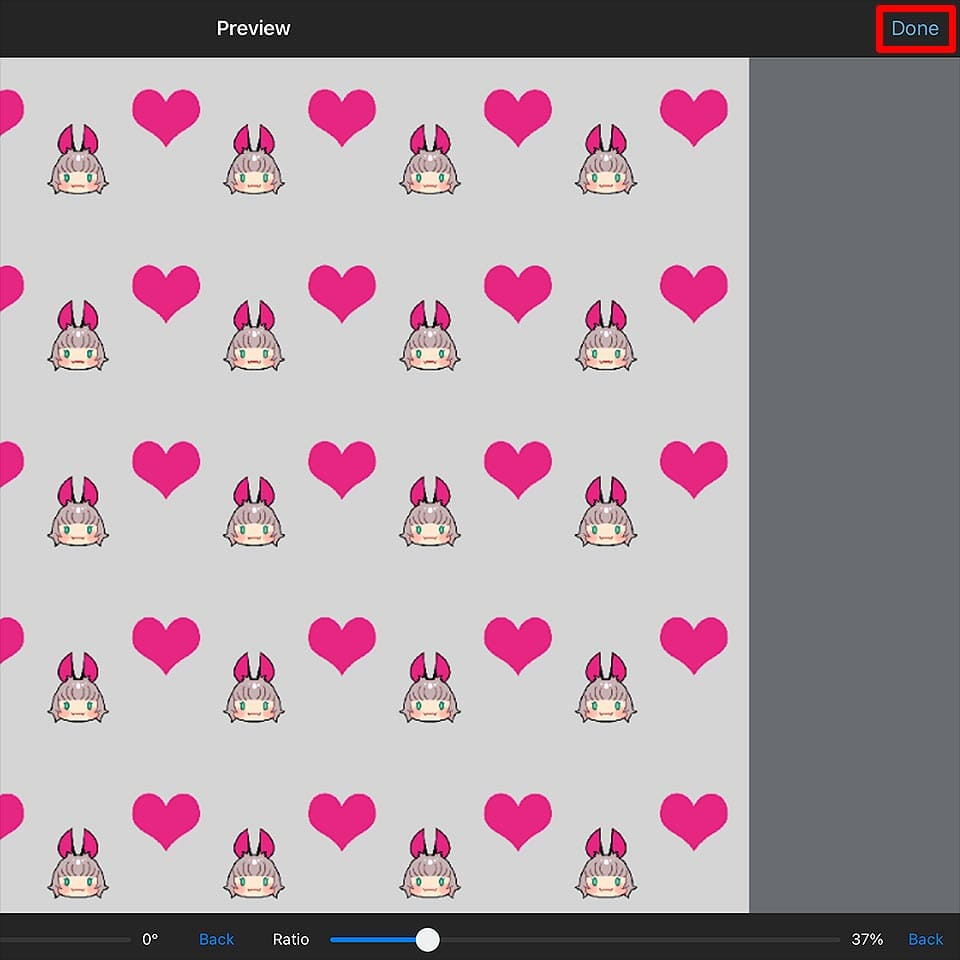
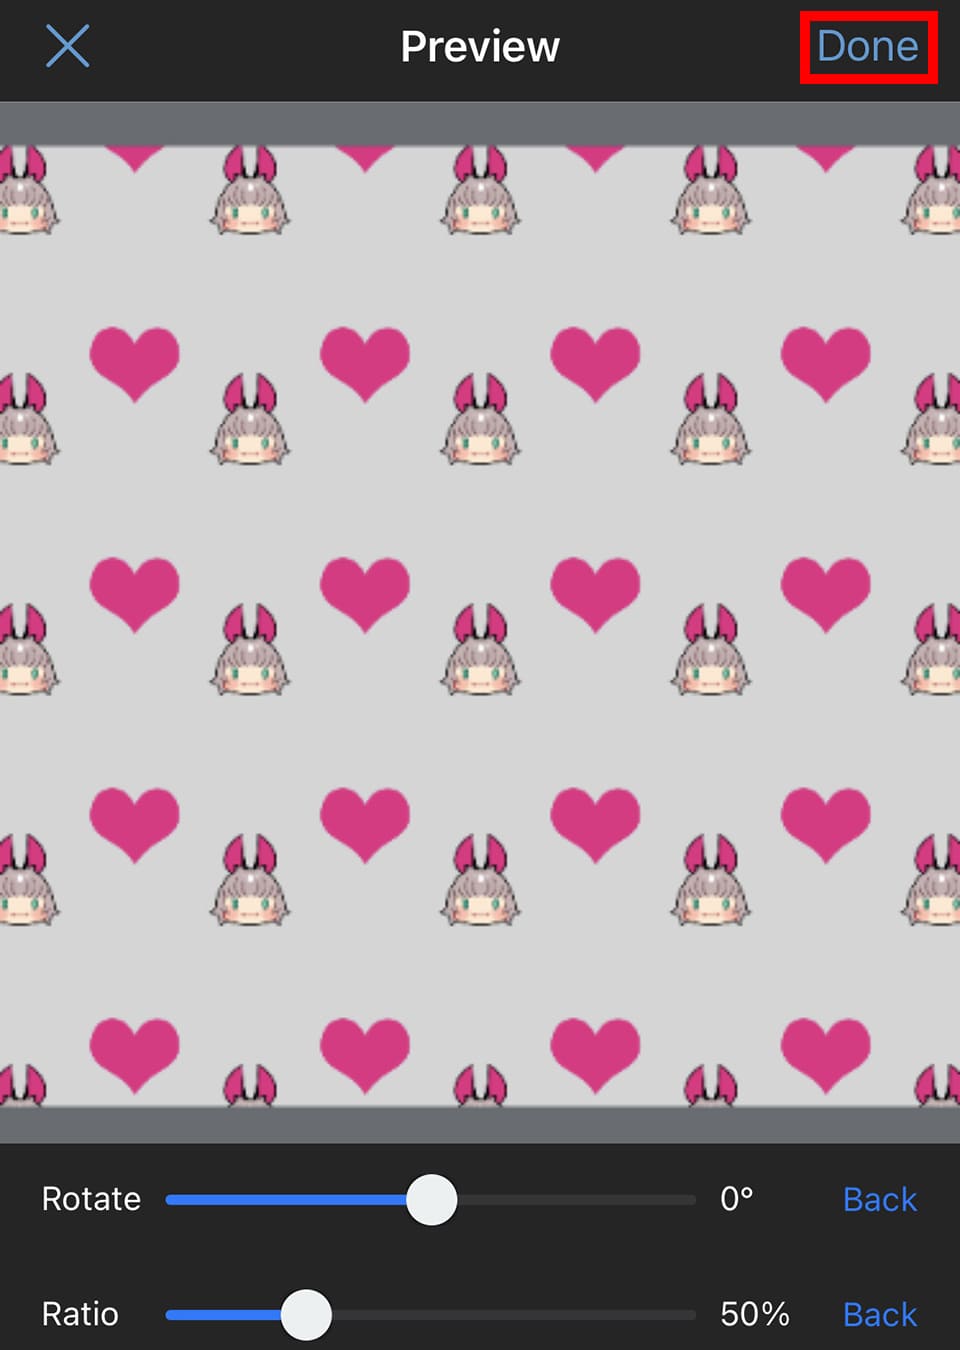
5.By tapping on the material available in your list, it will jump to the preview display.
Once you adjust the numbers and choose「Finish」from the top right corner, you can paste the material to your canvas.
※Before initiating the image material settings, please save your file with the image data (in psd/png) to the File app in your iPhone.
1.Create a new canvas and open the Materials panel.
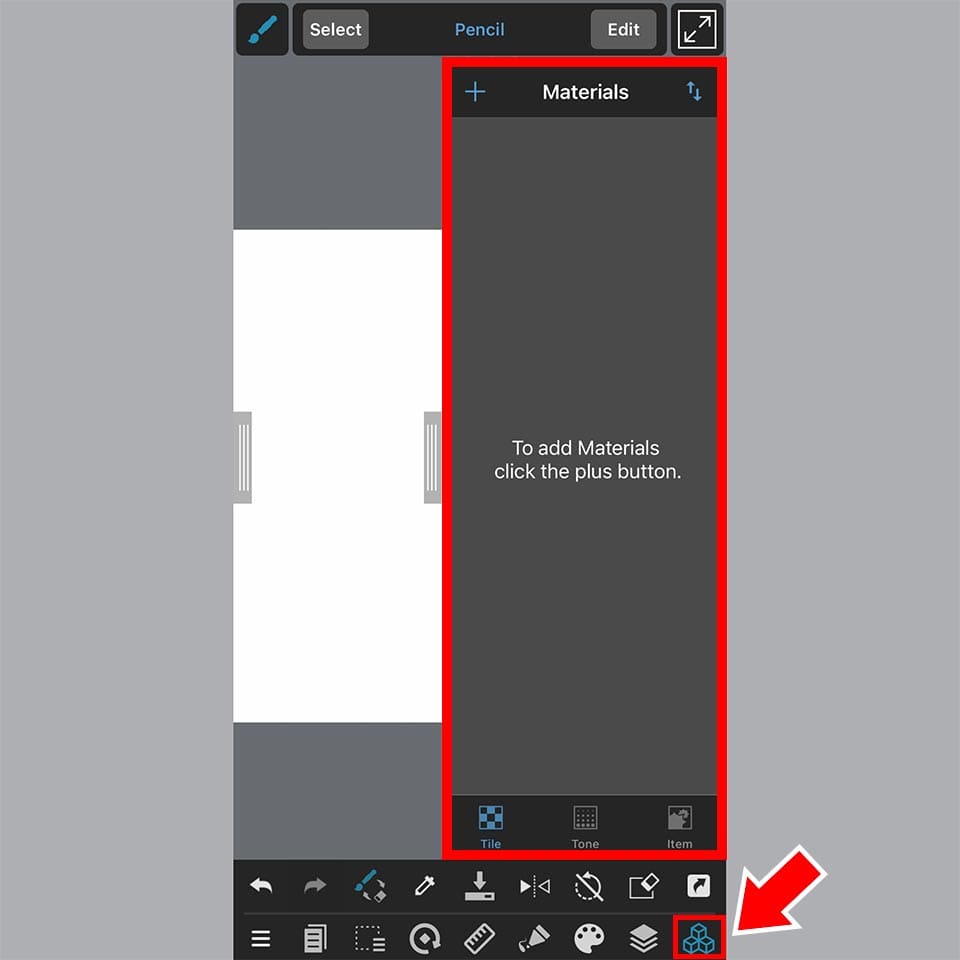
2.Choose one of the three tabs「Tile」「Tone」「Item」and tap「+」at the top left corner of the Materials panel to choose「Import from another app」.
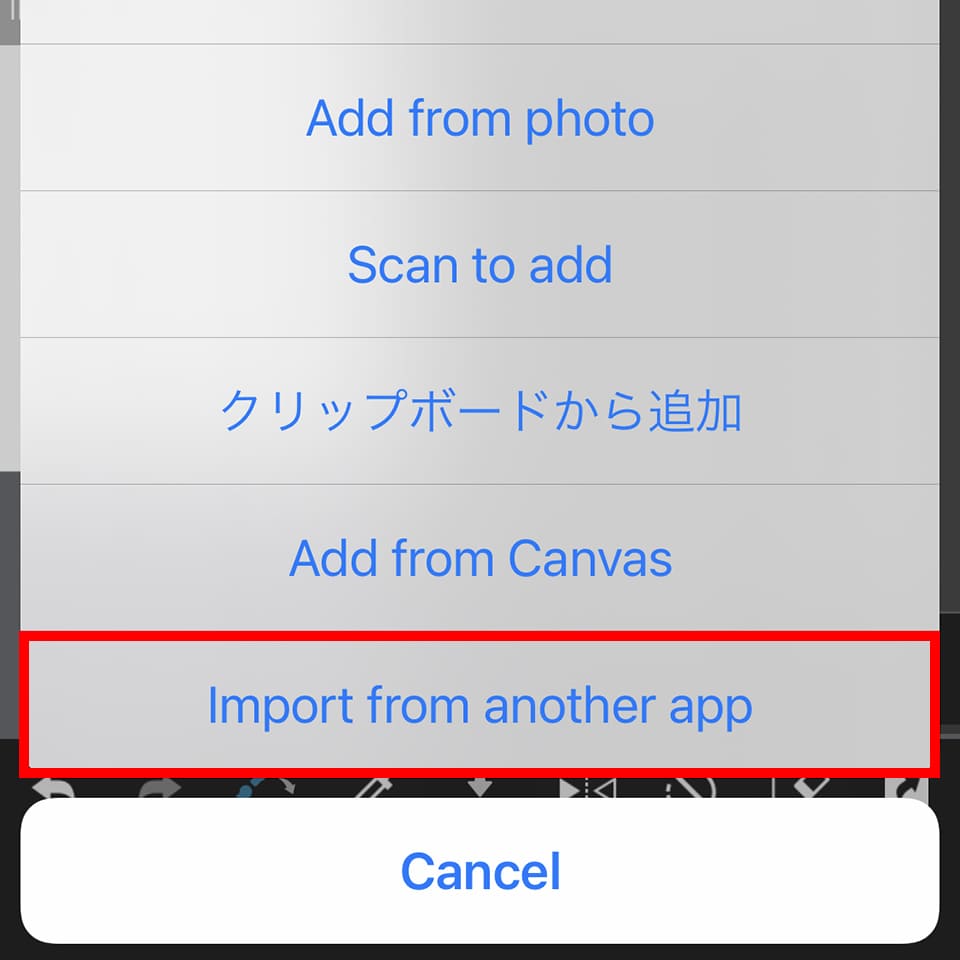
3.Choose your image data (in psd or png) from the File app.
※If the size of your material file is above the recommended value (512 pixels), you will still be able to register the file but please be aware that depending on your device environment, the MediBang Paint app might slow down or quit unexpectedly.
4.The material will be added to your list on the Materials panel.
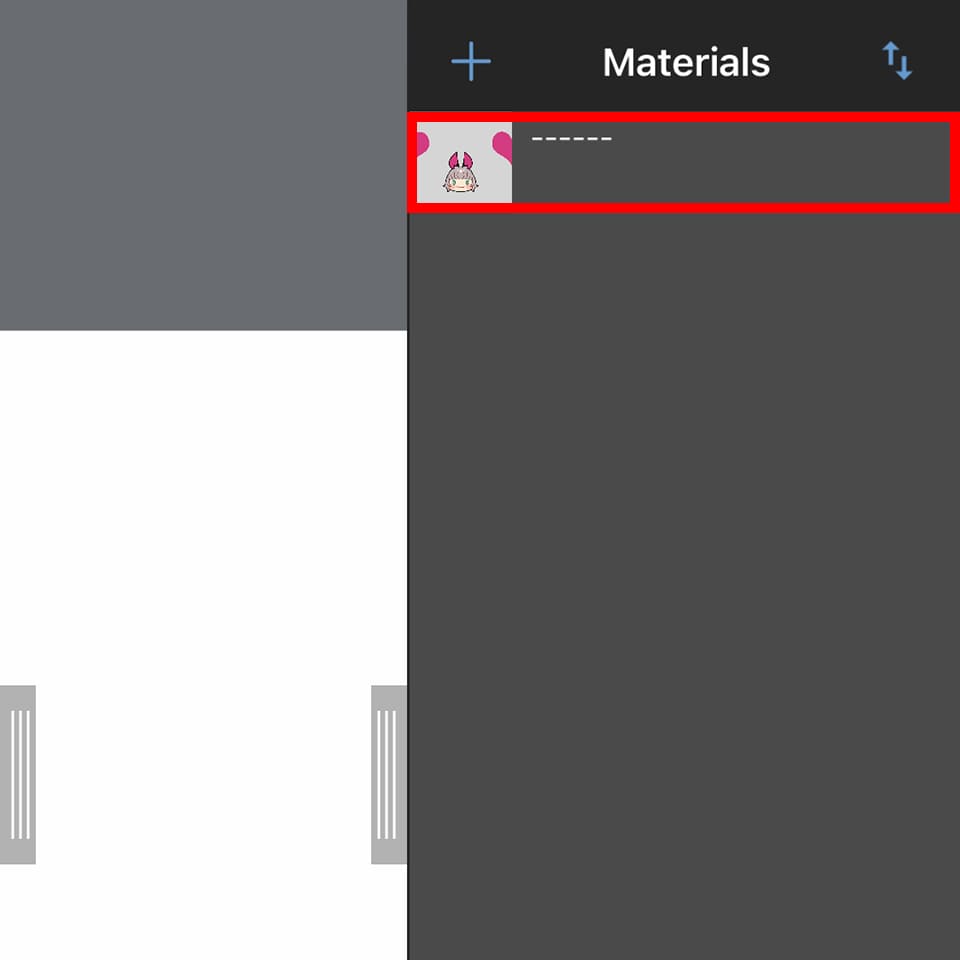
5.By tapping on the material available in your list, it will jump to the preview display.
Once you adjust the numbers and choose「Finish」from the top right corner, you can paste the material to your canvas.
※Before initiating the image material settings, please save your file with the image data (in psd/png) to the Files app in your Android.
With PSD Data
※For Android devices, you need to convert the PSD data file into PNG in order to register the material to your Materials Menu.
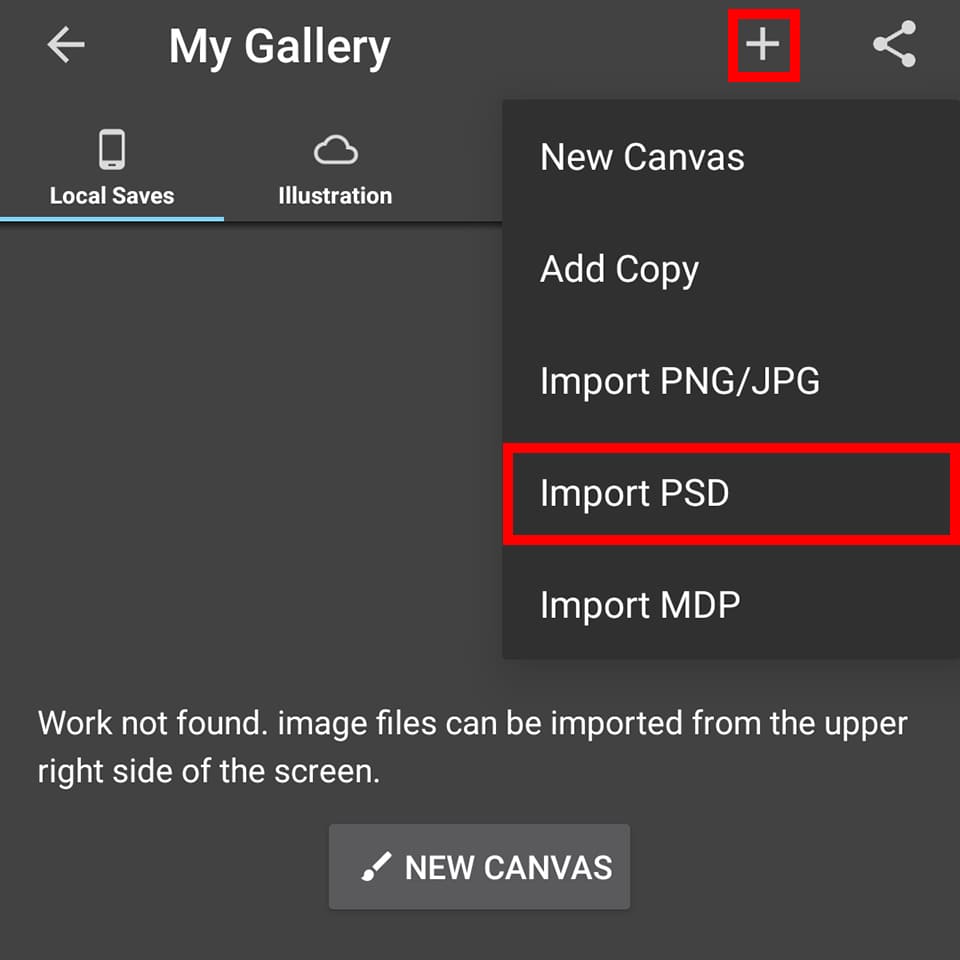
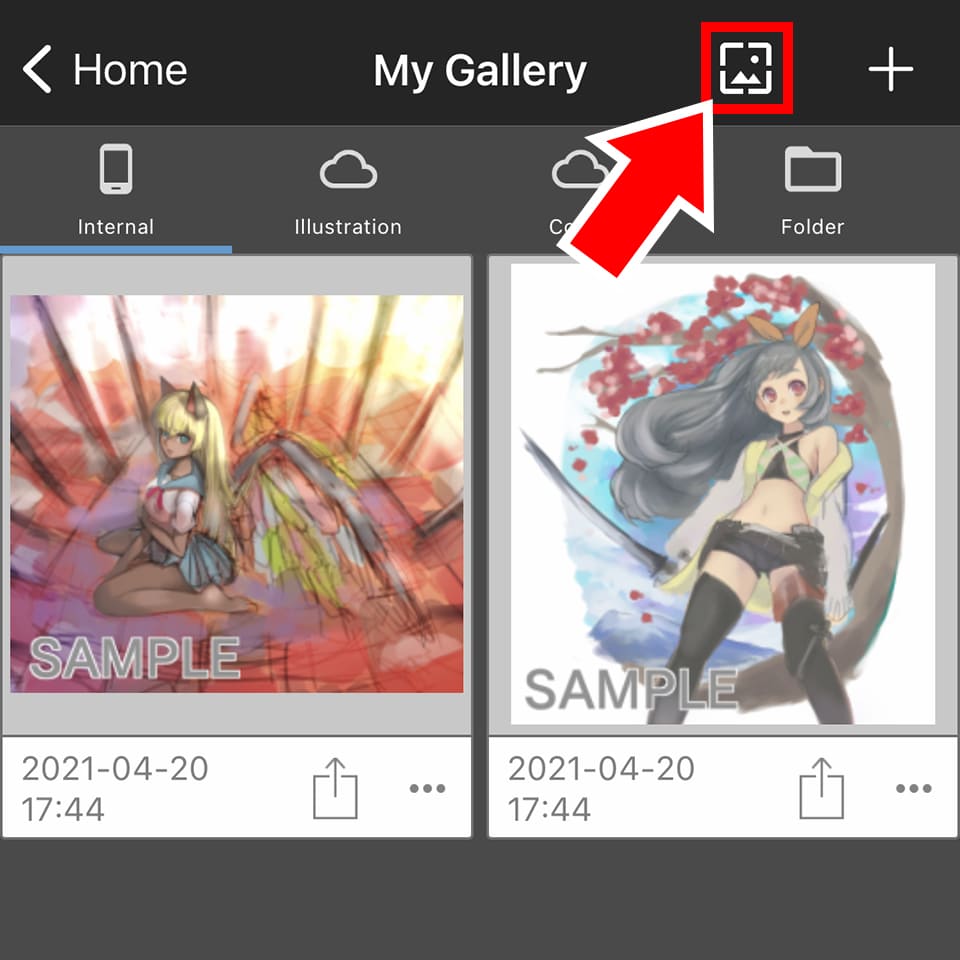
1.Tap on「+」at the top right of your My Gallery and select「Import PSD」.
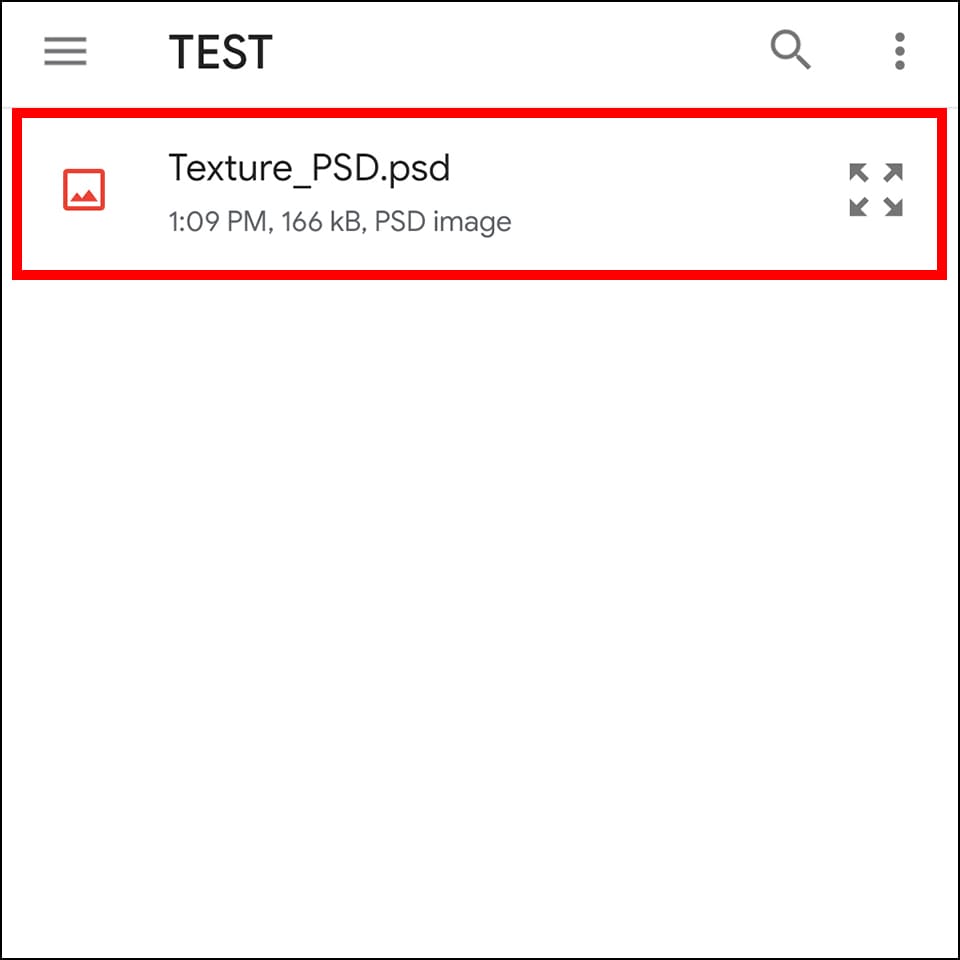
2.Choose your image data (in psd) from「Files」.
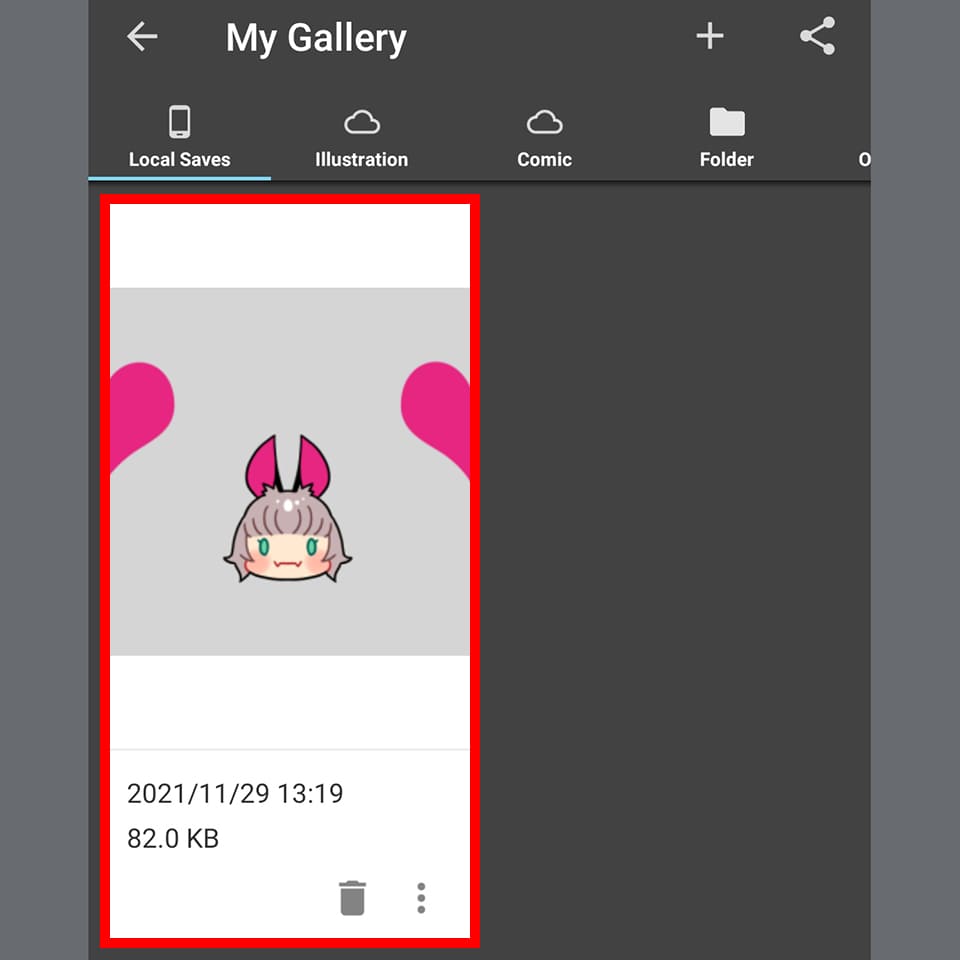
3.Tap on the PSD file added to your My Gallery to open the data.
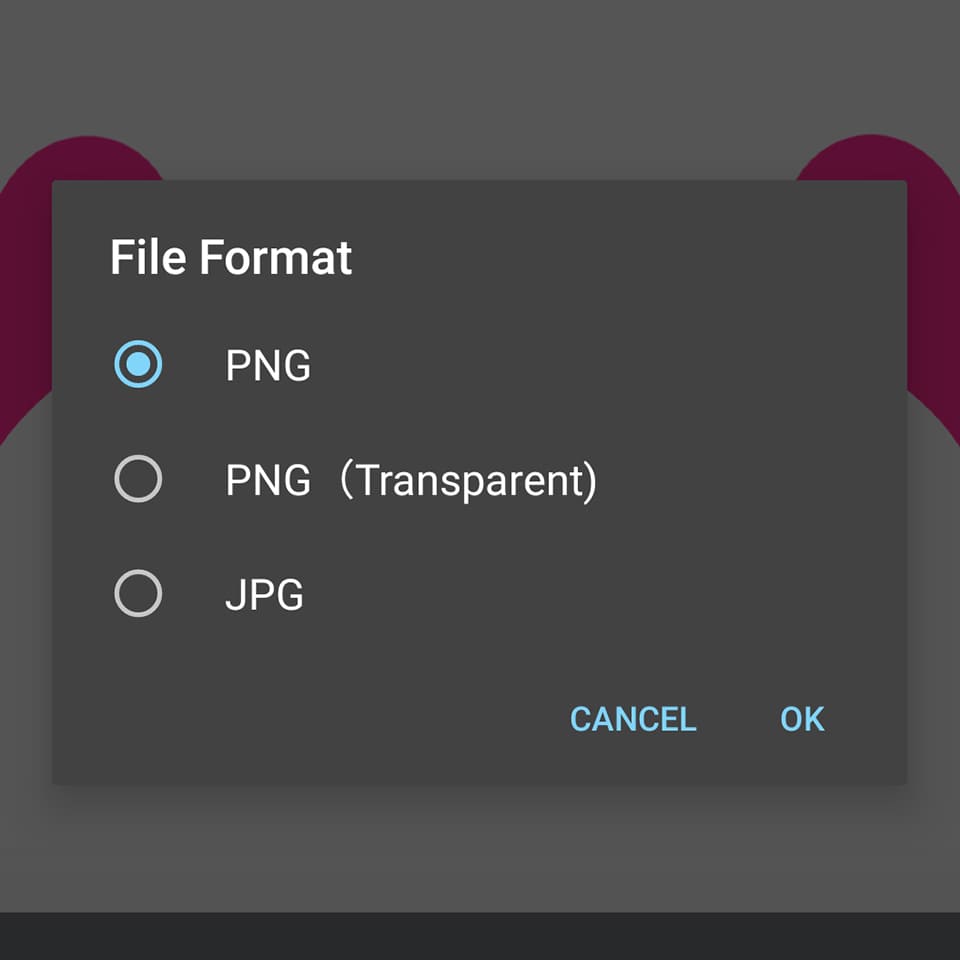
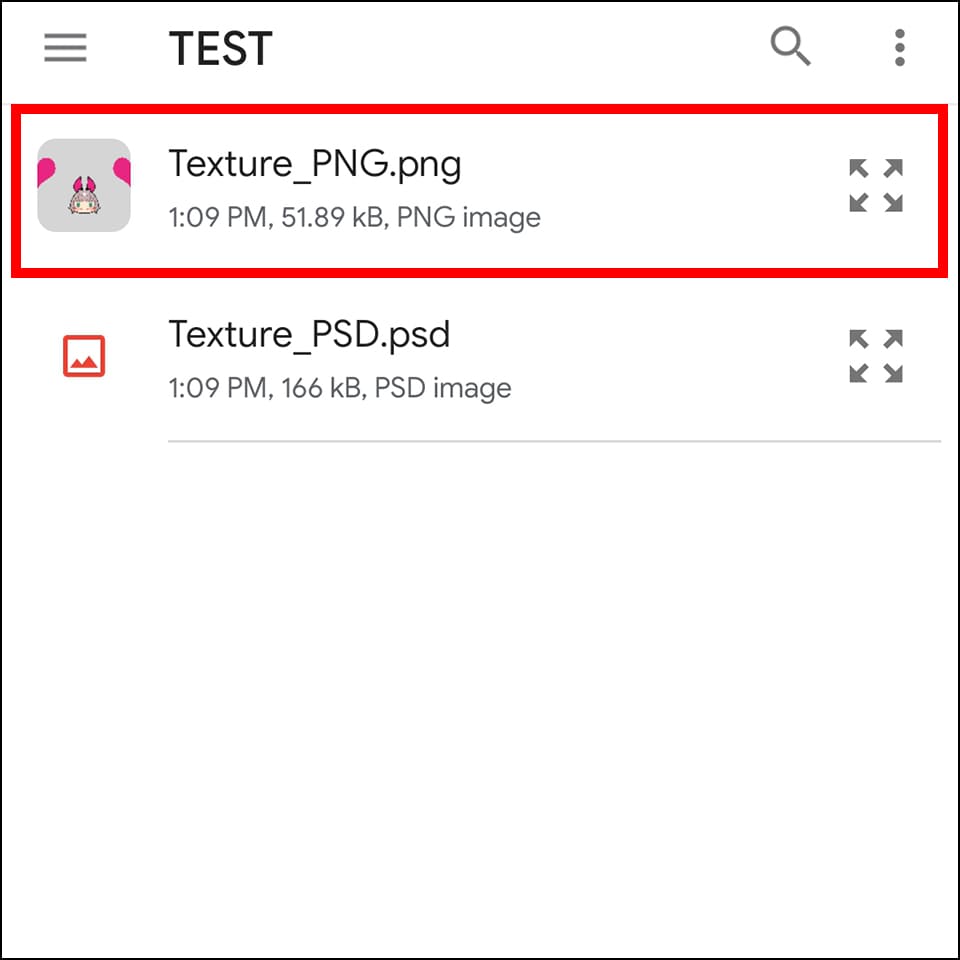
4.From the menu icon on the lower left corner, select「Export png/jpg files」.

5.Save as either「PNG」or「PNG (Transparent)」and close the canvas.
※ Please make sure that it is saved in PNG format inside the Files app etc.
6.Create a new canvas and open the Materials Menu.
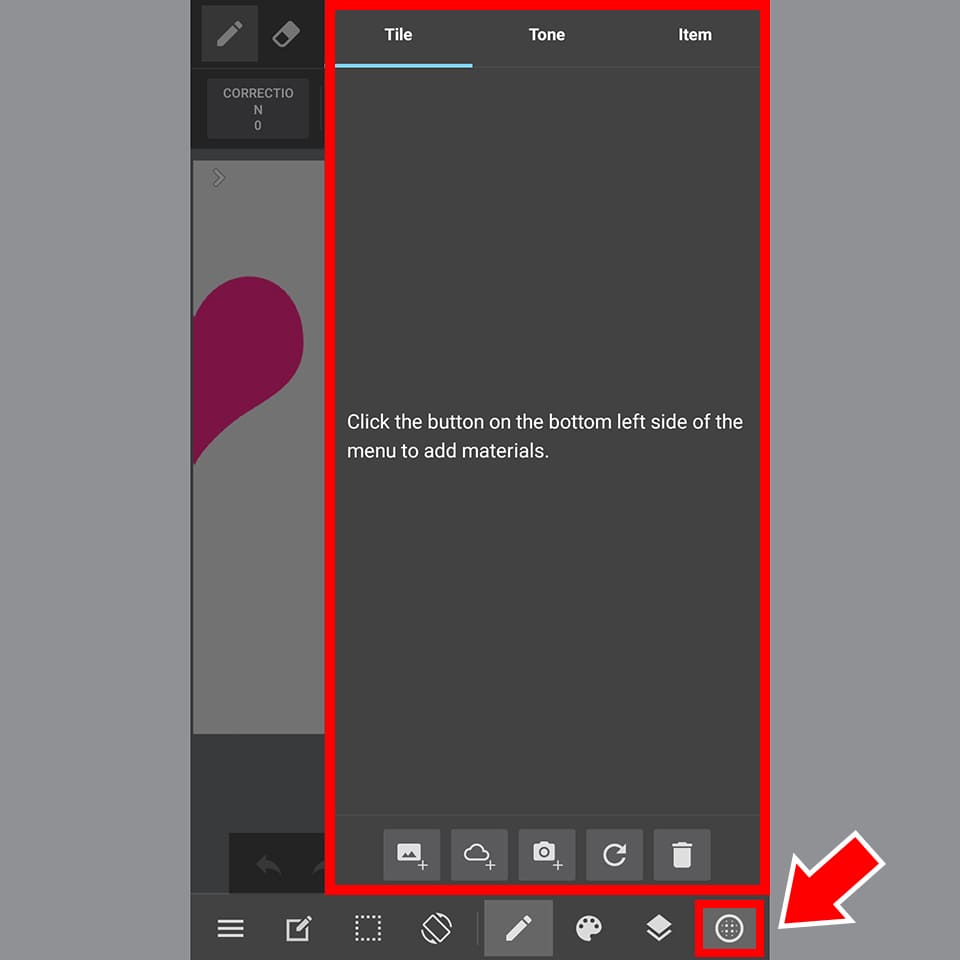
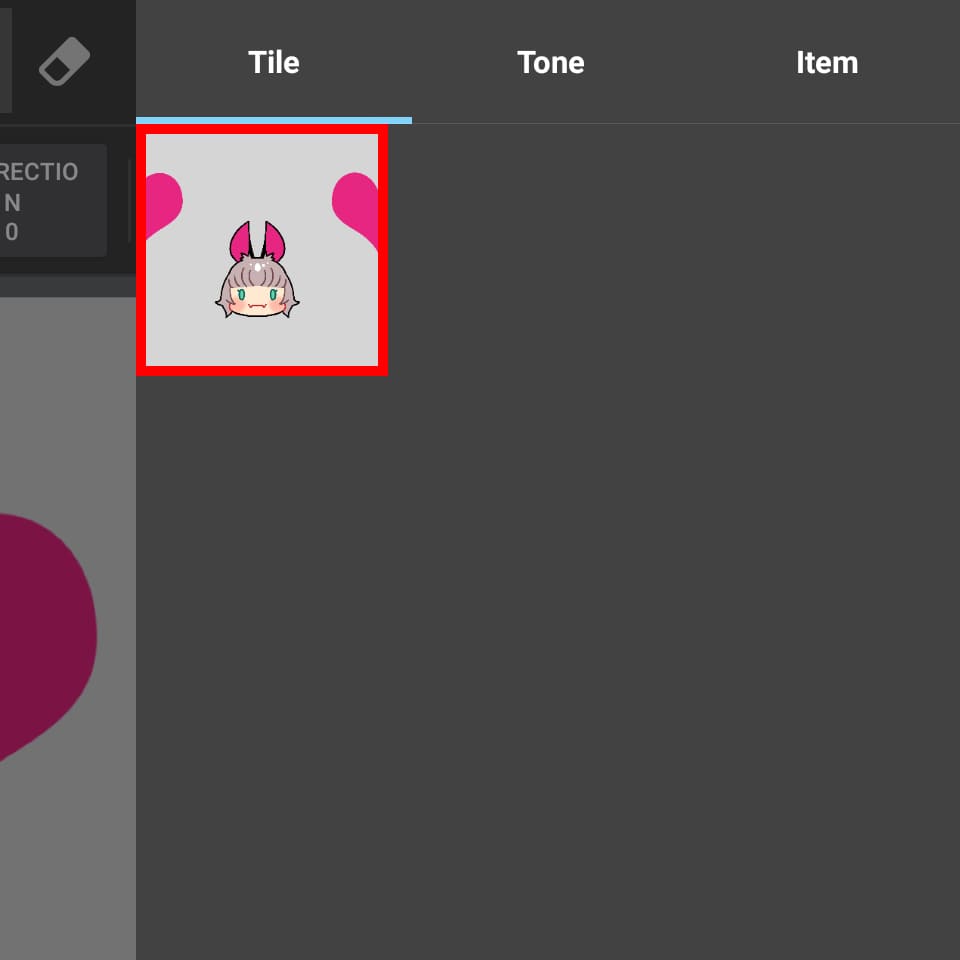
7.Choose from the three tabs「Tile」「Tone」「Item」and tap on the lower left corner of the Materials Menu.
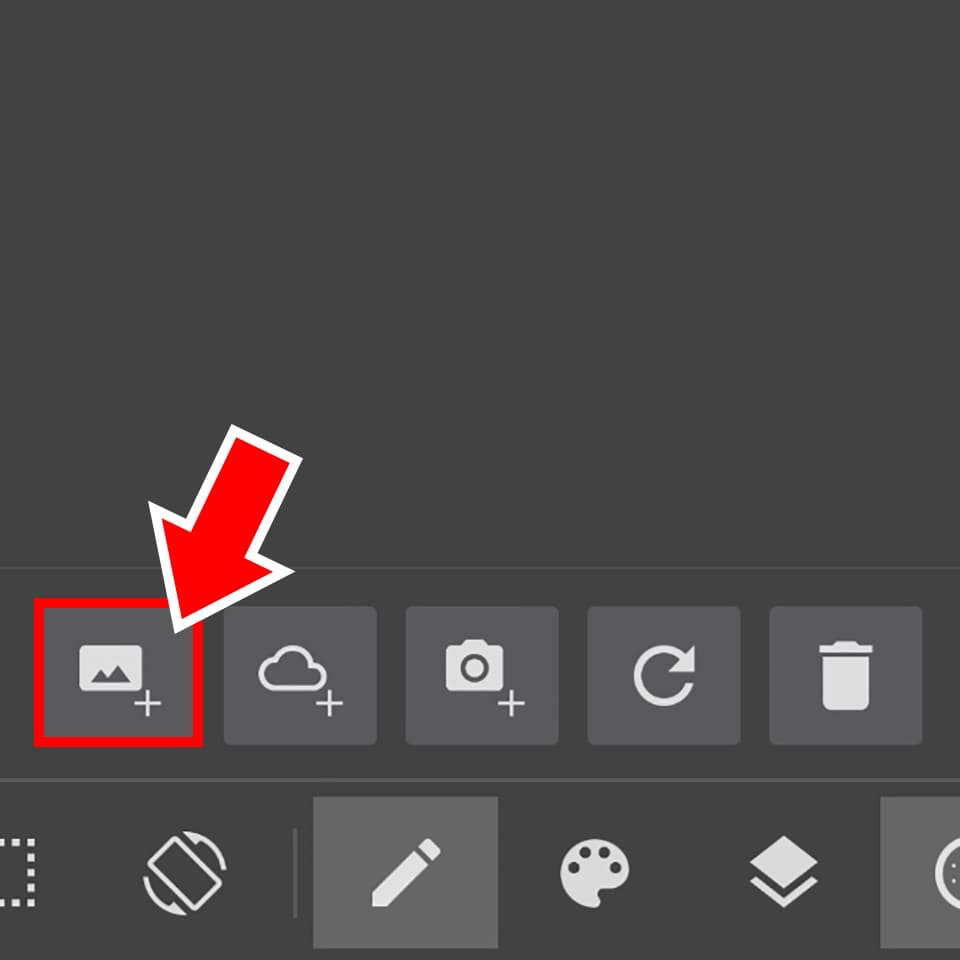
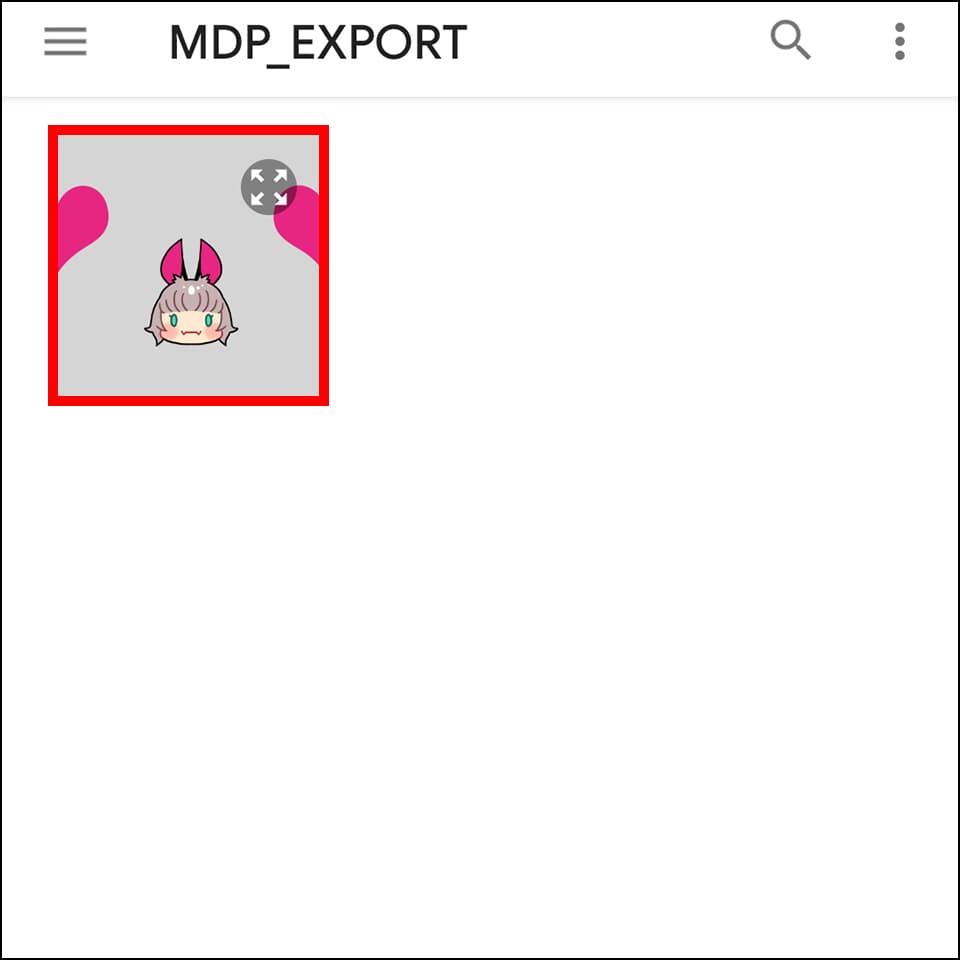
8.Select the image data (saved in png) from your local apps like Files.
※If the size of your material file is above the recommended value (512 pixels), you will still be able to register the file but please be aware that depending on your device environment, the MediBang Paint app might slow down or quit unexpectedly.
9.The material will be added to your list on the Materials Menu.
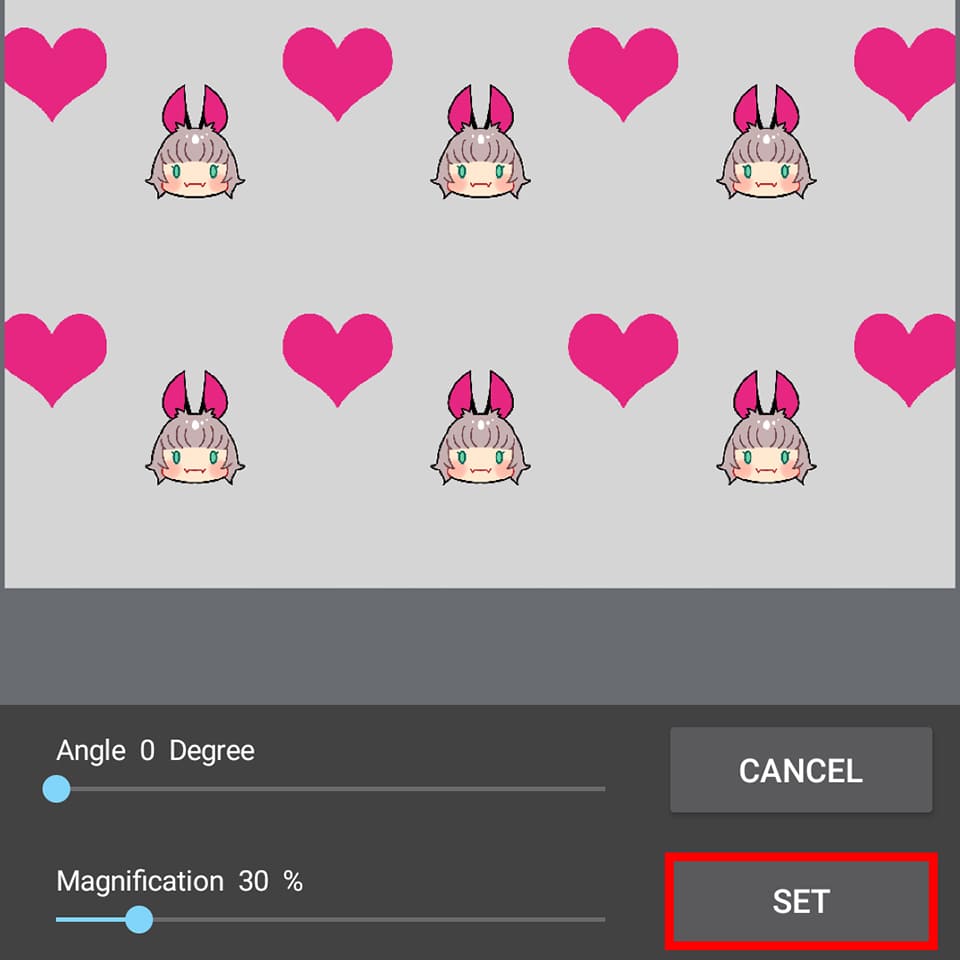
10.If you tap on the material available in your list, you will be redirected to the control window.
Adjust the numbers and tap on「Set」at the lower right to paste the material to your canvas.
With PNG Data
1.Create a new canvas and open the Materials Menu.
2.Choose from the three tabs「Tile」「Tone」「Item」and tap on the lower left corner of the Materials Menu.
3.Select your image data file (in png) from the Files app.
※If the size of your material file is above the recommended value (512 pixels), you will still be able to register the file but please be aware that depending on your device environment, the MediBang Paint app might slow down or quit unexpectedly.
4.The material will be added to your list on the Materials Menu.
5.If you tap on the material available in your list, you will be redirected to the control window.
Adjust the numbers and tap on「Set」at the lower right to paste the material to your canvas.
This is a tutorial for how to open psd data files on different devices.
※For psd materials with multiple layers, we recommend opening the file in this method rather than the registering method explained above.
For PC
1.「File」→「Open」and choose your psd file to open.
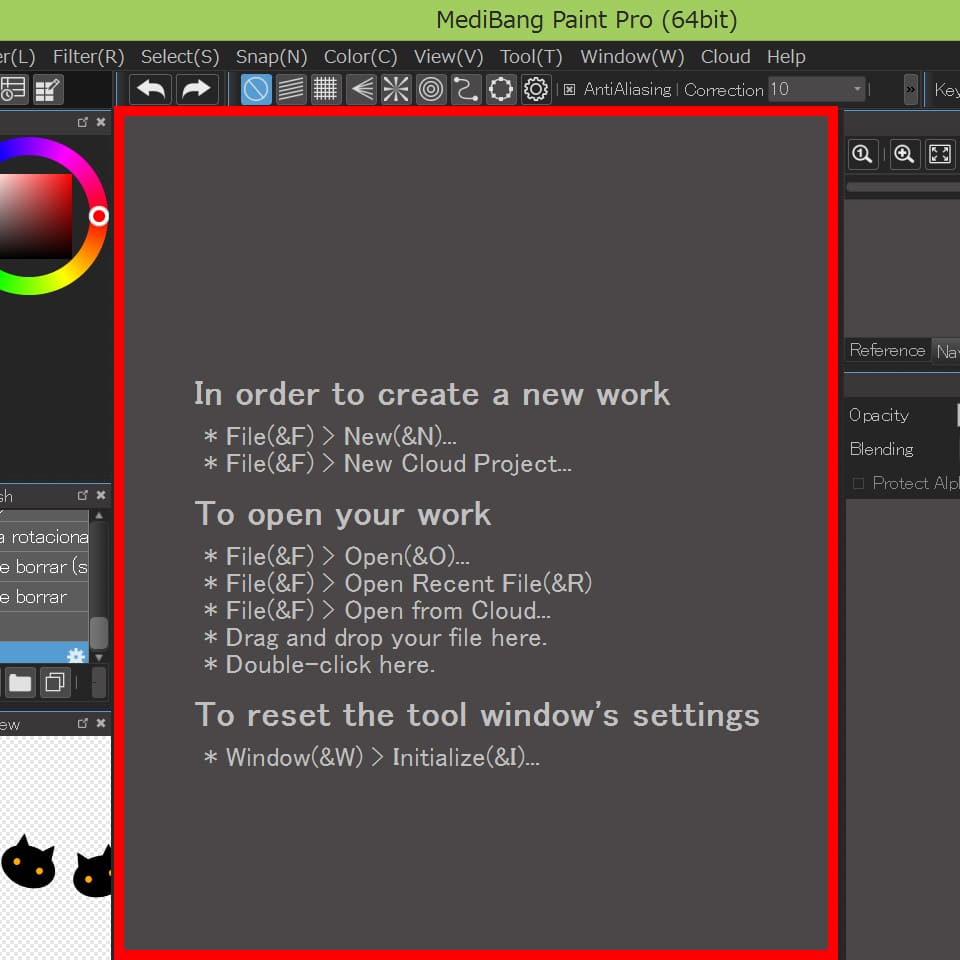
2.Double click the central area of the app window (around「To open your work」) and choose the psd file you want to open.
3.Drag and drop your psd file to the central area of the app window.
For iPad and iPhone
1.From「New Canvas」choose「Import from another app」.
Or tap「Import from another app」on the top right of the「Internal」tab of「My Gallery」.
2.Choose your psd data file from the File app.
For Android
1.Choose「Import PSD」from the「+」icon above「Internal」tab inside「My Gallery」.
2.Choose your psd data file from「Files」app.
3.Tap to open the psd data file added to your My Gallery.
As the image materials are copyright free, you can use them inside any work created for commercial use, doujin, or adult content.
However, we do not allow redistribution of the data of image material itself.