
How to blend the character into the background
2021-01-29

This time we will use the Windows version of CLIP STUDIO to draw the characters and background.
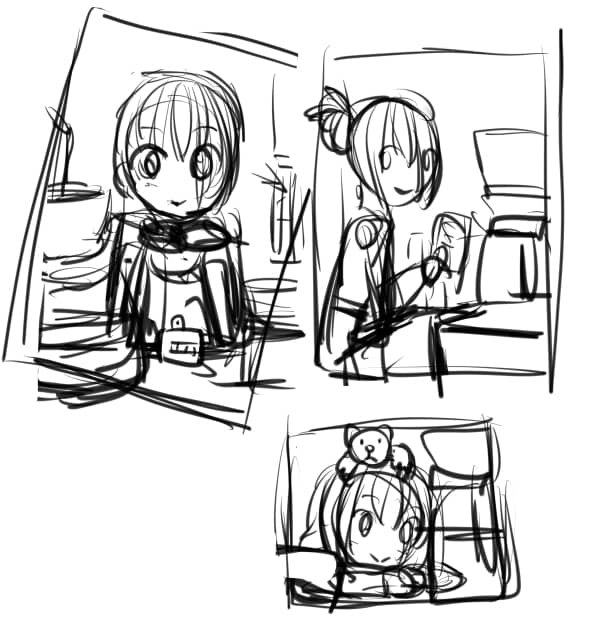
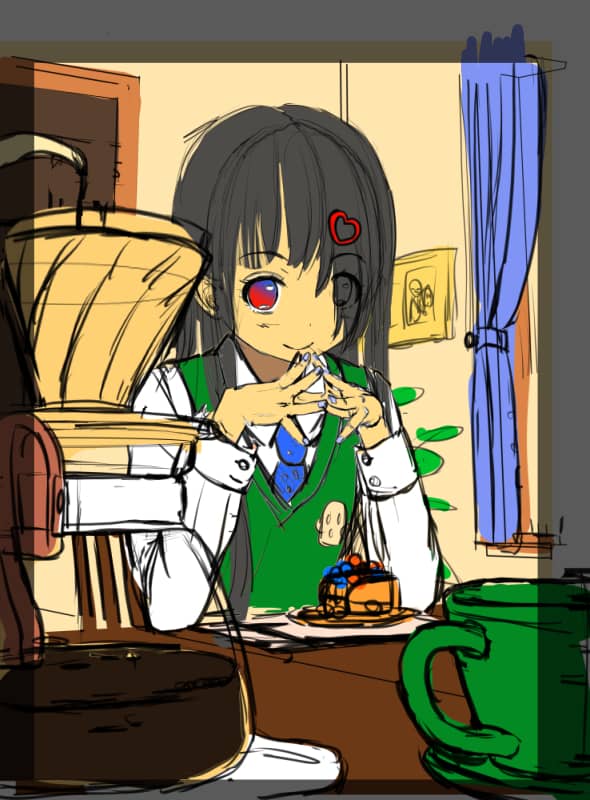
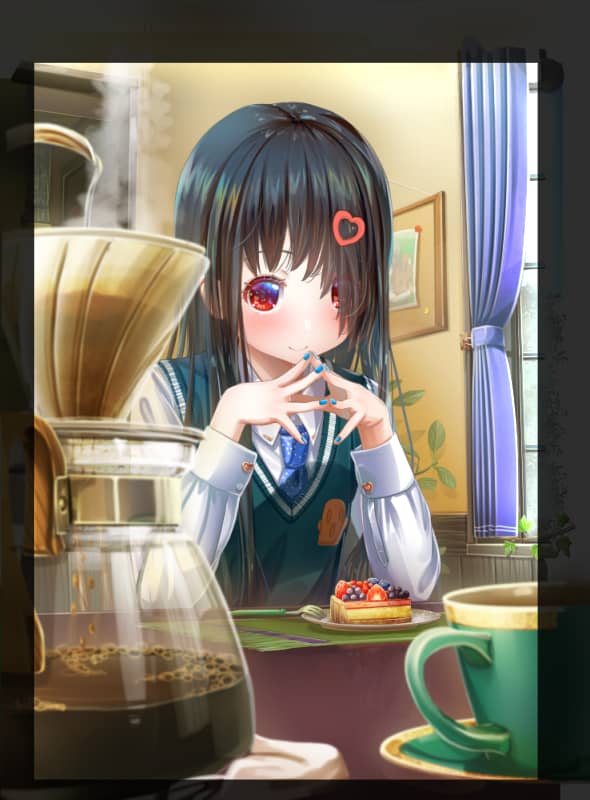
I planned the main composition of the character over coffee.
I use the default mechanical pencil tool and draw roughly at a small size.
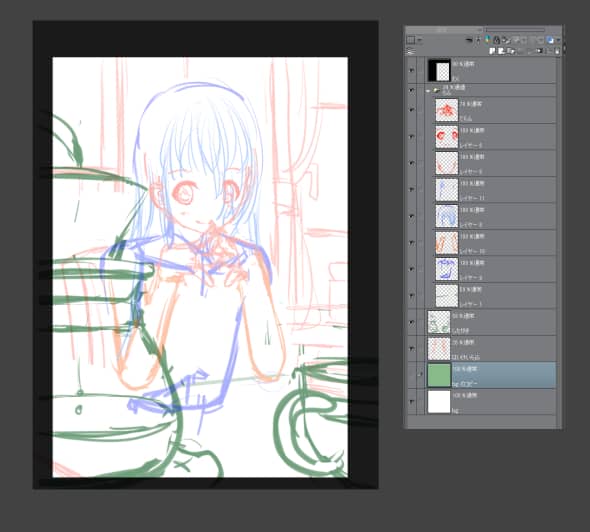
The frame is prepared on the upper layer.
I lower the opacity while working, but sometimes I set it to 100 to make it easier to visualize the finished image.
It's easier to understand if you color-code the parts that overlap in front and behind.
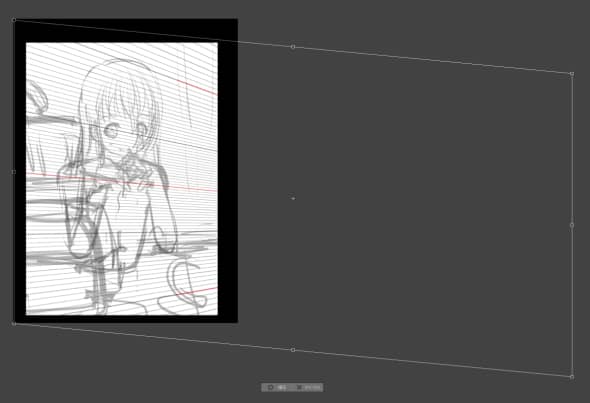
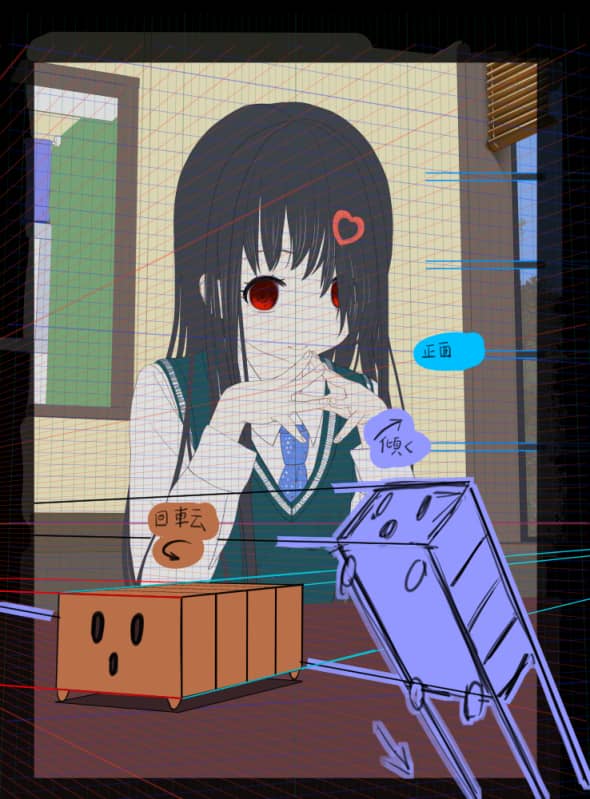
I will use this perspective grid.
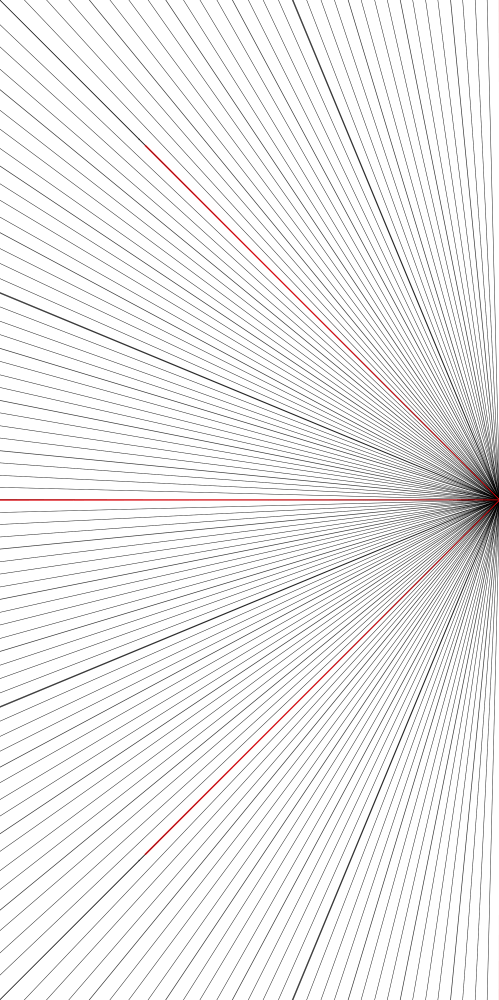
Drag it to the layer window and then match the size of the canvas.
You can use Ctrl + Shift + T to free transform the image, so pull the middle point of the right side, and when the perspective is close to your image, press Enter to decide.
The height of the middle point (the most horizontal line) is the eye level.
Add another perspective material, this time a perspective with a setting that intersects the perspective line perpendicular to the eye level.
Two main perspective grids are created.
The green line is the eye level, the blue line is the horizontal perspective, and the red line is the depth perspective.
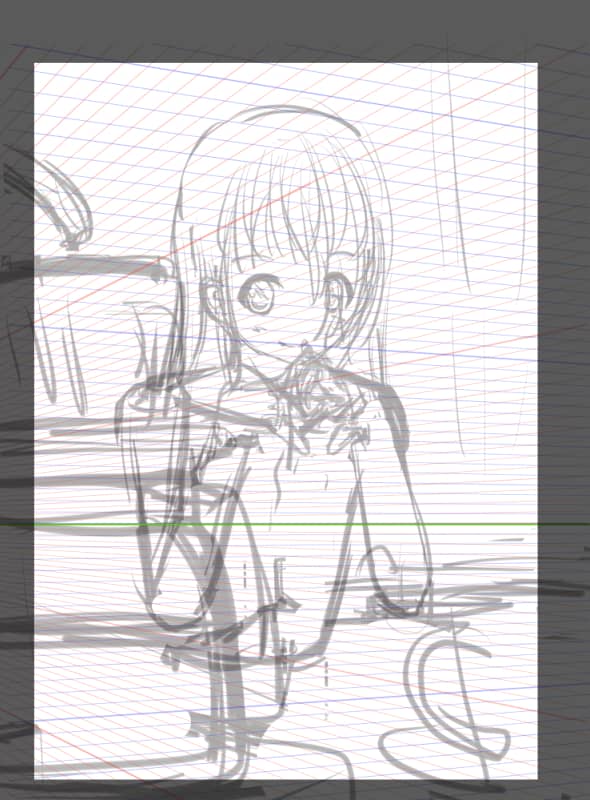
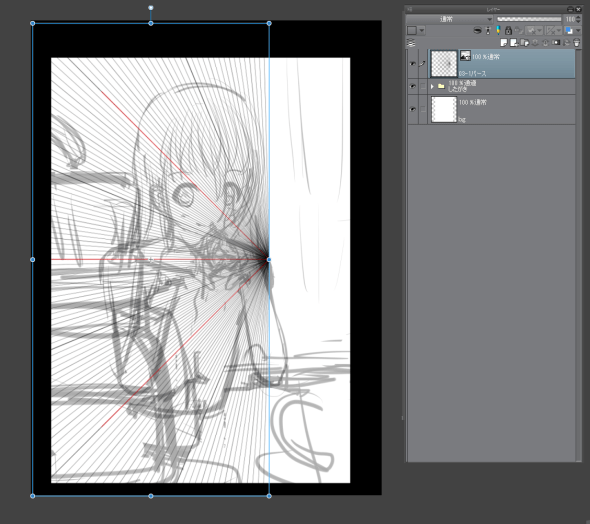
For this character, I did not use a dynamic pose or an extreme angle. She is in line with the main perspective grid.
I aligned the lines for both shoulders and elbows.
Only the head is twisted, so the height of the face parts are different on the left and right.
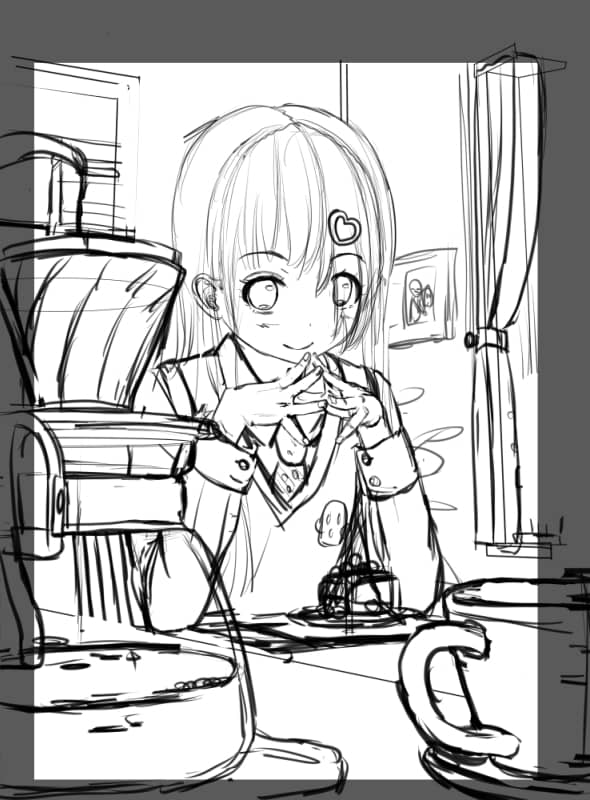
If you draw with a narrow depth, you can easily create a calm atmosphere.
If the depth is wider, the perspective is emphasized and the image becomes more powerful.
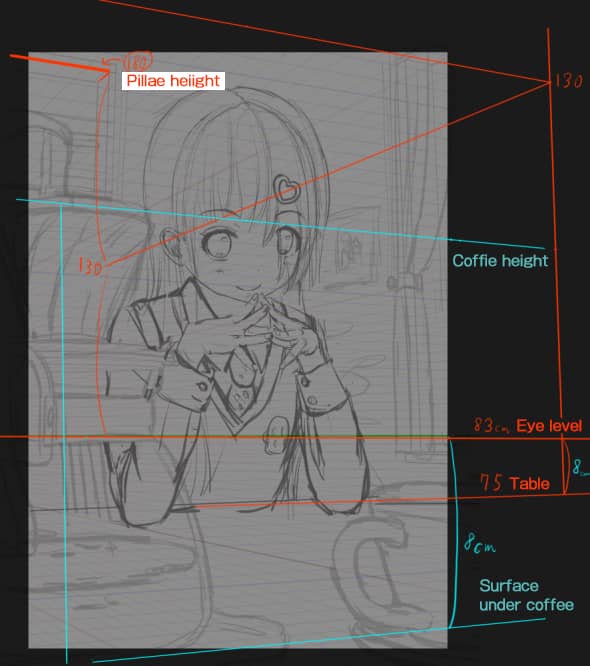
I checked the approximate size based on the height of the desk.
Red is the height from the floor and blue is the height from the desk.
If I notice that the ceiling is too low or the accessories are too small, I would fix it at this point.
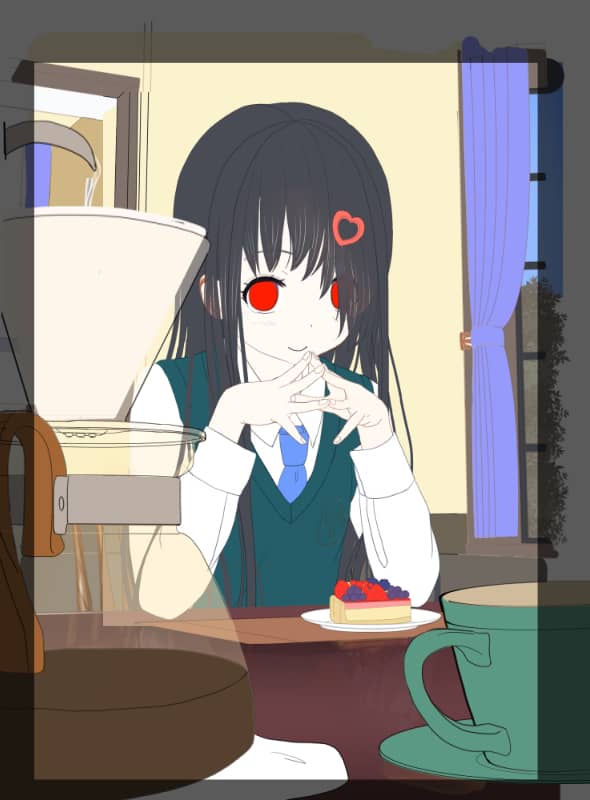
Consider the placement of the colors.
This picture has a yellow base, with blue and red as accent colors.
Separate folders for foreground, character, and background for lineart and ground painting.
Since the desk will be sandwiched between the body and arms, the body and arms will also be painted in separate folders for easy correction later.
I use the mechanical pencil for the character lineart, and the straight line and curve tools for the foreground and background, since the lineart is supposed to be almost invisible.
The glass part of the dripper is painted in yellow with lowered opacity to create a selection.
For objects that don't match the main perspective, I draw them with the image of shifting the edge of the perspective to the left or right in the direction of rotation if the object is rotating, and with the image of the top and bottom edges becoming closer to parallel as they face the front.
The upper and lower edges are drawn so that they become closer to parallel as they face the front. The windows in the bay window are drawn so that they almost face the front.
Paint the light and shadow.
Make sure that the direction of the light and shadow and the color of the light are not too different between the character and the background.
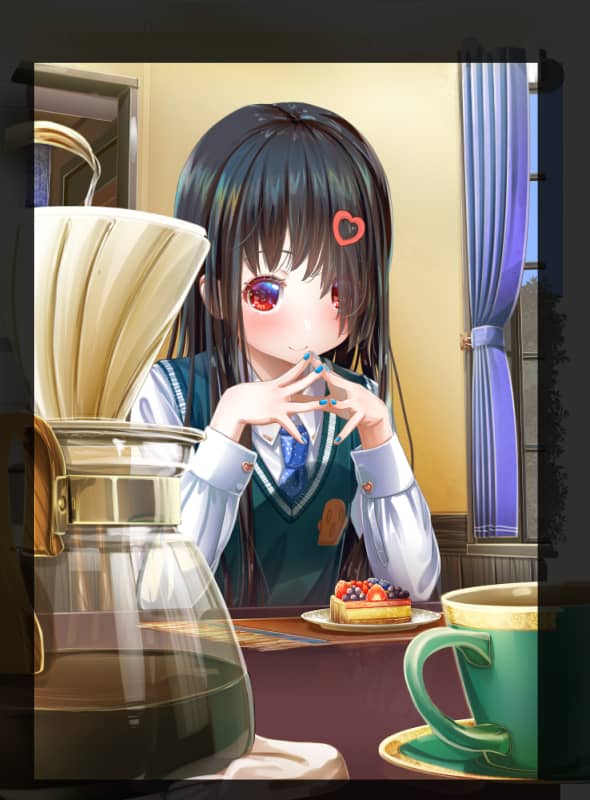
We'll clarify the foreground and background, and add some effects and accessories.
First, I merged the foreground folders and did a Gaussian blur from the filter menu.
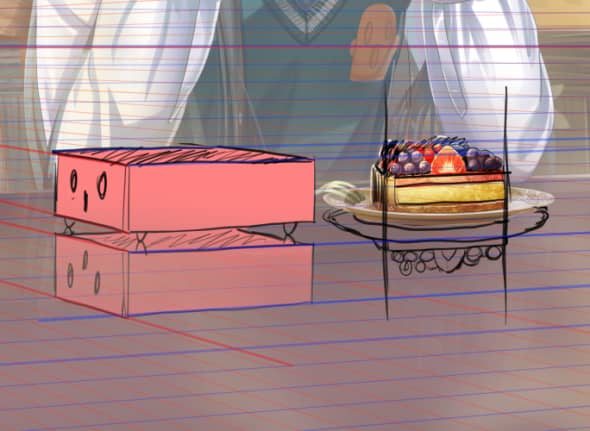
I used the airbrush to softly add color behind the objects I wanted to bring forward, such as between the dripper and the right shoulder, and between the tart and the left elbow.
I darkened the back of the upper left corner to make the brighter parts in the front stand out.
The steam, the reflection on the desk, and the small items were added because there were no wall decorations and forks.
Reflections in the mirror, shadows falling from the character, or shadows of objects in the area falling on the character will increase the sense of being there.
If the mirror is not tilted, the reflection can be drawn using the same perspective as the main body. The upper surface cannot be seen from the mirror's perspective, but the vertical line can be an extension of the main body.
This time the reflection is not noticeable, so I copied it and transformed it to fit the perspective.
Add glitter and color to increase the amount of information.
For clarity, I've added some gray in between.
The entire screen is covered in yellow with a multiply layer (45%).
The red, yellow, and pink at the top are overlay layers.
Rather than aiming to paint it, I'll try it and if it looks good, I'll adopt it, and if It looks not good, I'll delete it.
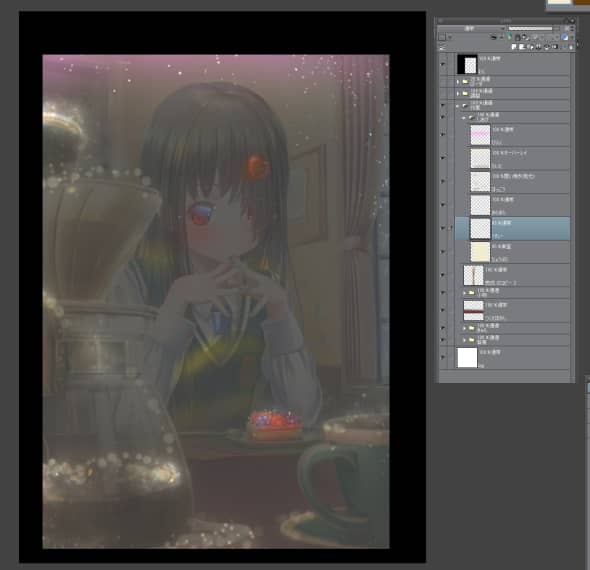
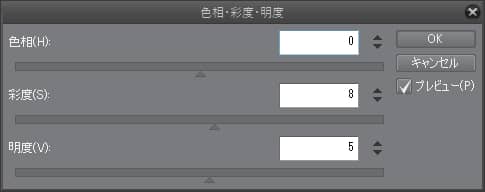
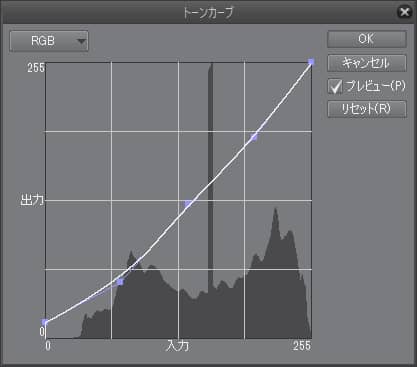
Merge all layers except for the frame, and change the color tone by going to Edit > Color Correction.
I tweaked the hue, saturation, luminosity, and tone curve.
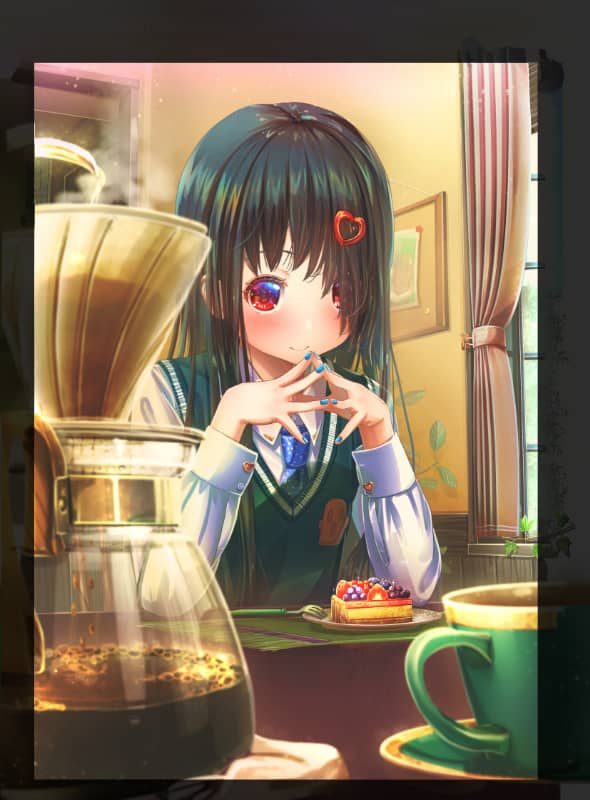
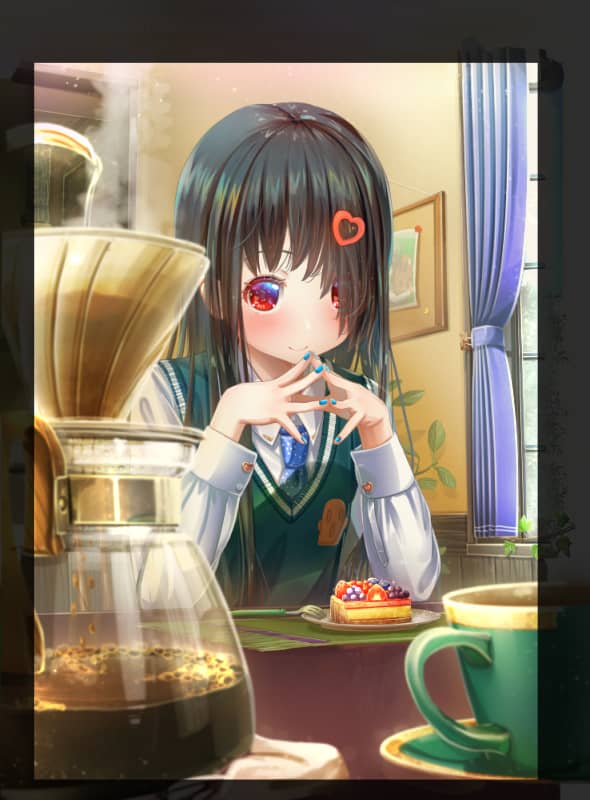
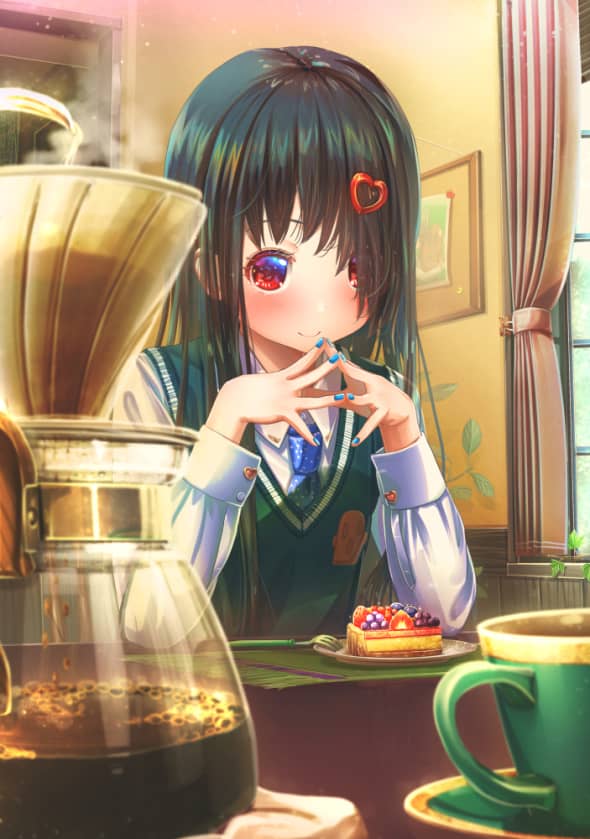
Crop and it’s done.
When drawing characters and backgrounds together, it's a lot of fun to imagine not only the location and situation, but also the character's taste, lifestyle, temperature, sounds, and smells.
Please give it a try!
Click here for the collection: https://medibang.com/u/aiuabo/
Click here for the interview: https://medibang.com/page/interview/aiuabo005/
twitter: https://twitter.com/aiuabo/
fantia: http://fantia.jp/fanclubs/7719/


