How to use Procreate and its useful functions
2021-03-26
In this article, I will show you how to use Procreate!
If you are familiar with other tools and want to try Procreate, this article will help you.
(1)
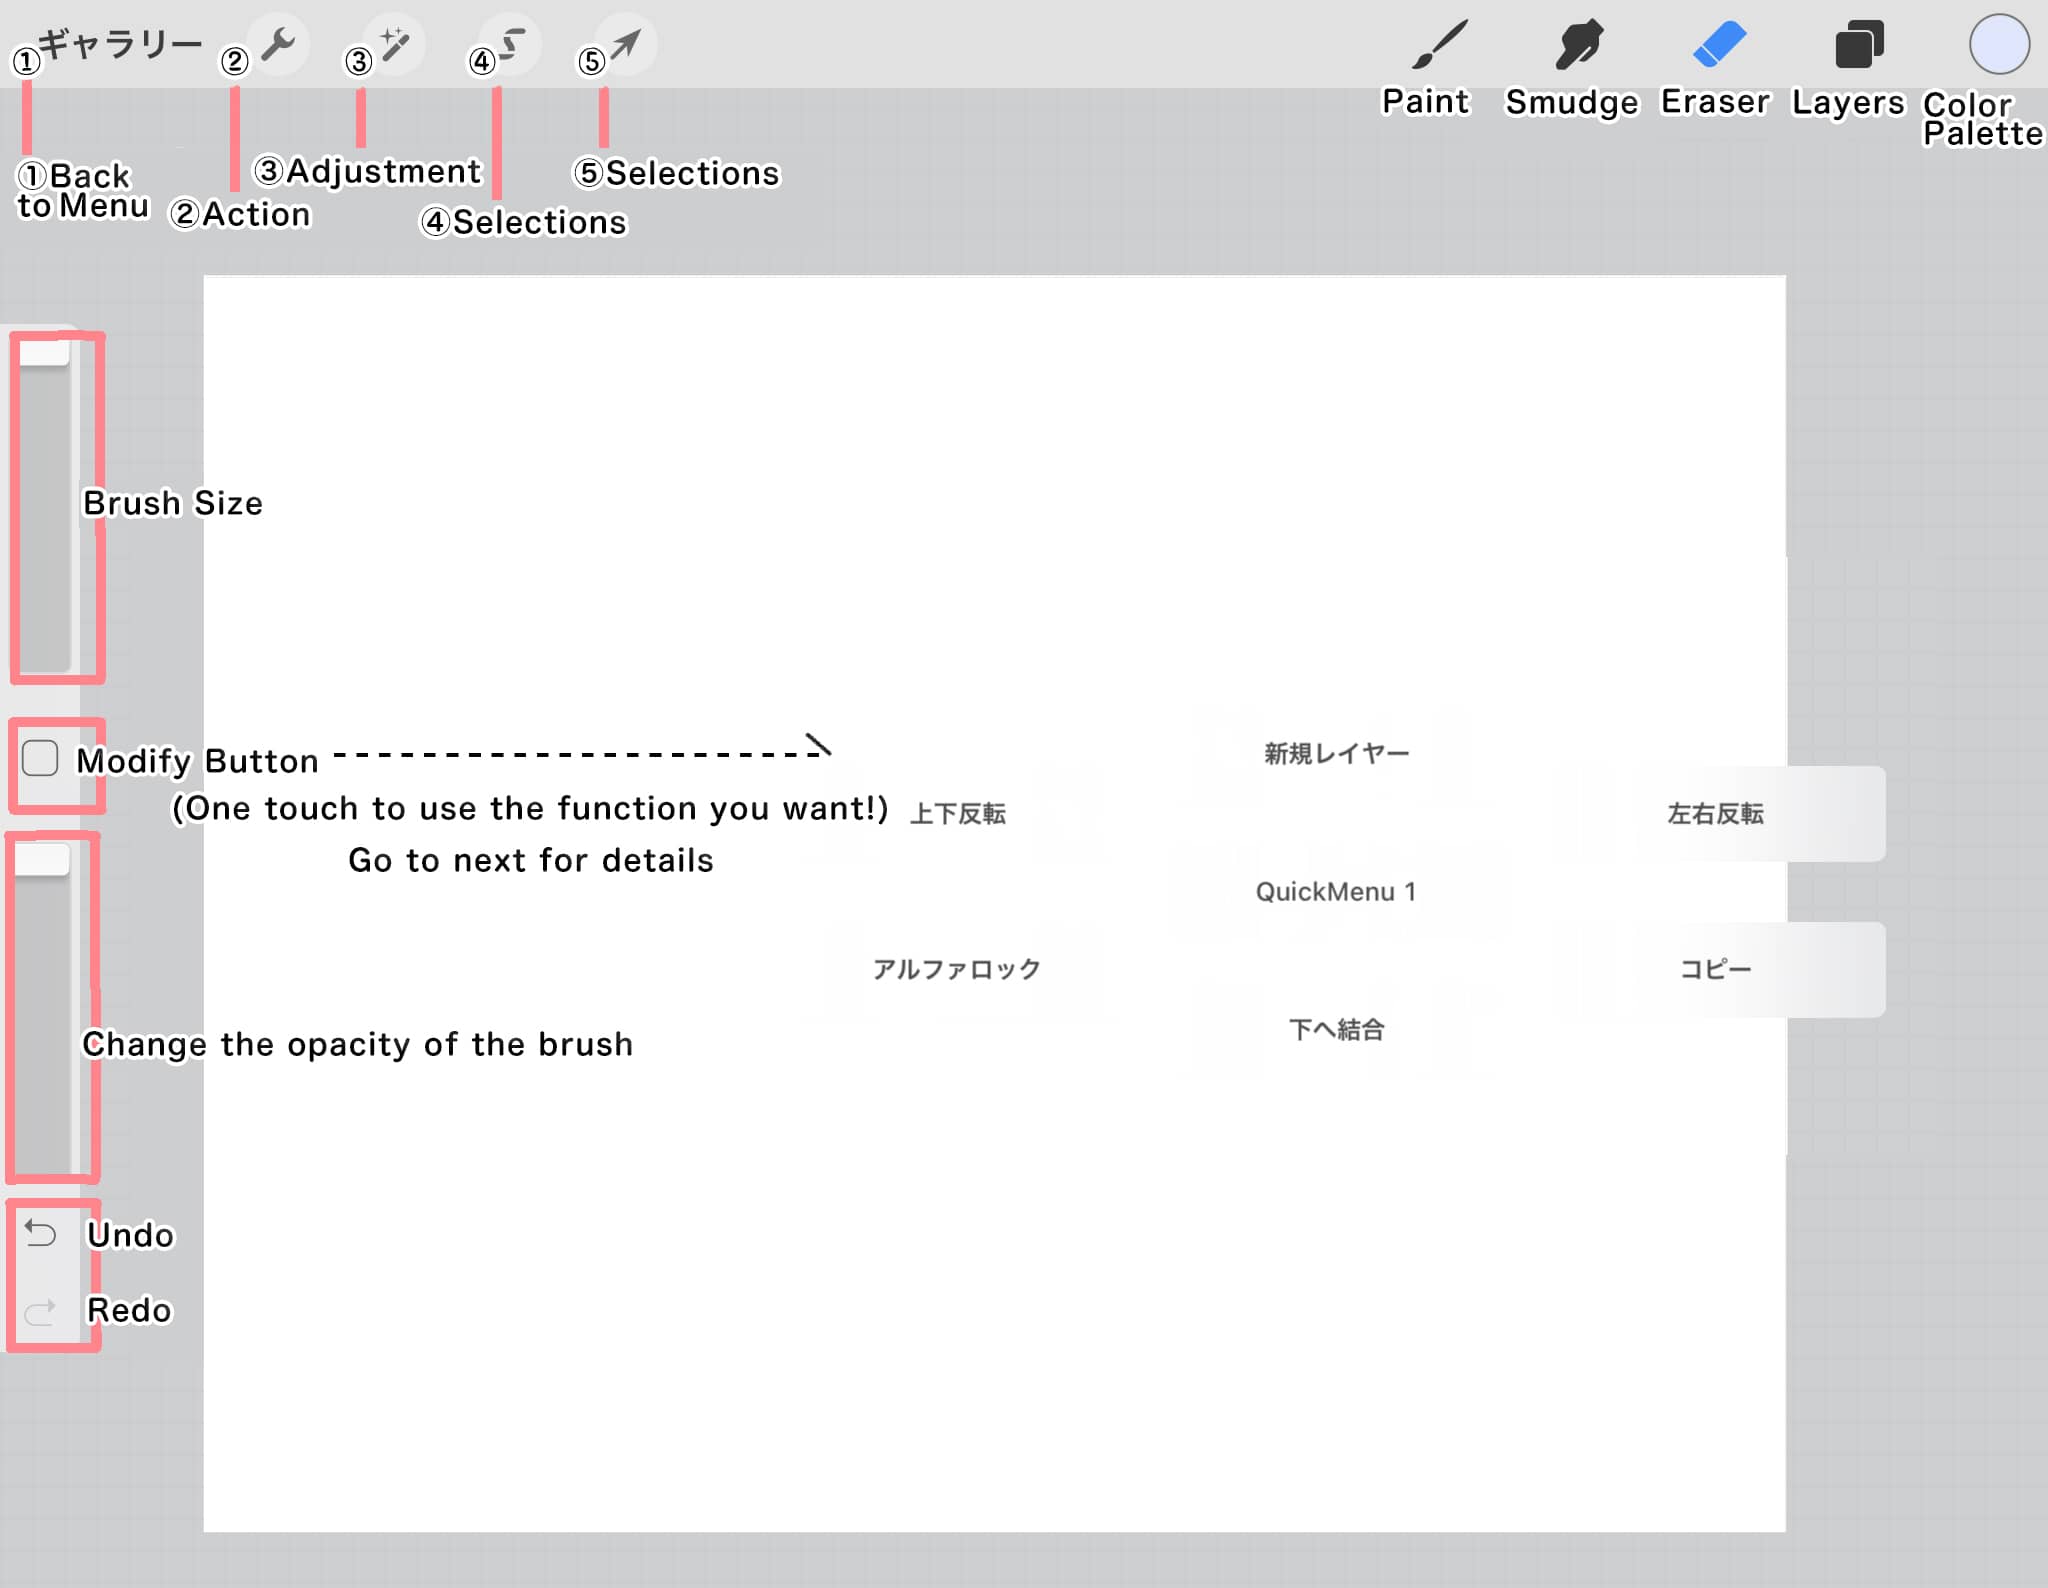
Once you have created a canvas in the gallery, you see the following screen.
It's populated only with icons, so try to remember what those icons mean!
(2)
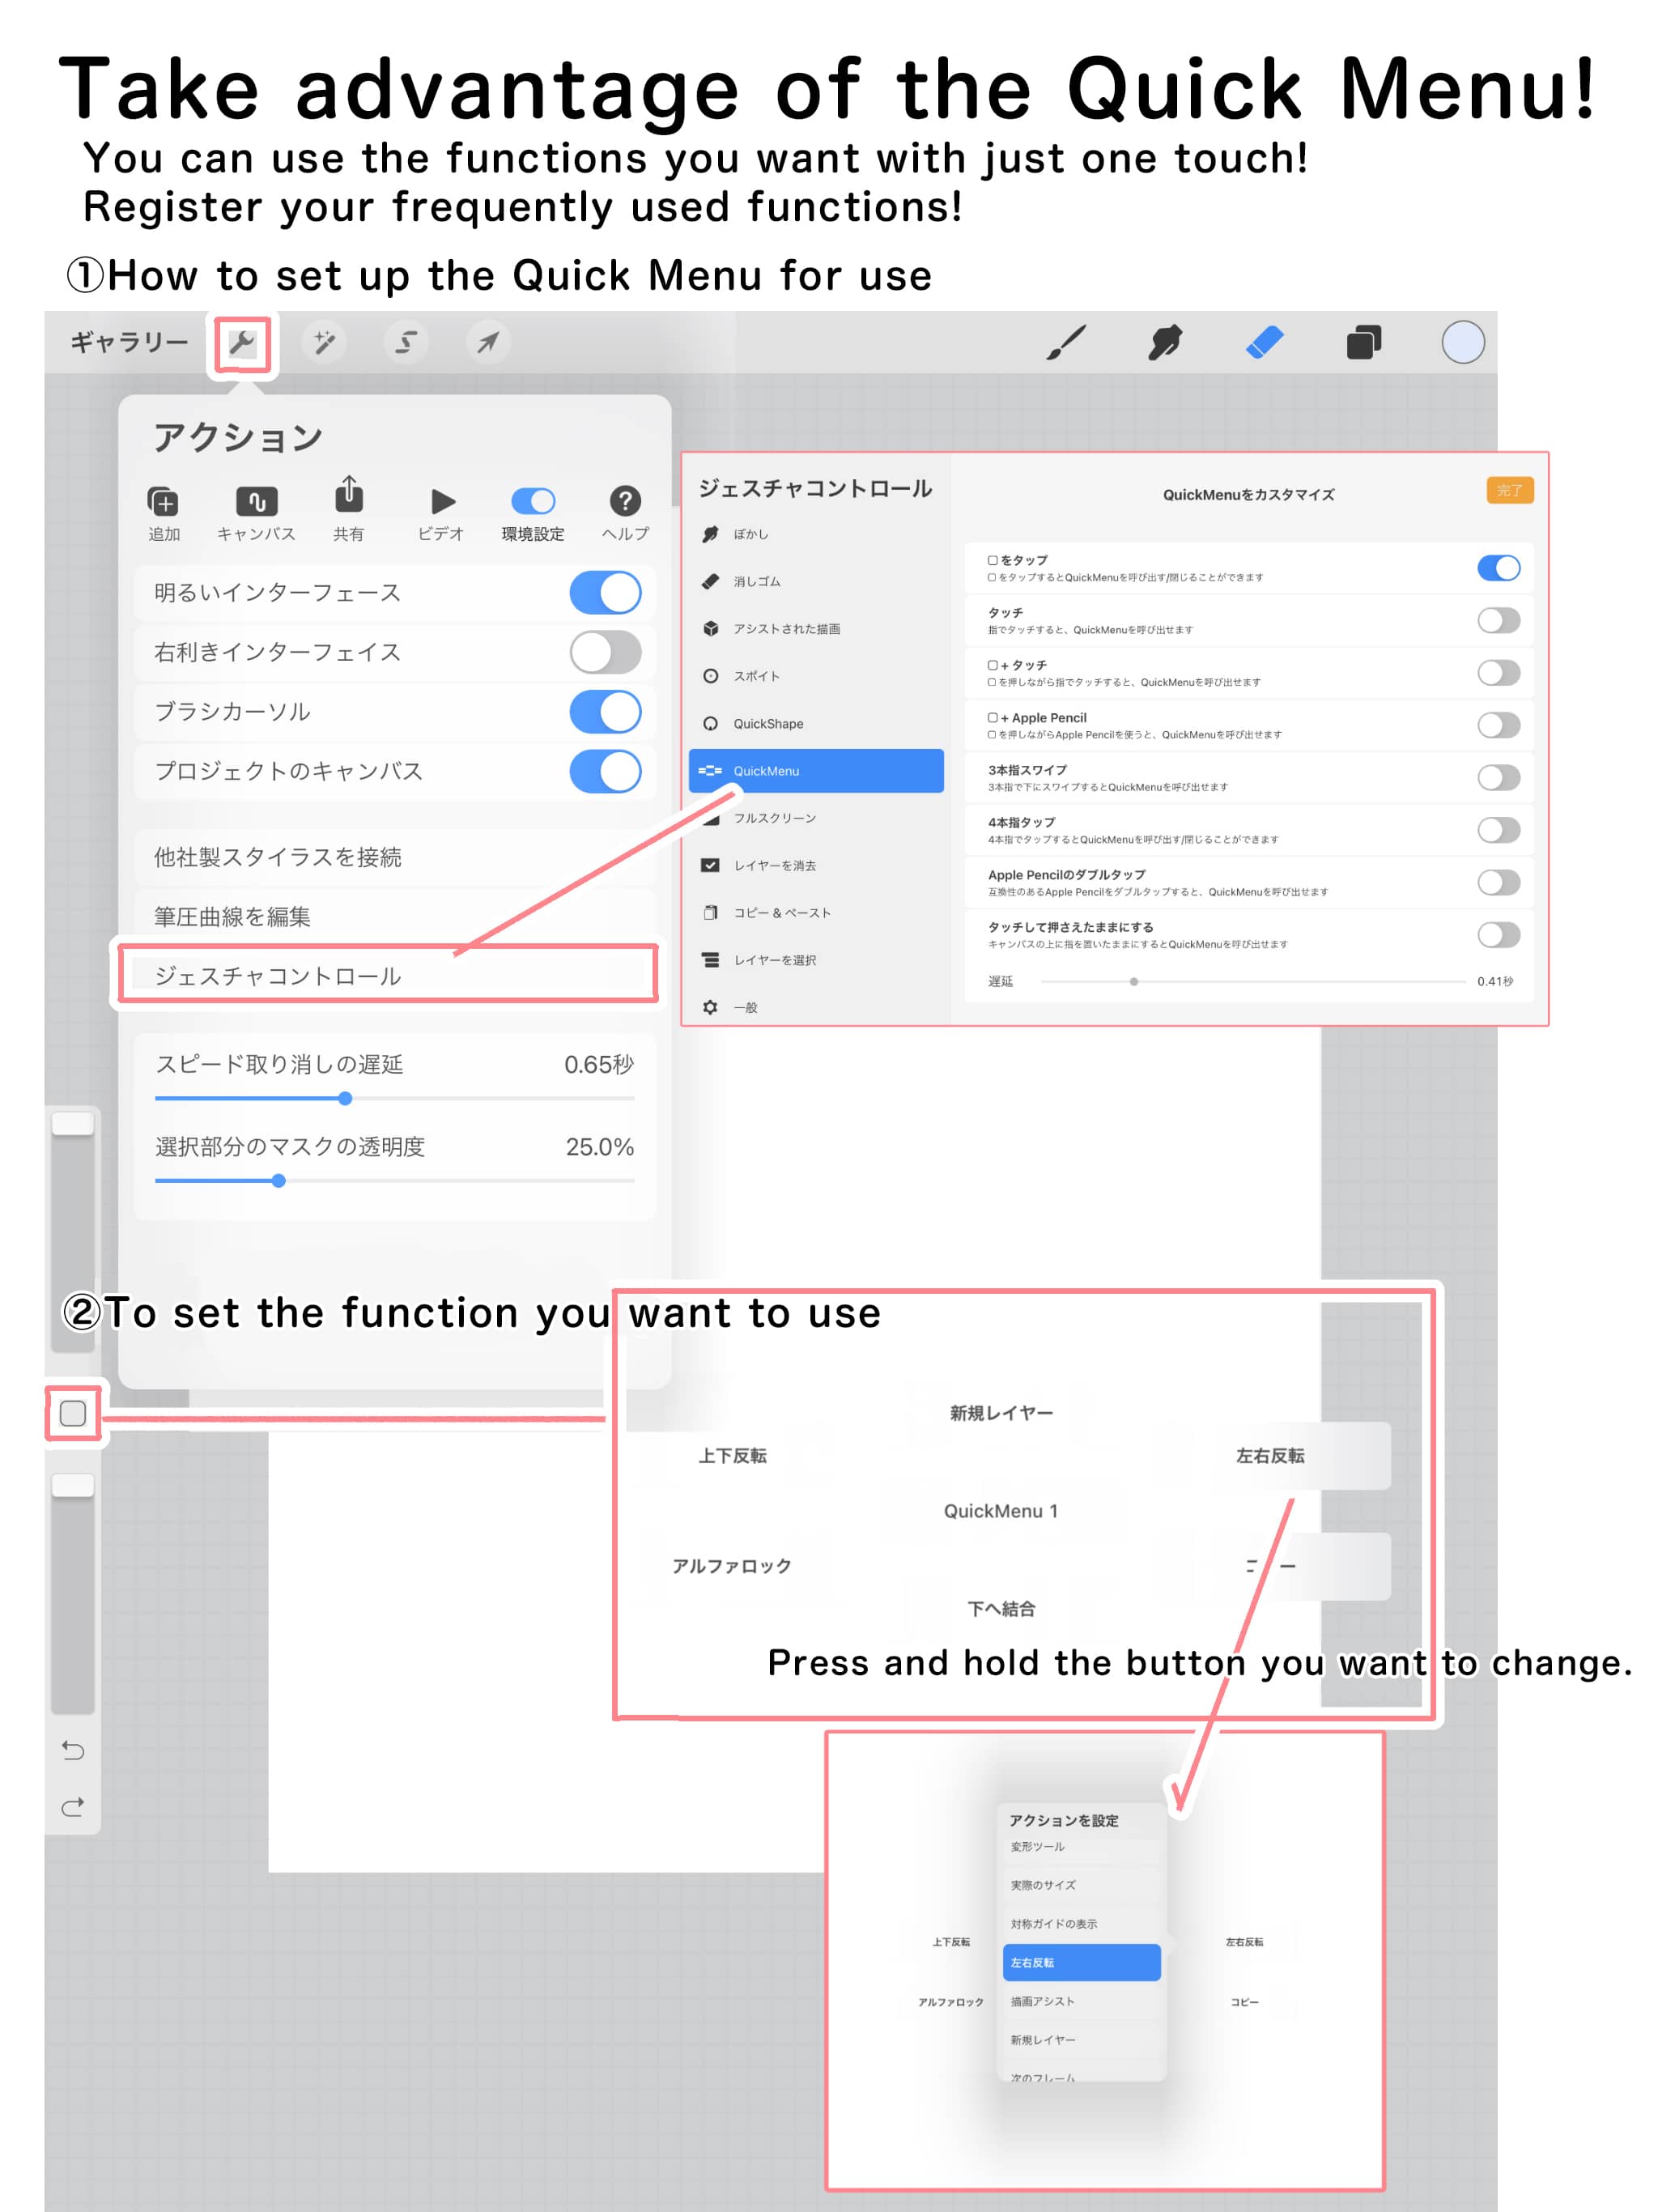
Let's use a quick menu!
You can register shortcuts for frequently used functions in the Quick Menu.
Action → Gesture Control → QuickMenu → Tap "□".
After setting up the shortcuts, try tapping the "□" button.
In the default settings, some functions may be registered that you don't need, so press and hold the function you want to change to the one you want.
(3)
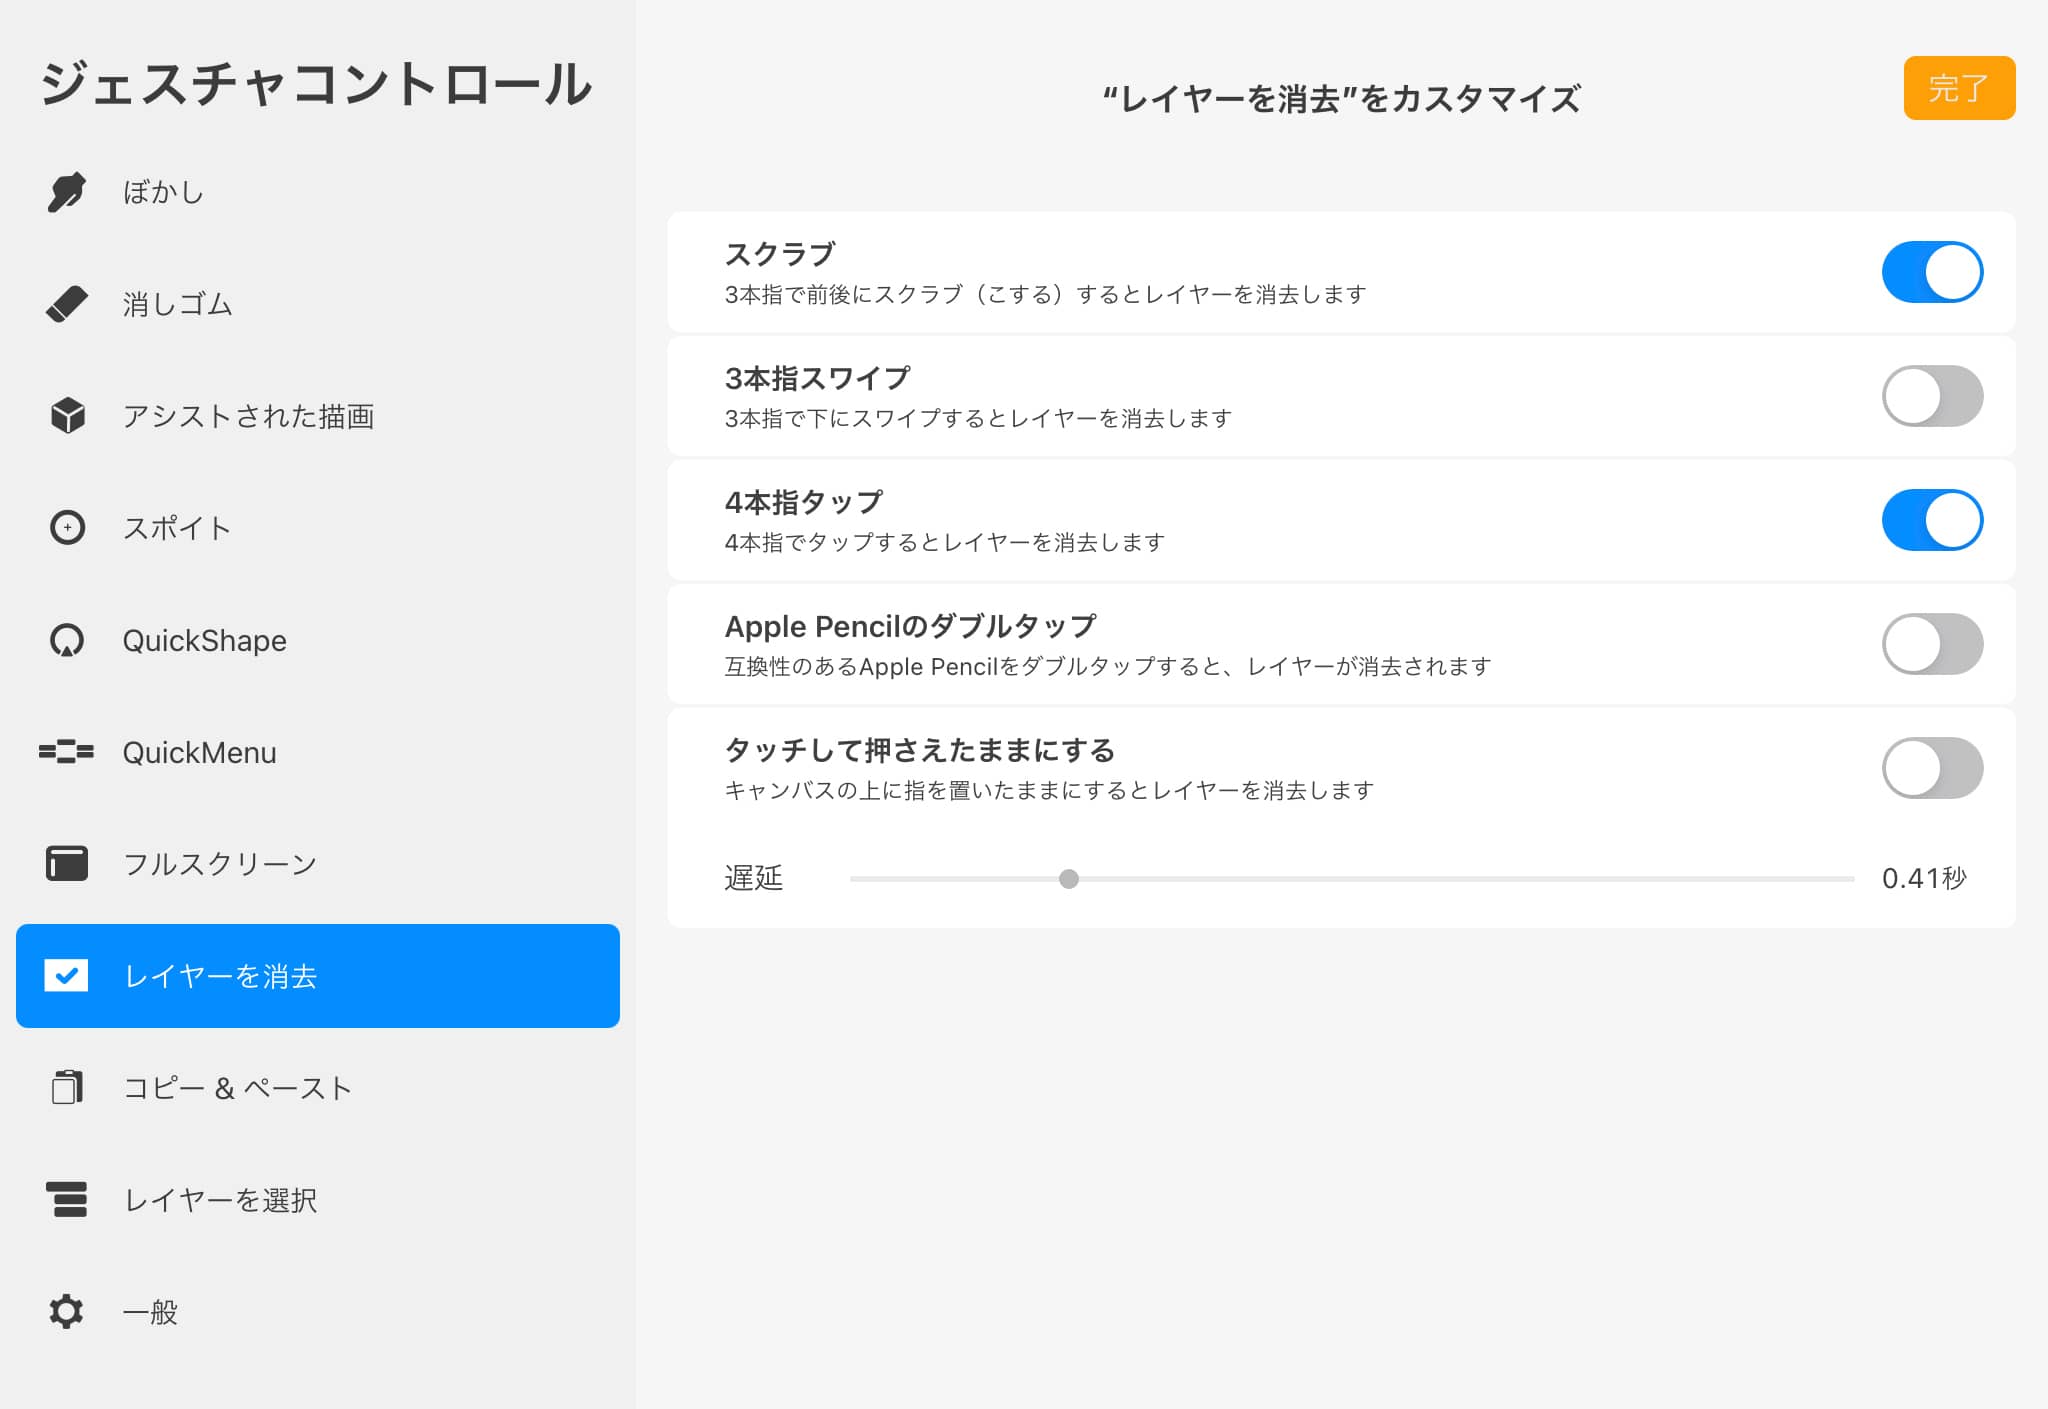
Here are some other gesture controls you may want to set up.
You can set up frequently used functions so that you can use them with just the movement of your Apple Pencil or finger.
Clear Layer → Four-Finger Tap is particularly useful.
(1)
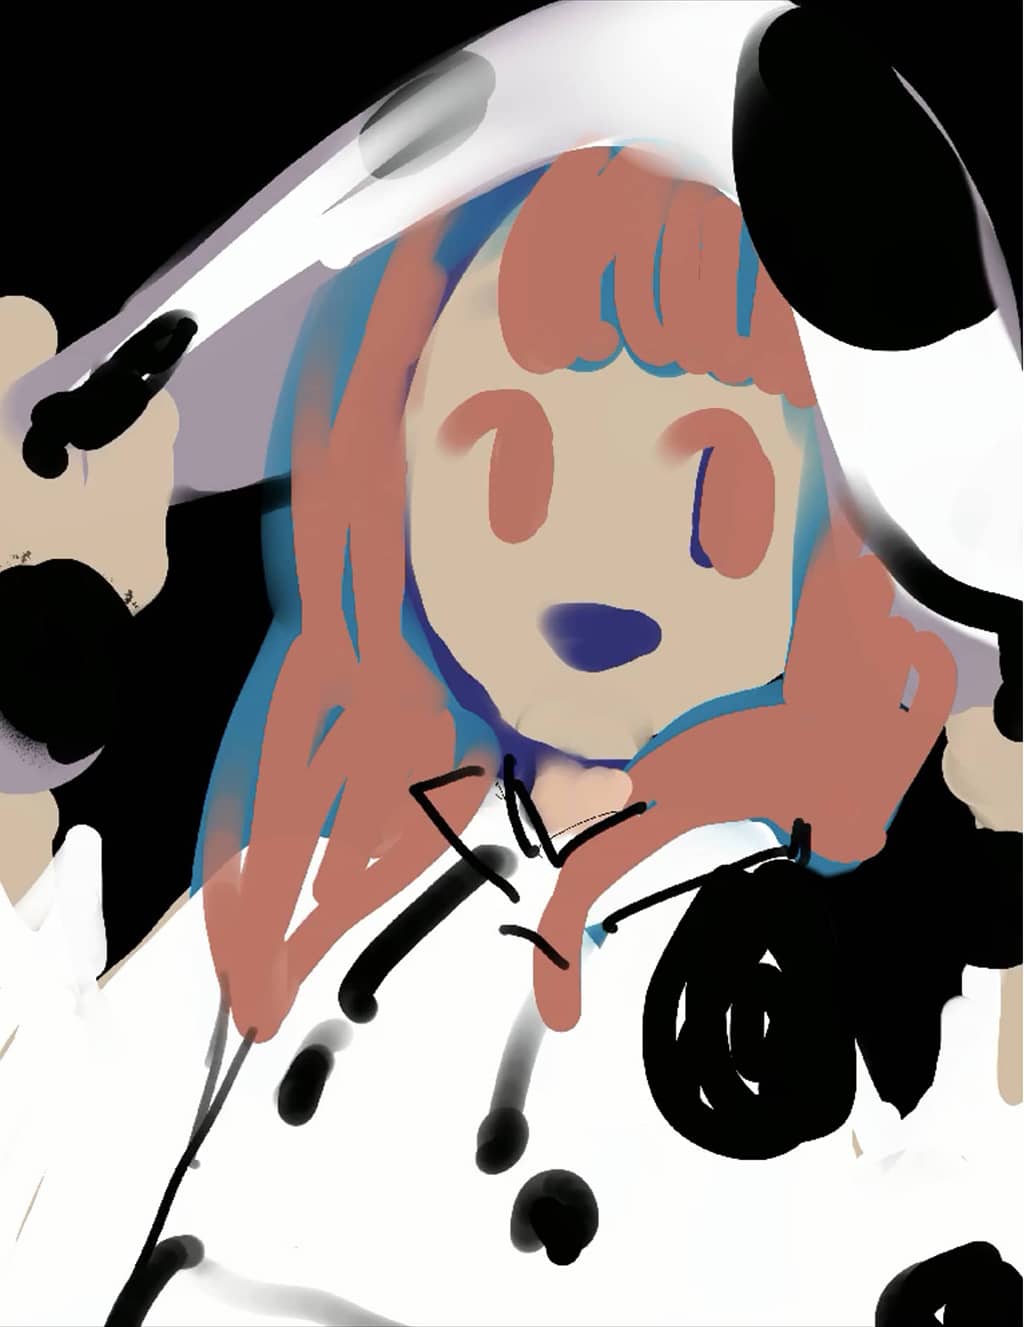
Draw Rough
(2)
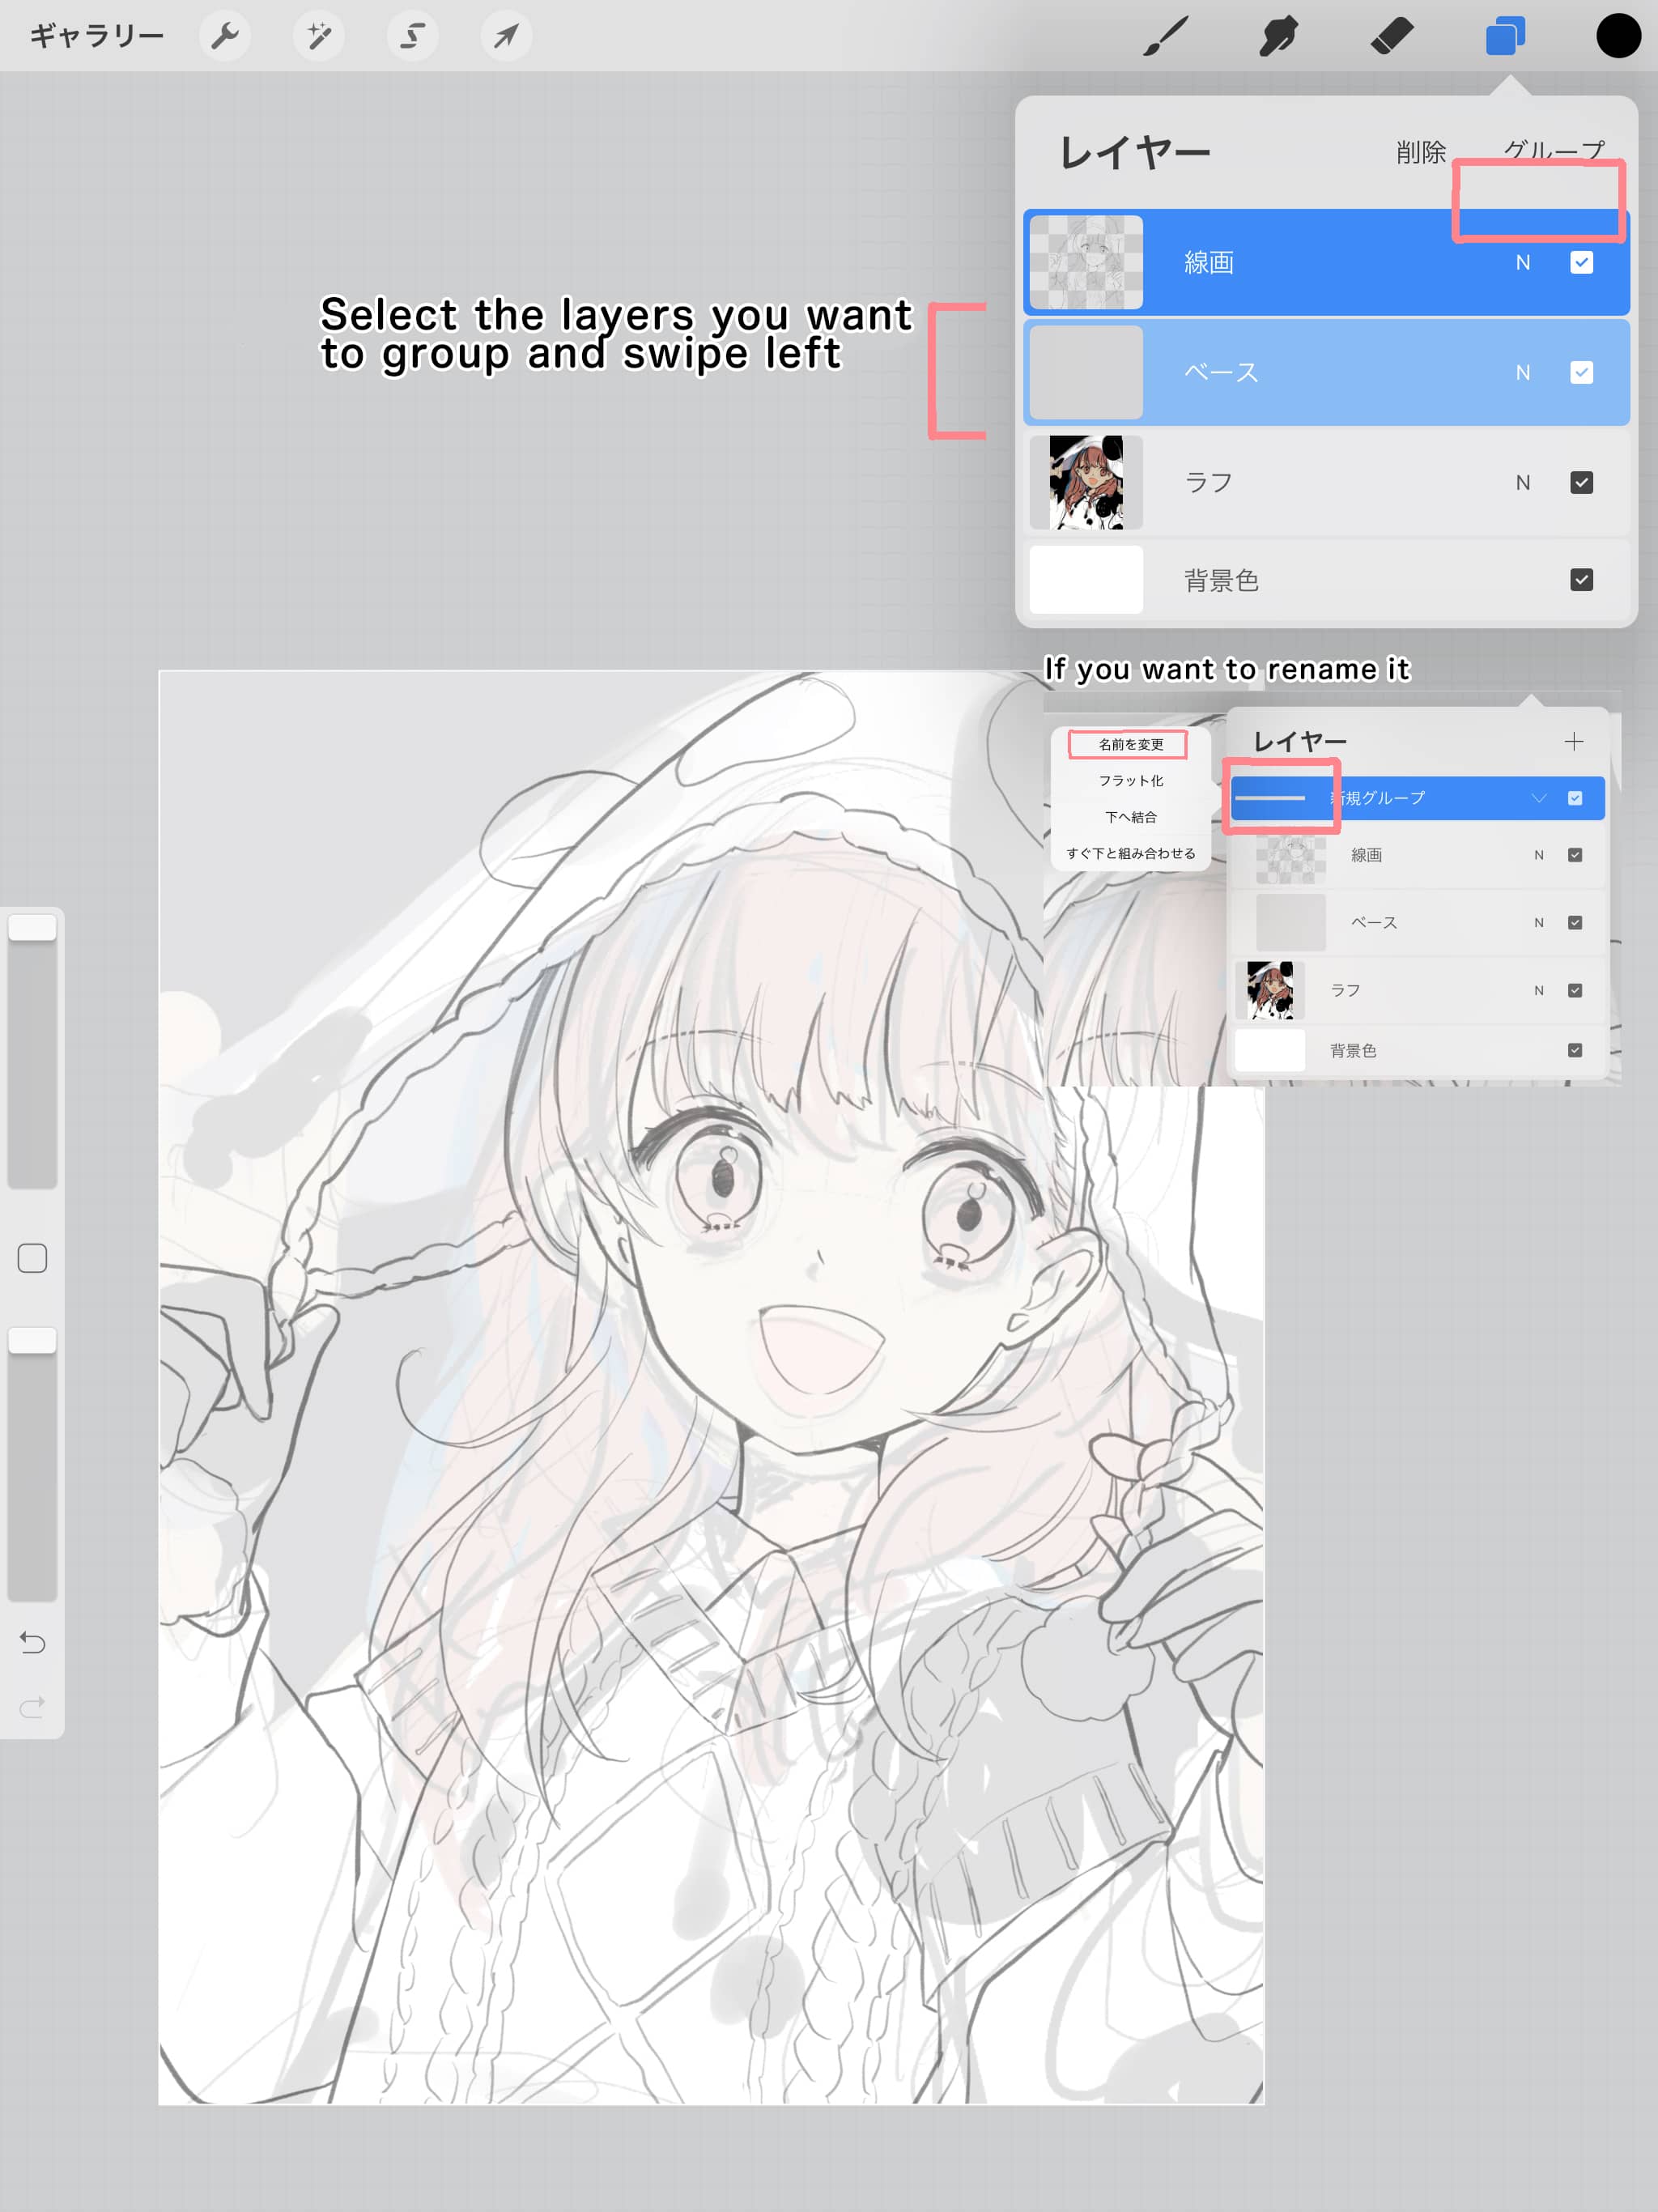
Create a layer for line drawing.
(3)
Create a layer for base coloring under line drawing.
(4)
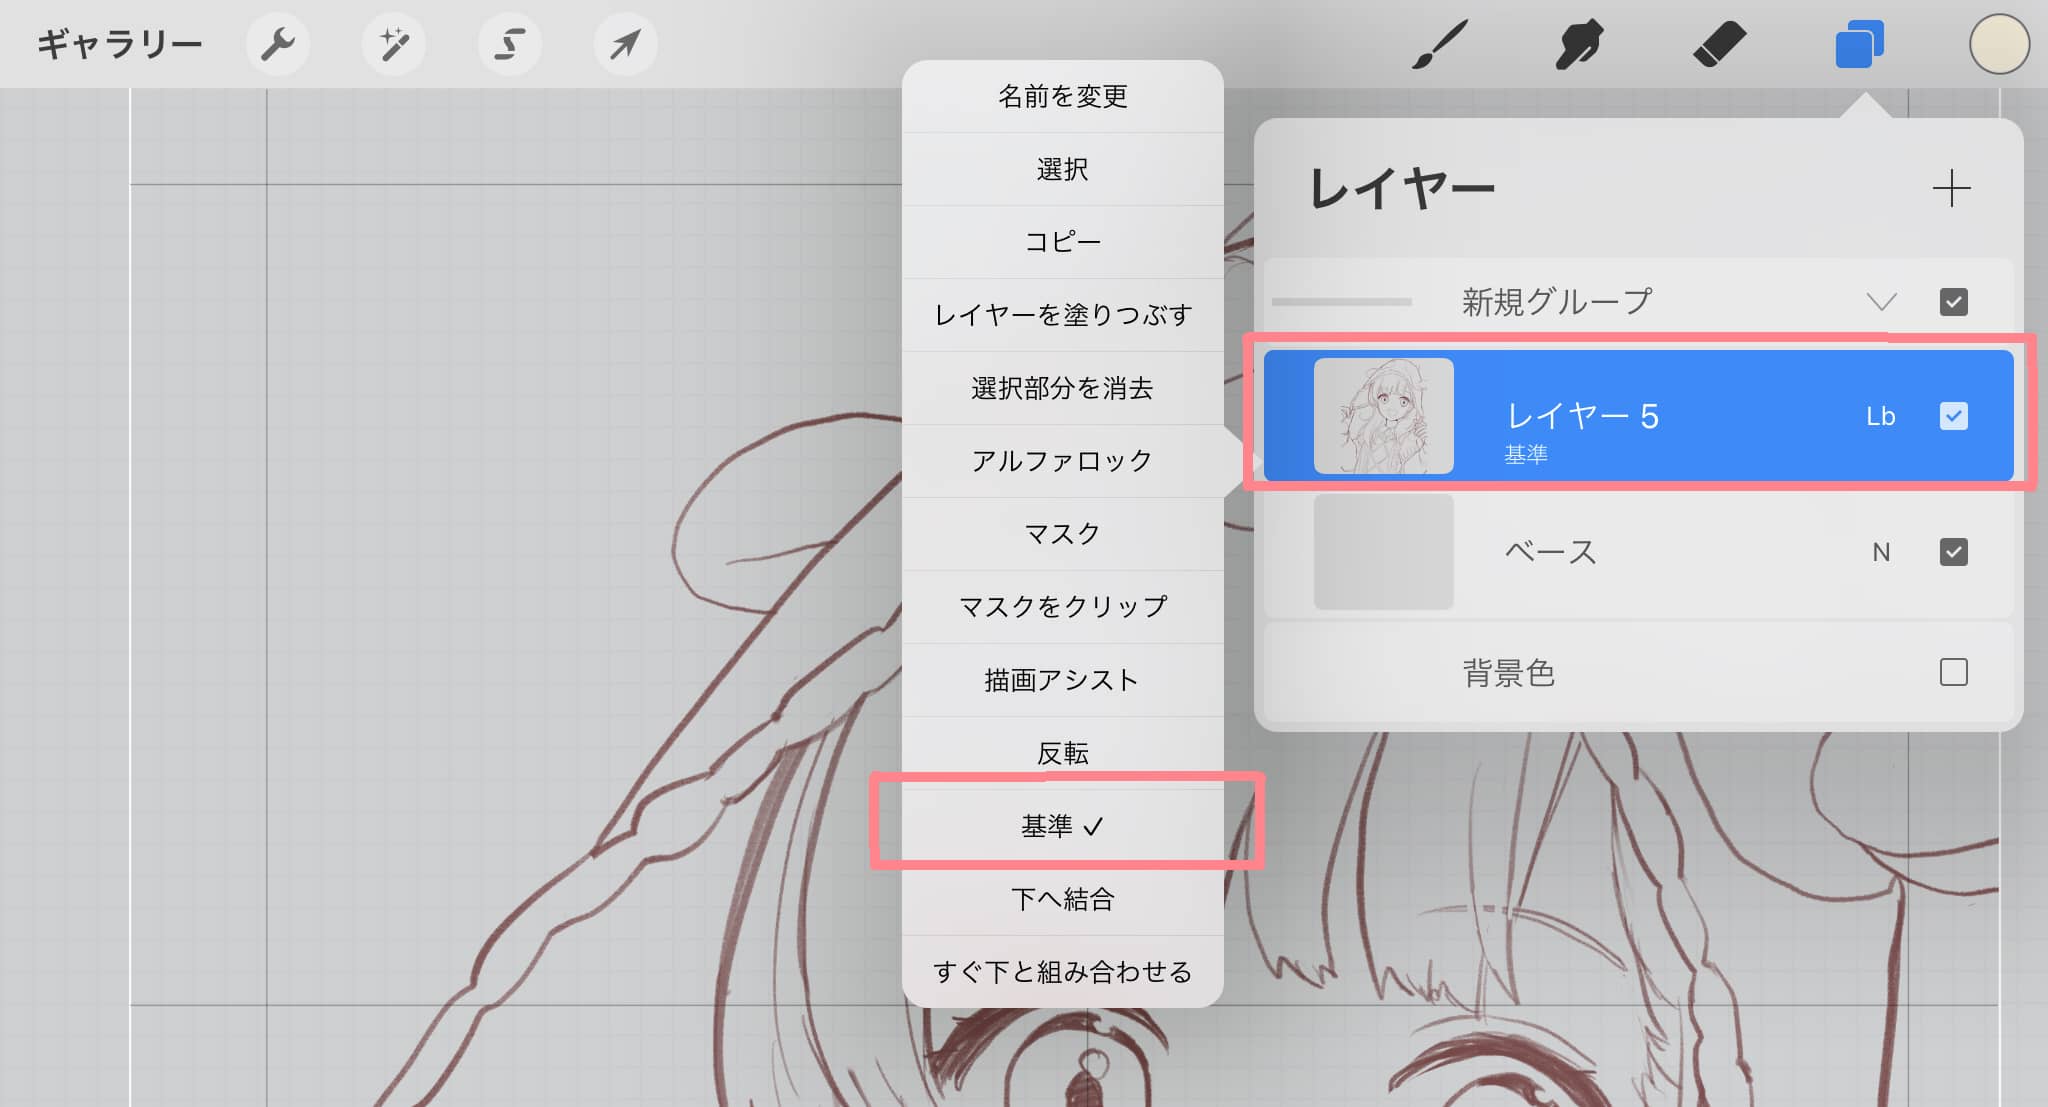
Tap line drawing and set as “standard”
(5)
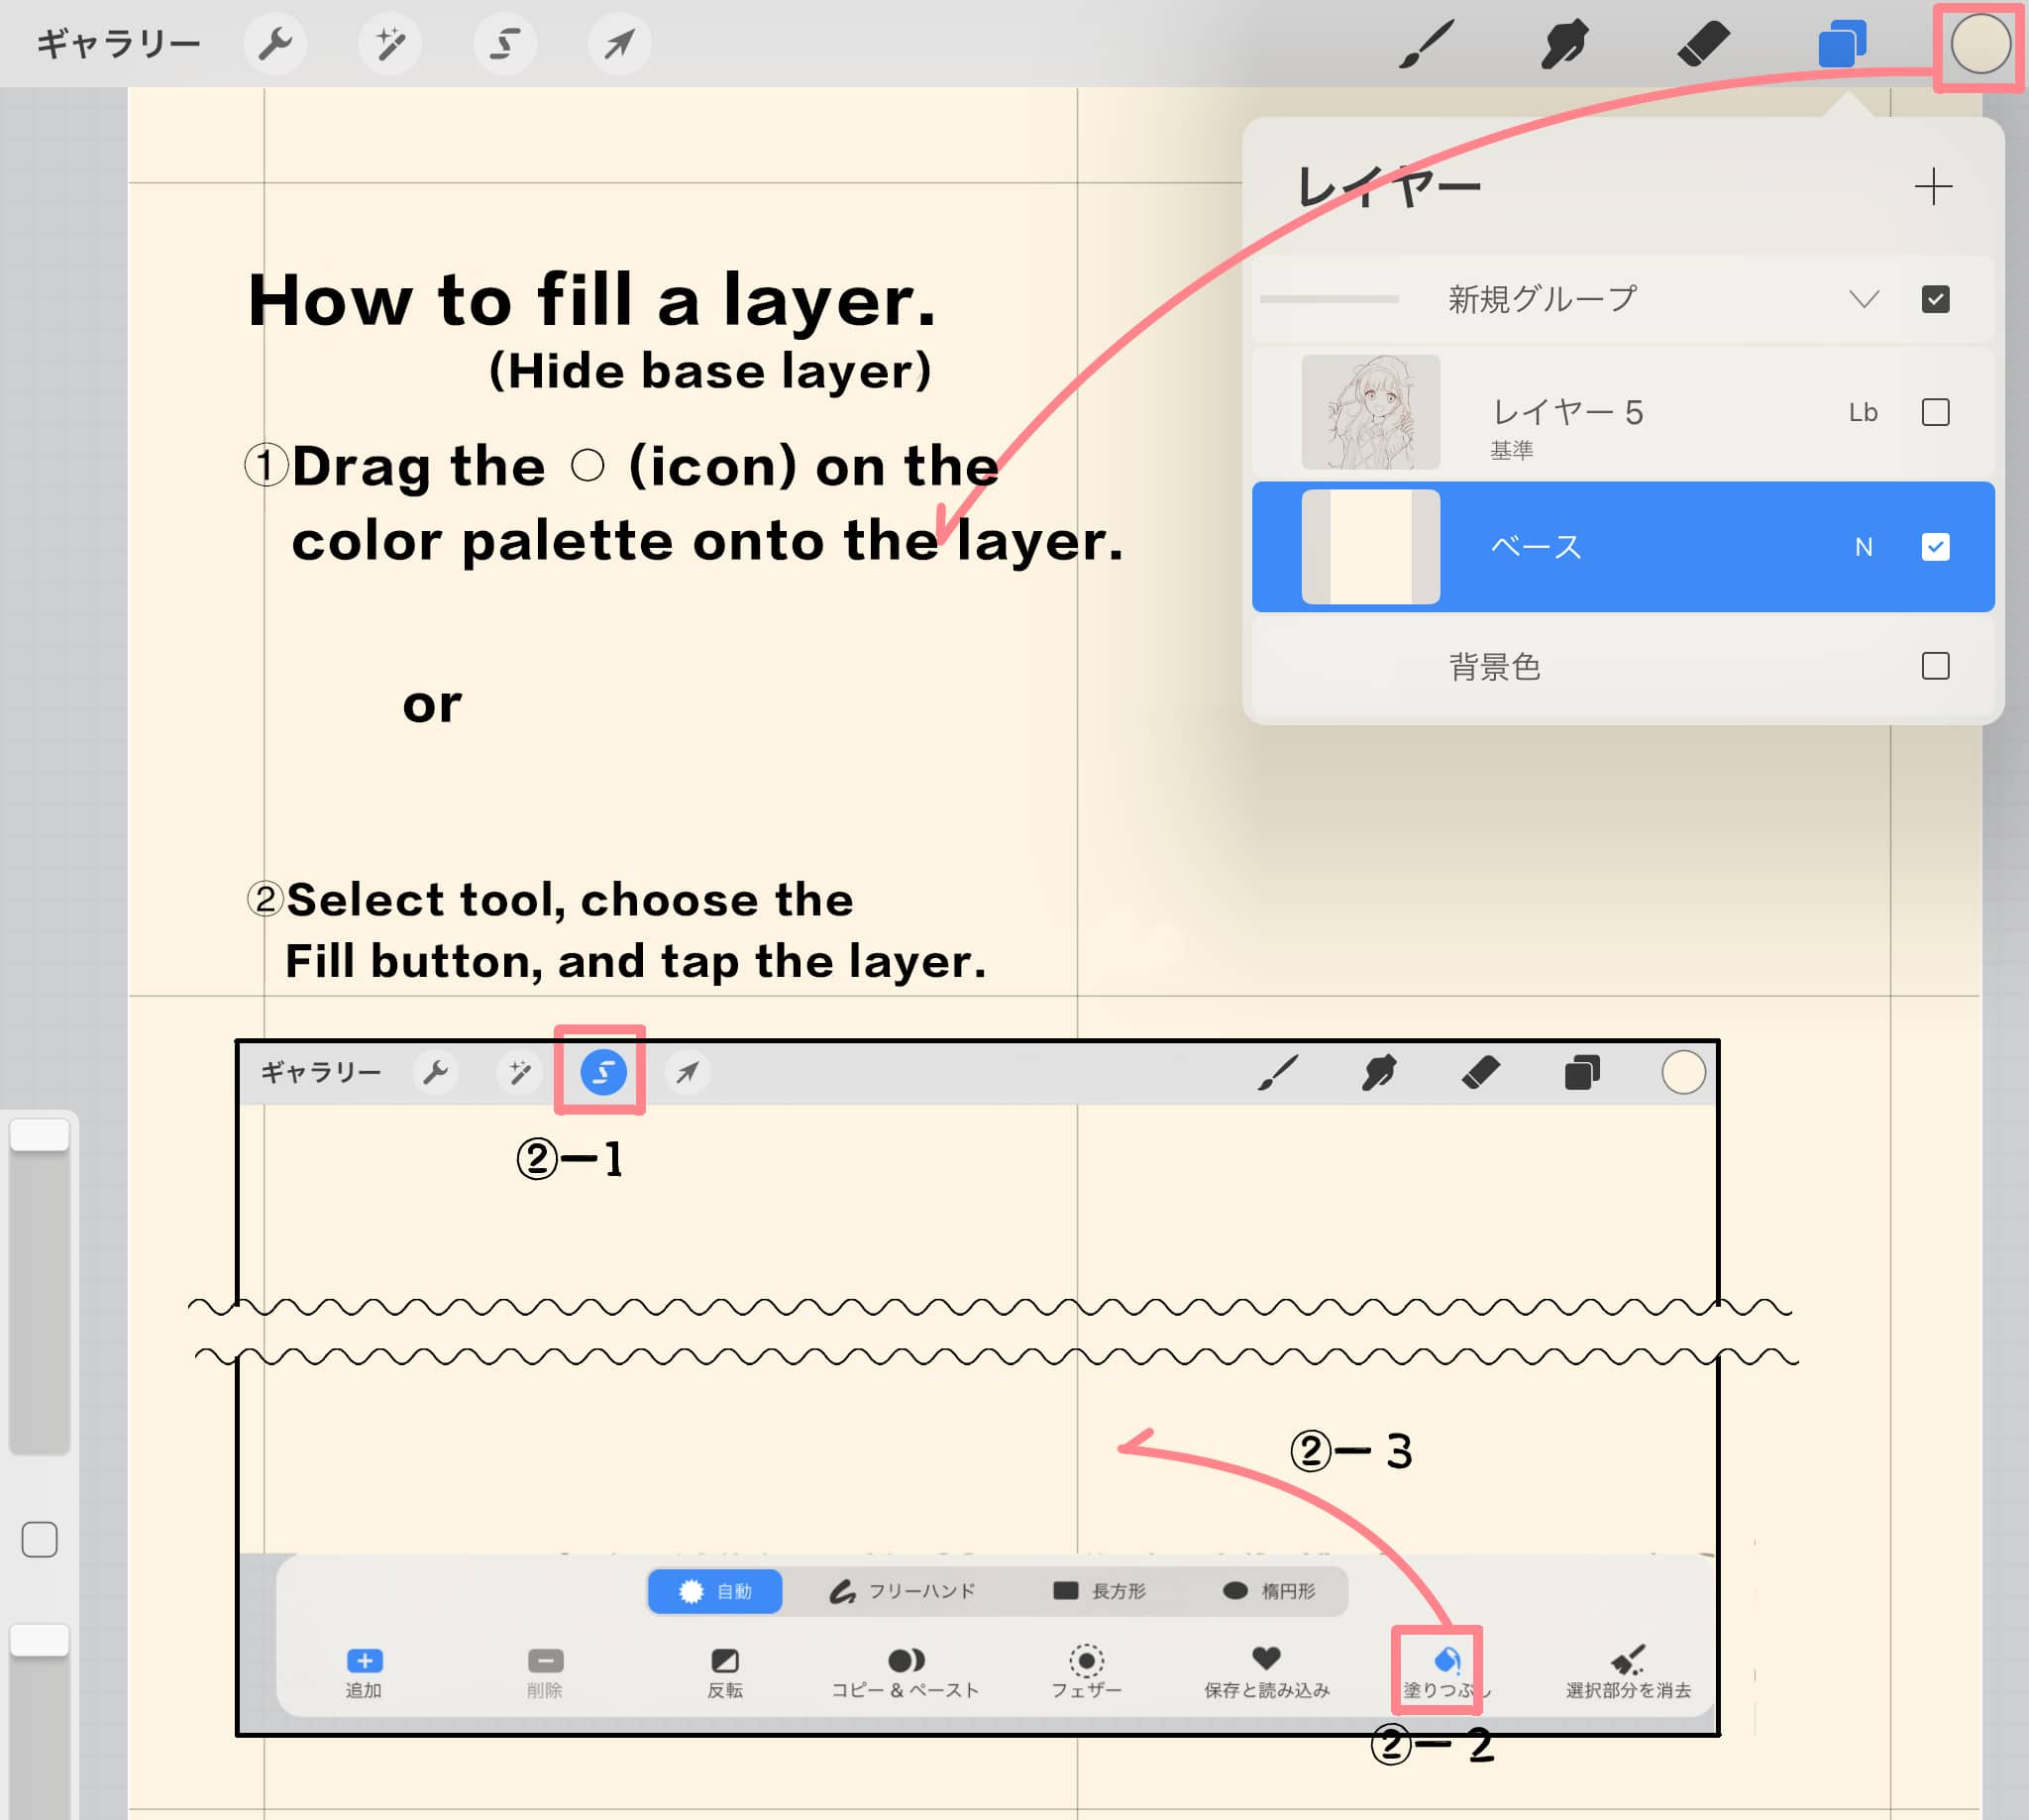
Hide the layer for line drawing and fill the layer for coloring with skin color.
There are two ways to fill it
①Drag the ○ (icon) on the color palette onto the layer.
②Select tool, choose the Fill button, and tap the layer.
You can fill the layer with either of the above.
(6)
Display the line drawing layer and delete the “fill in the margins”.
①Select Tools → Auto Select + Add button → Tap on the area you want to delete.
②When you have finished selecting the deleting part, select the reverse button.
③Tap a tool button other than the selection tool → Clear Layer
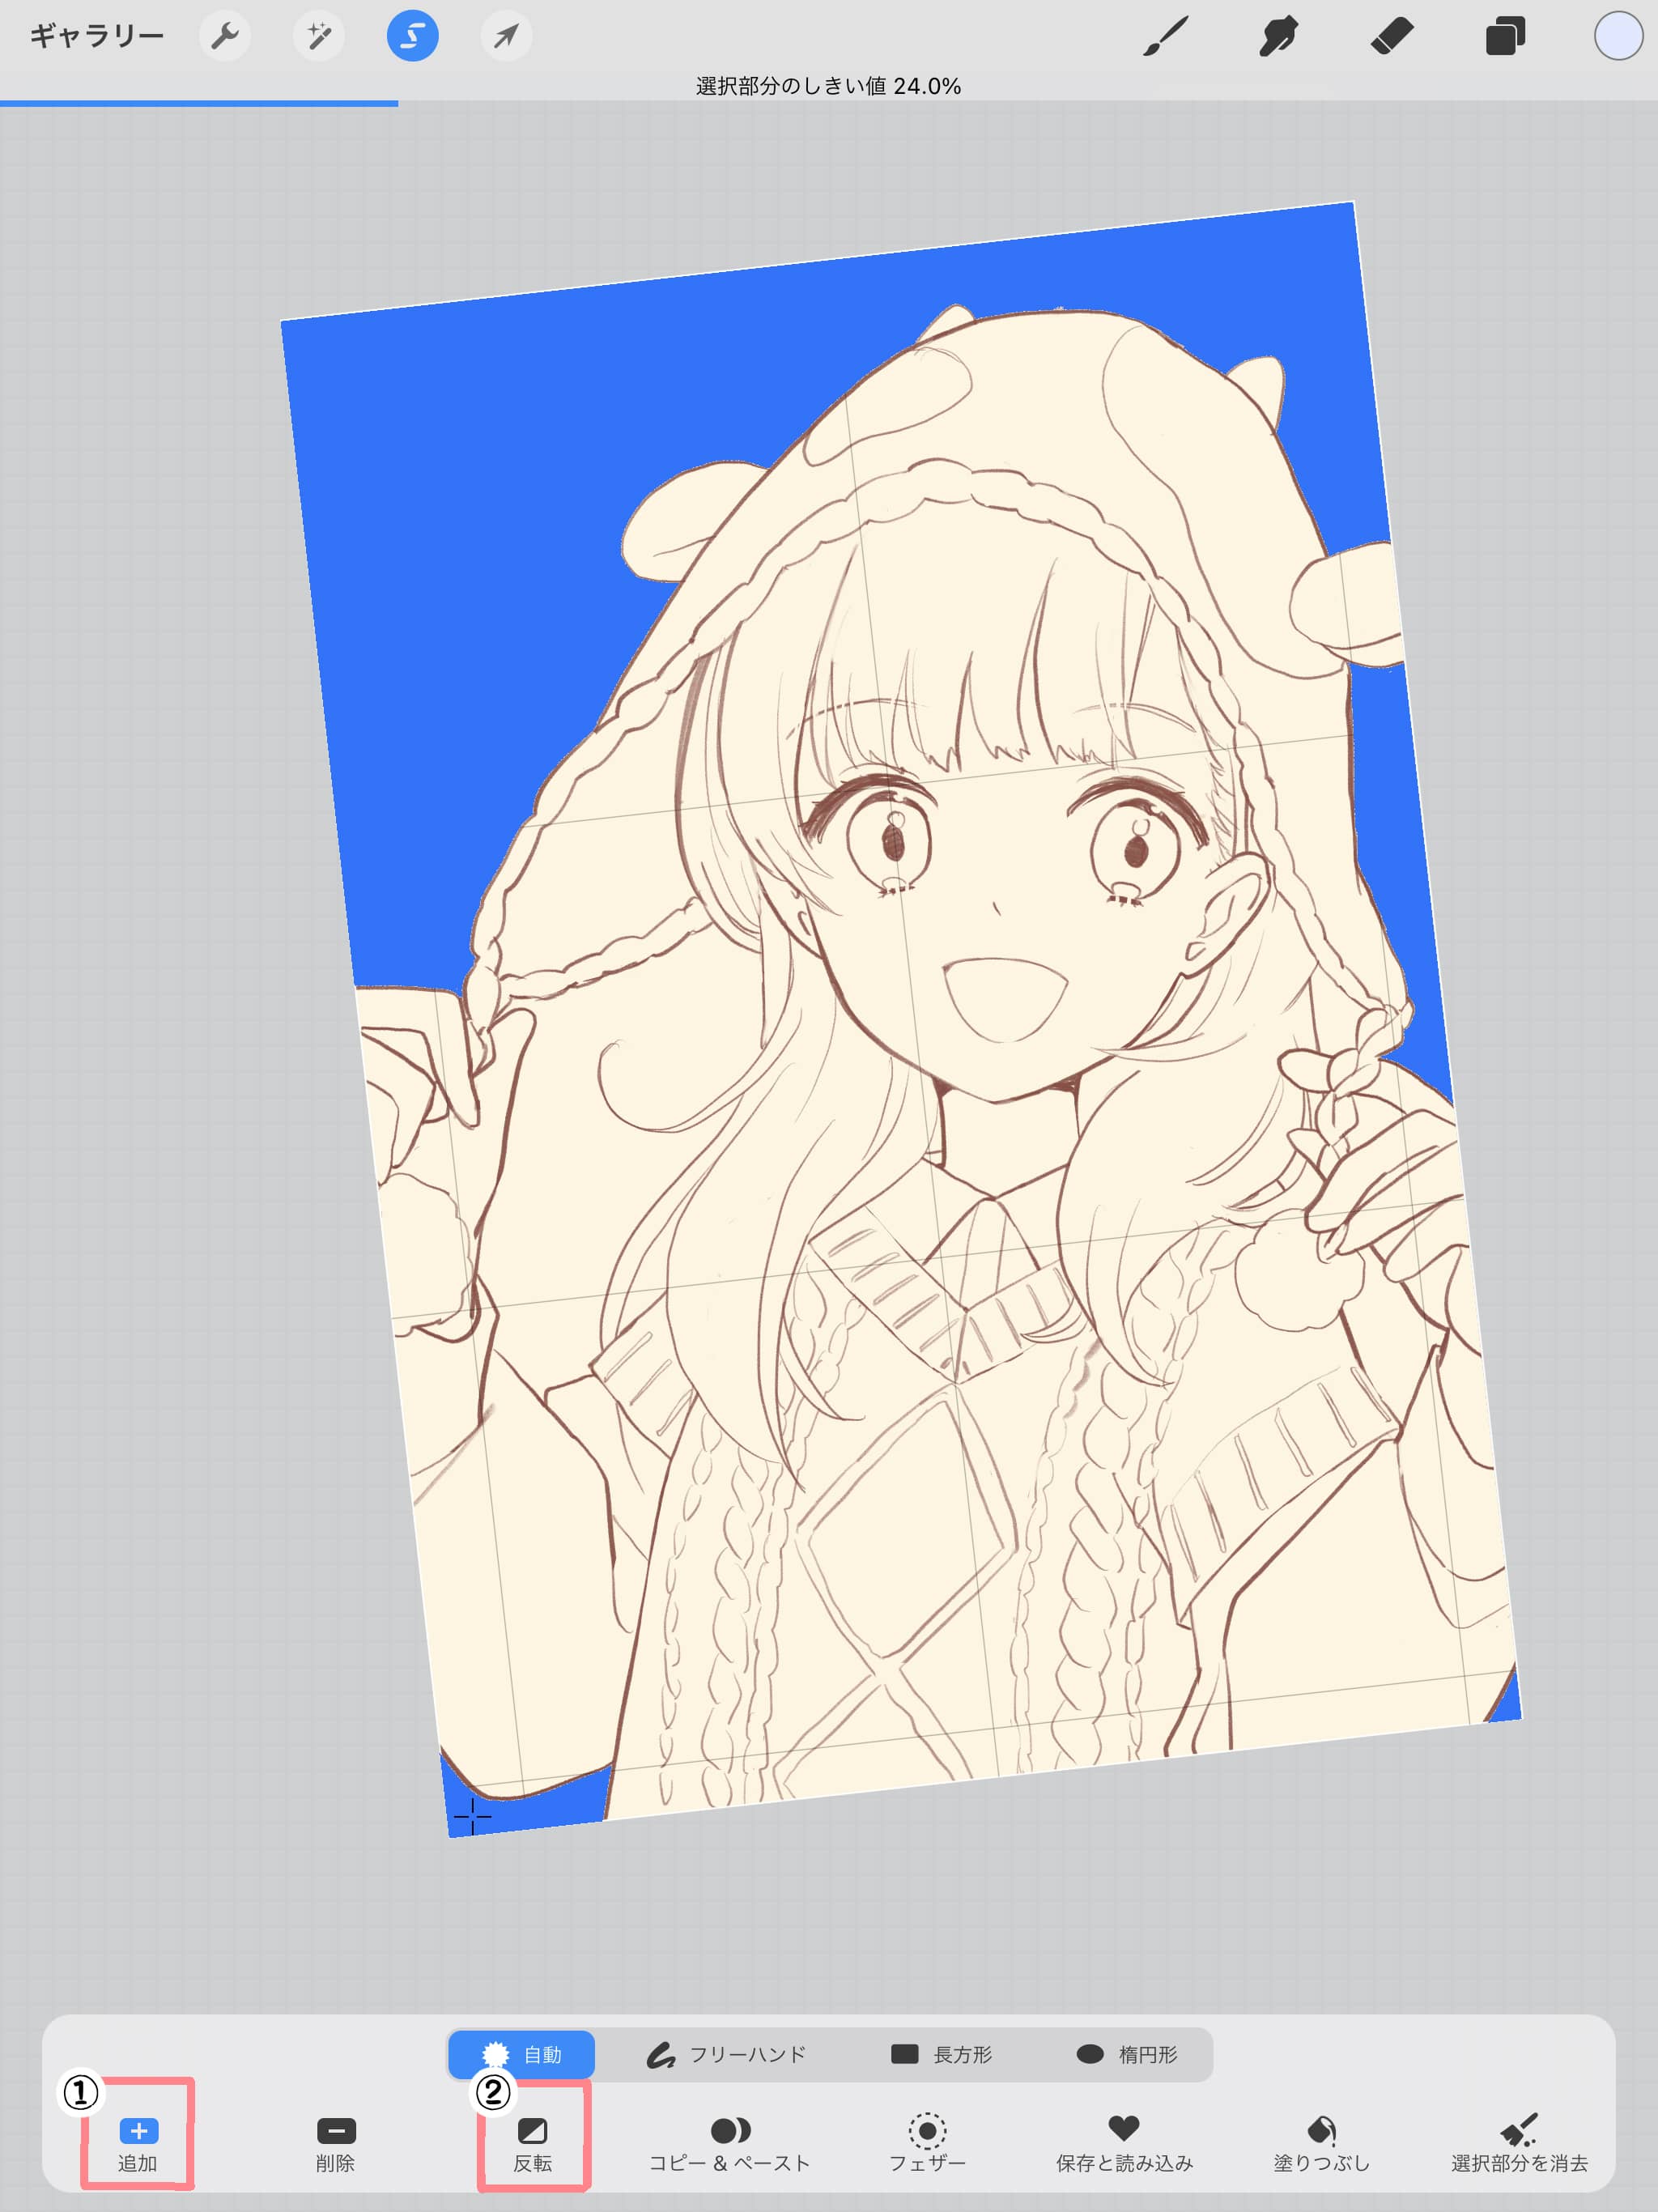
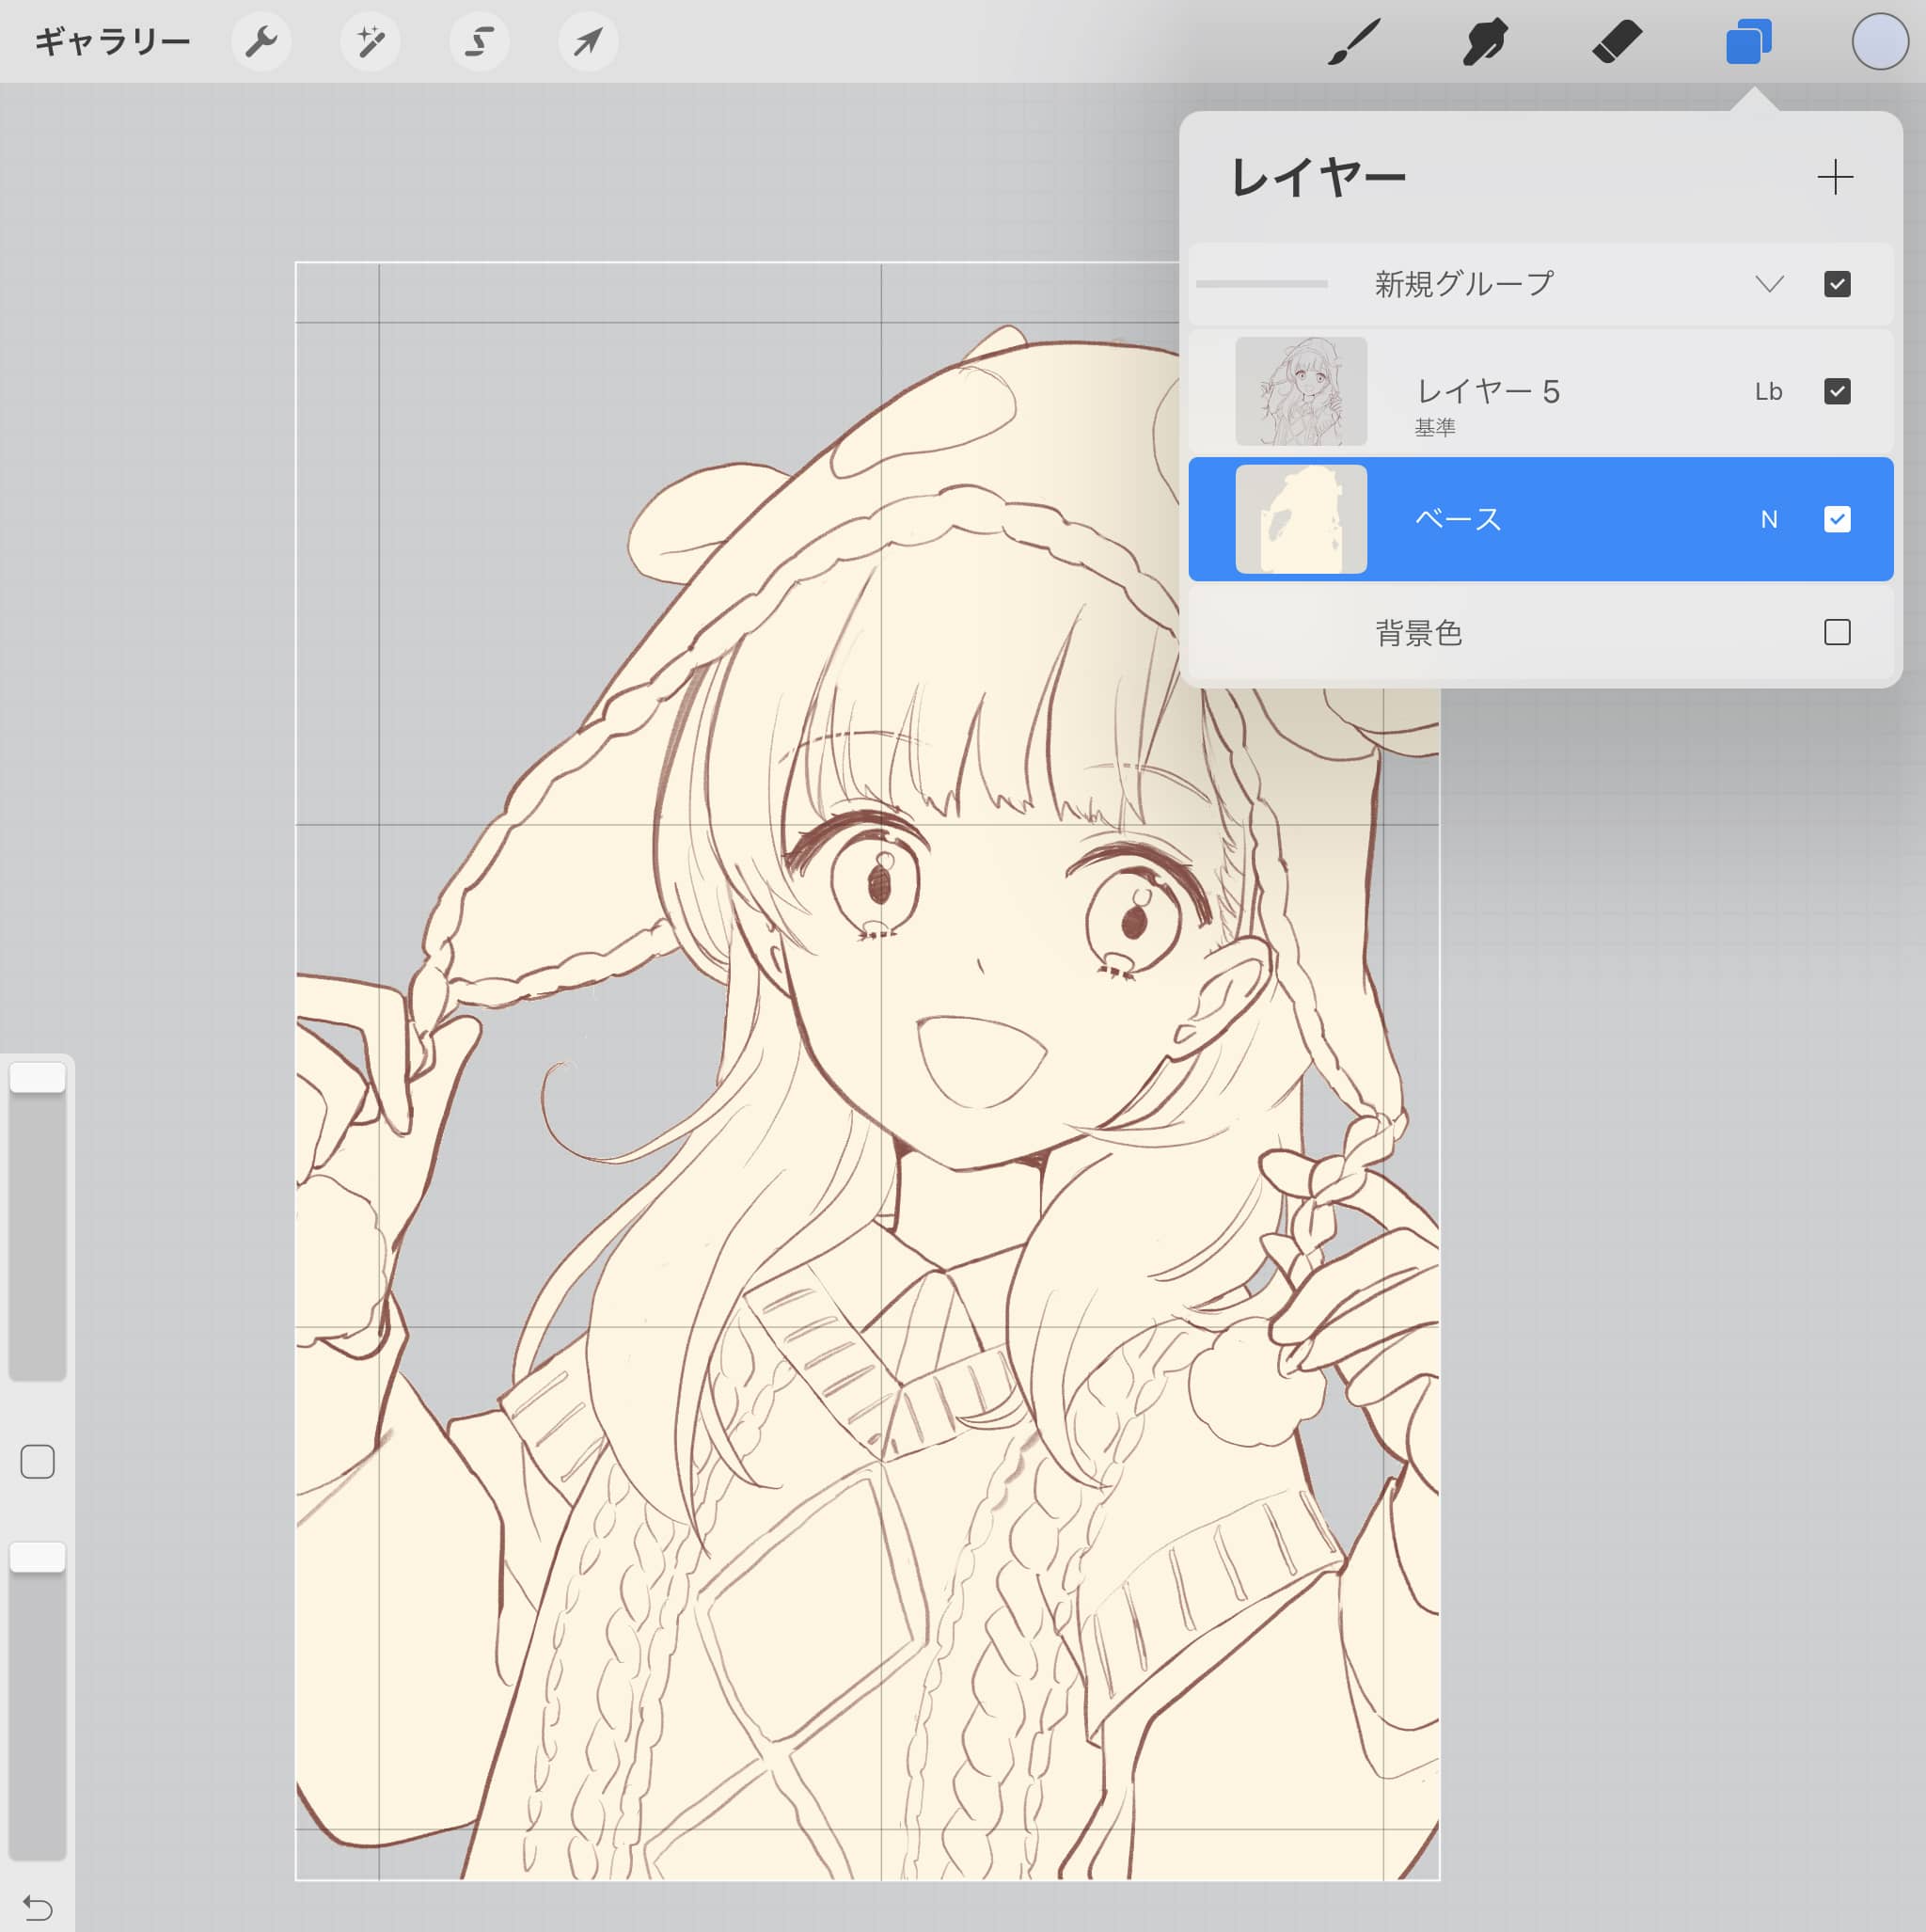
The base for coloring is now ready!
(1)
On top of the base layer, we will create a paint layer for each part.
①Tap the thumbnail of the layer and "Clip Mask". This will allow you to paint the color without it protruding from the base layer.
②Create a similar layer for each part, and when you are done painting, apply an alpha lock to each layer. This is similar to locking transparent pixels in Photoshop, etc. This will allow you to paint another color on a part without it sticking out from the painted part.
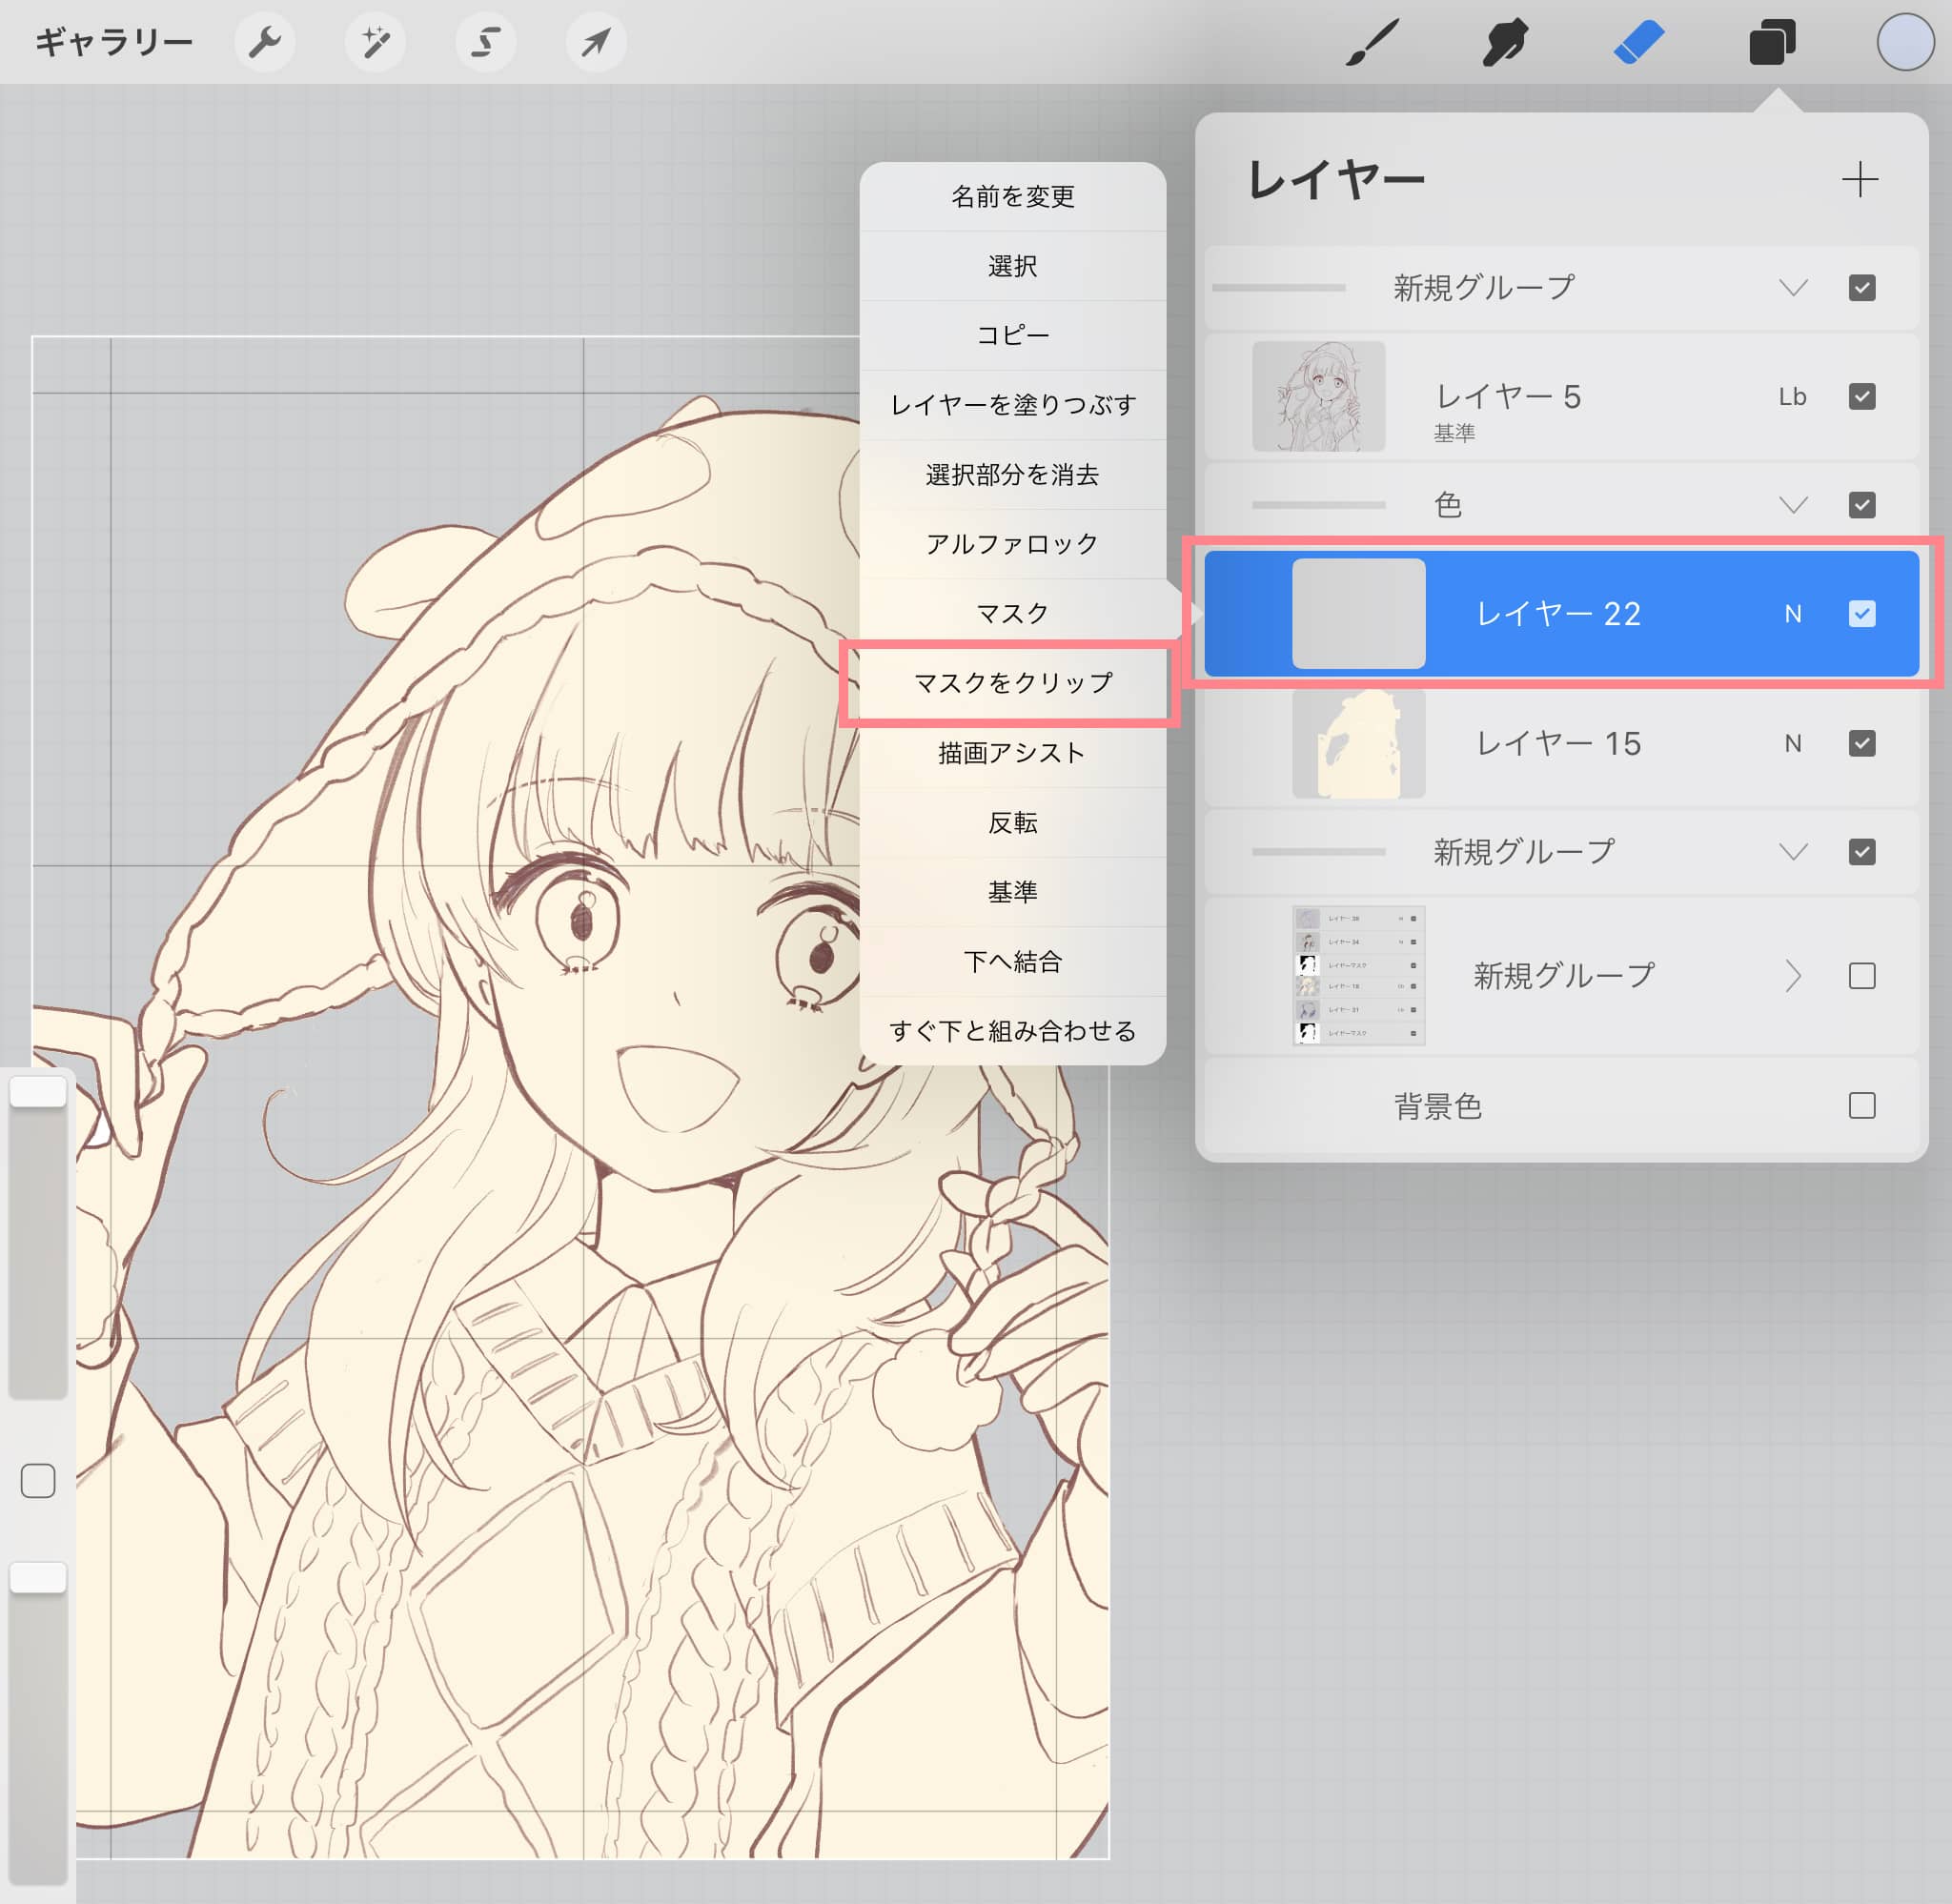
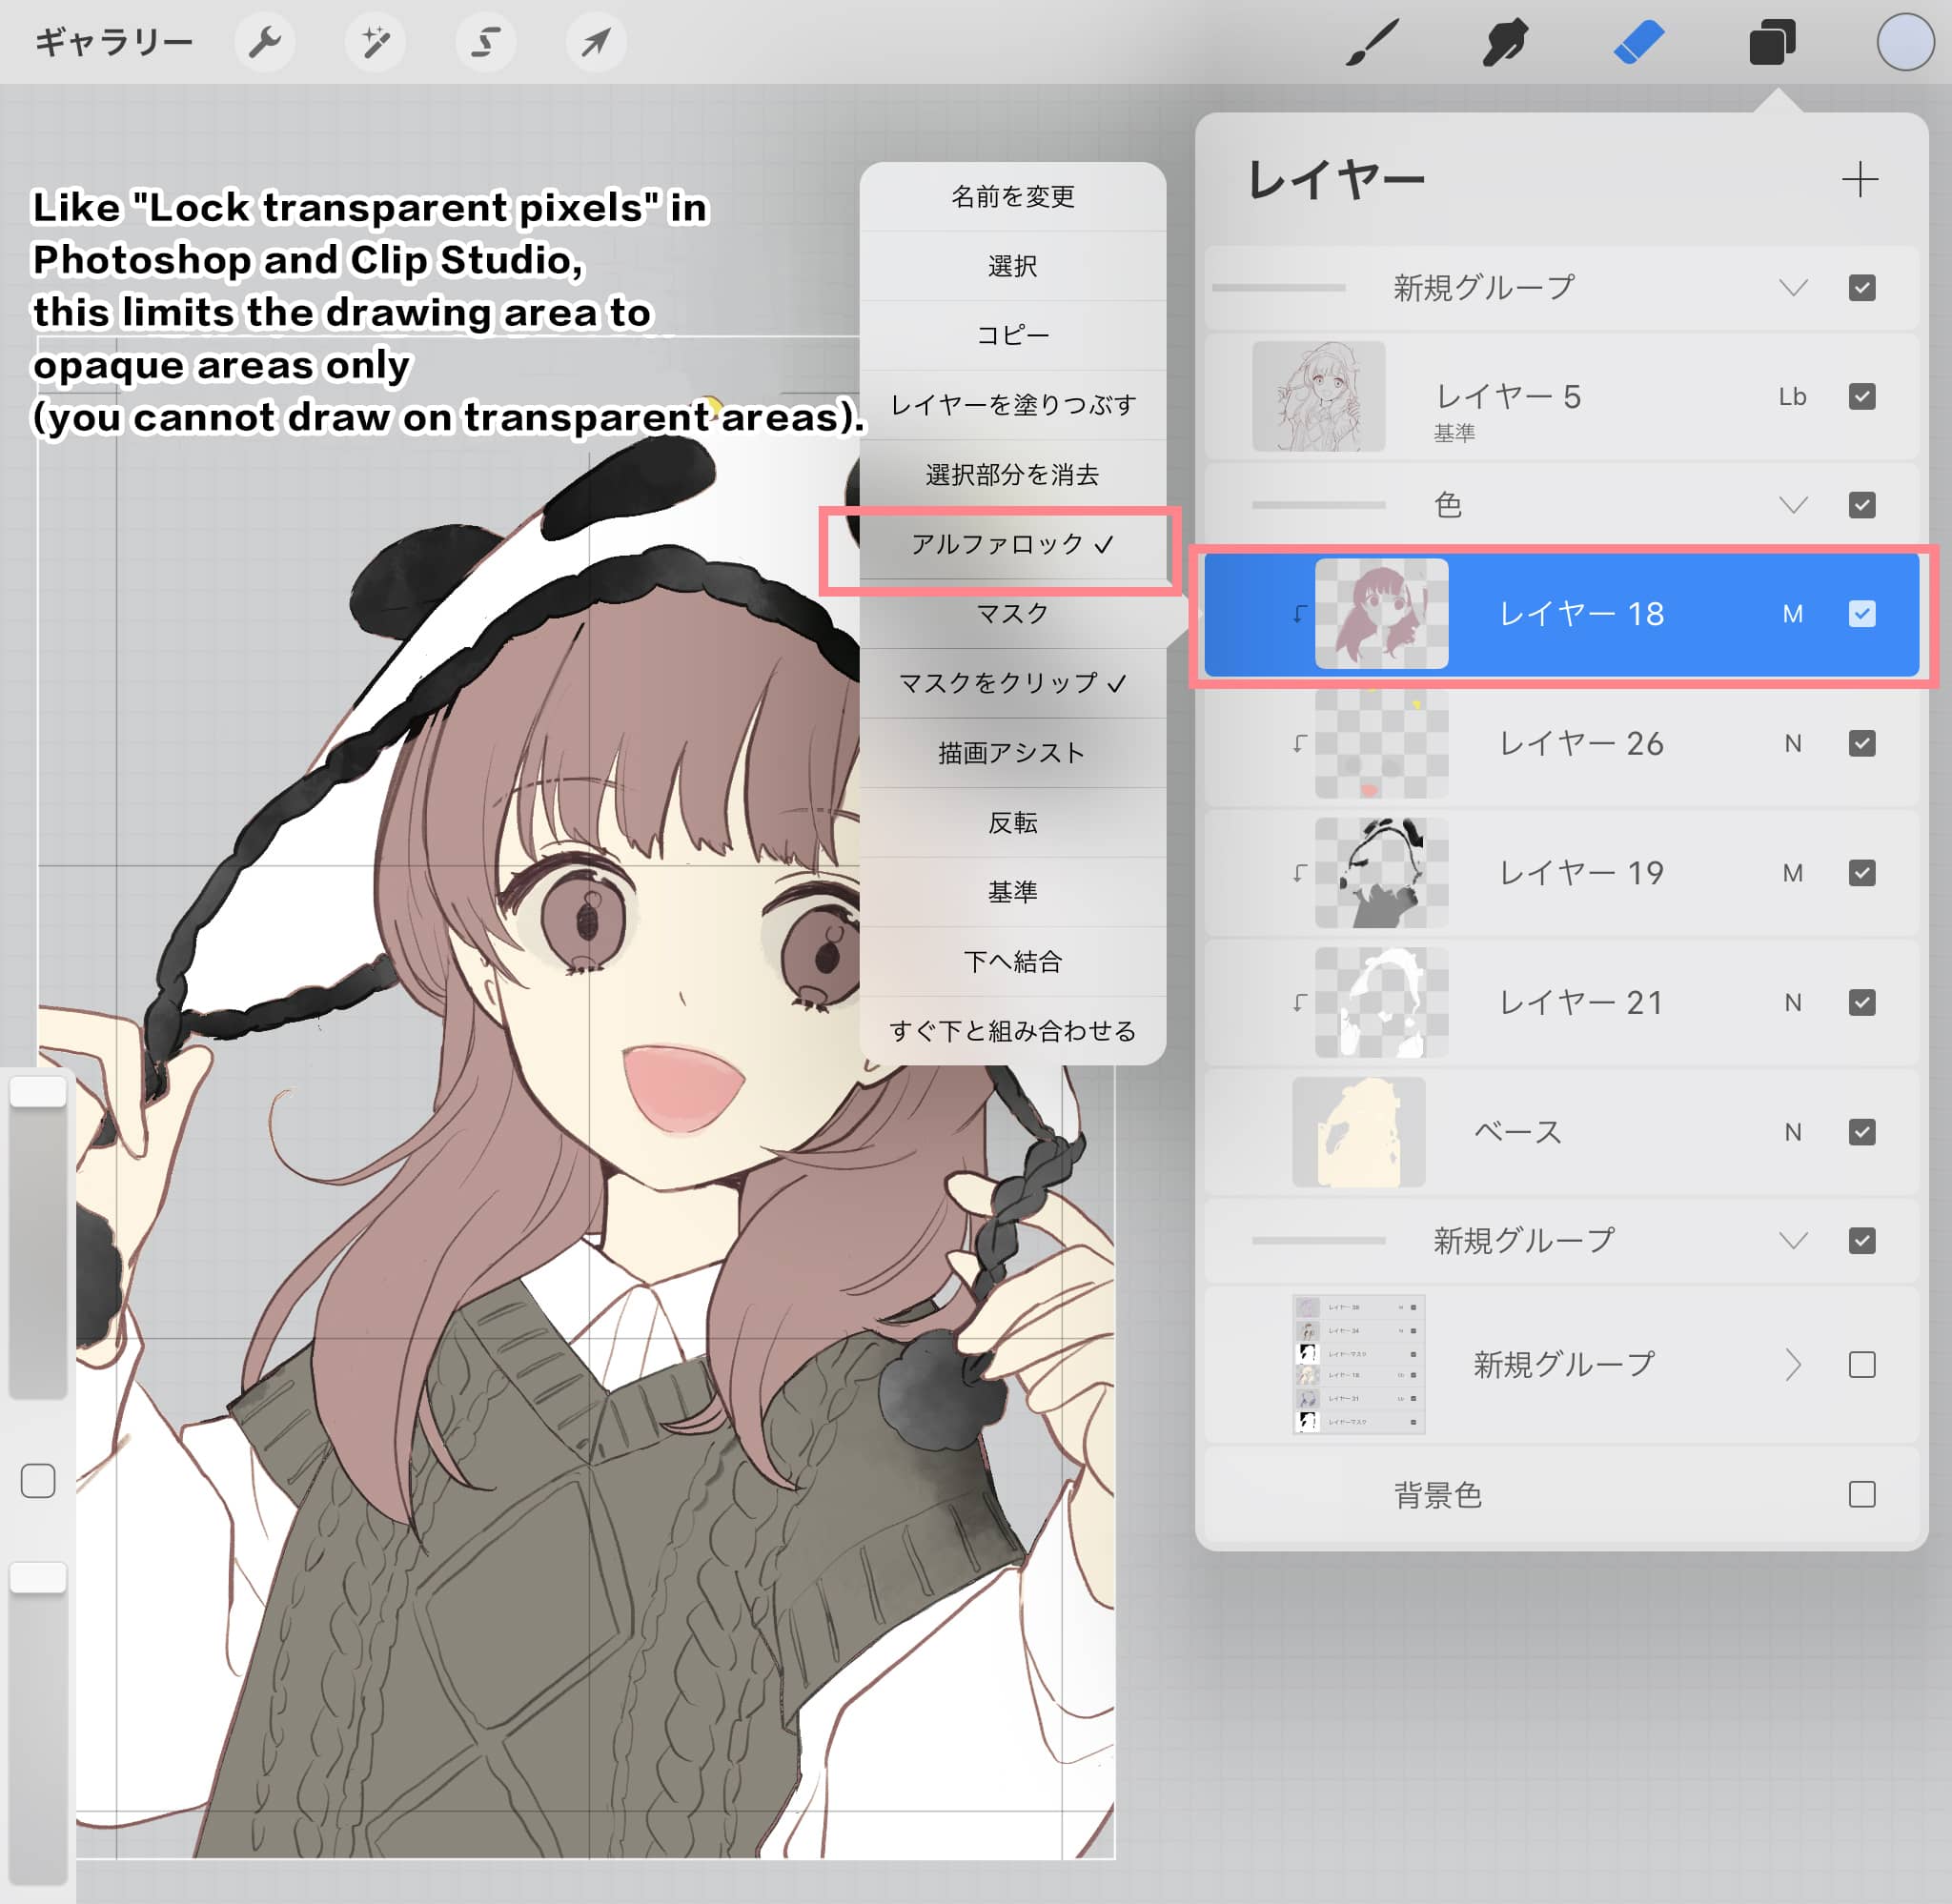
③For shadows and highlights, do the same thing: new layer → clip mask → solid fill with one color → change layer mode -> alpha lock, and change the color to match the light source or part.
(2)
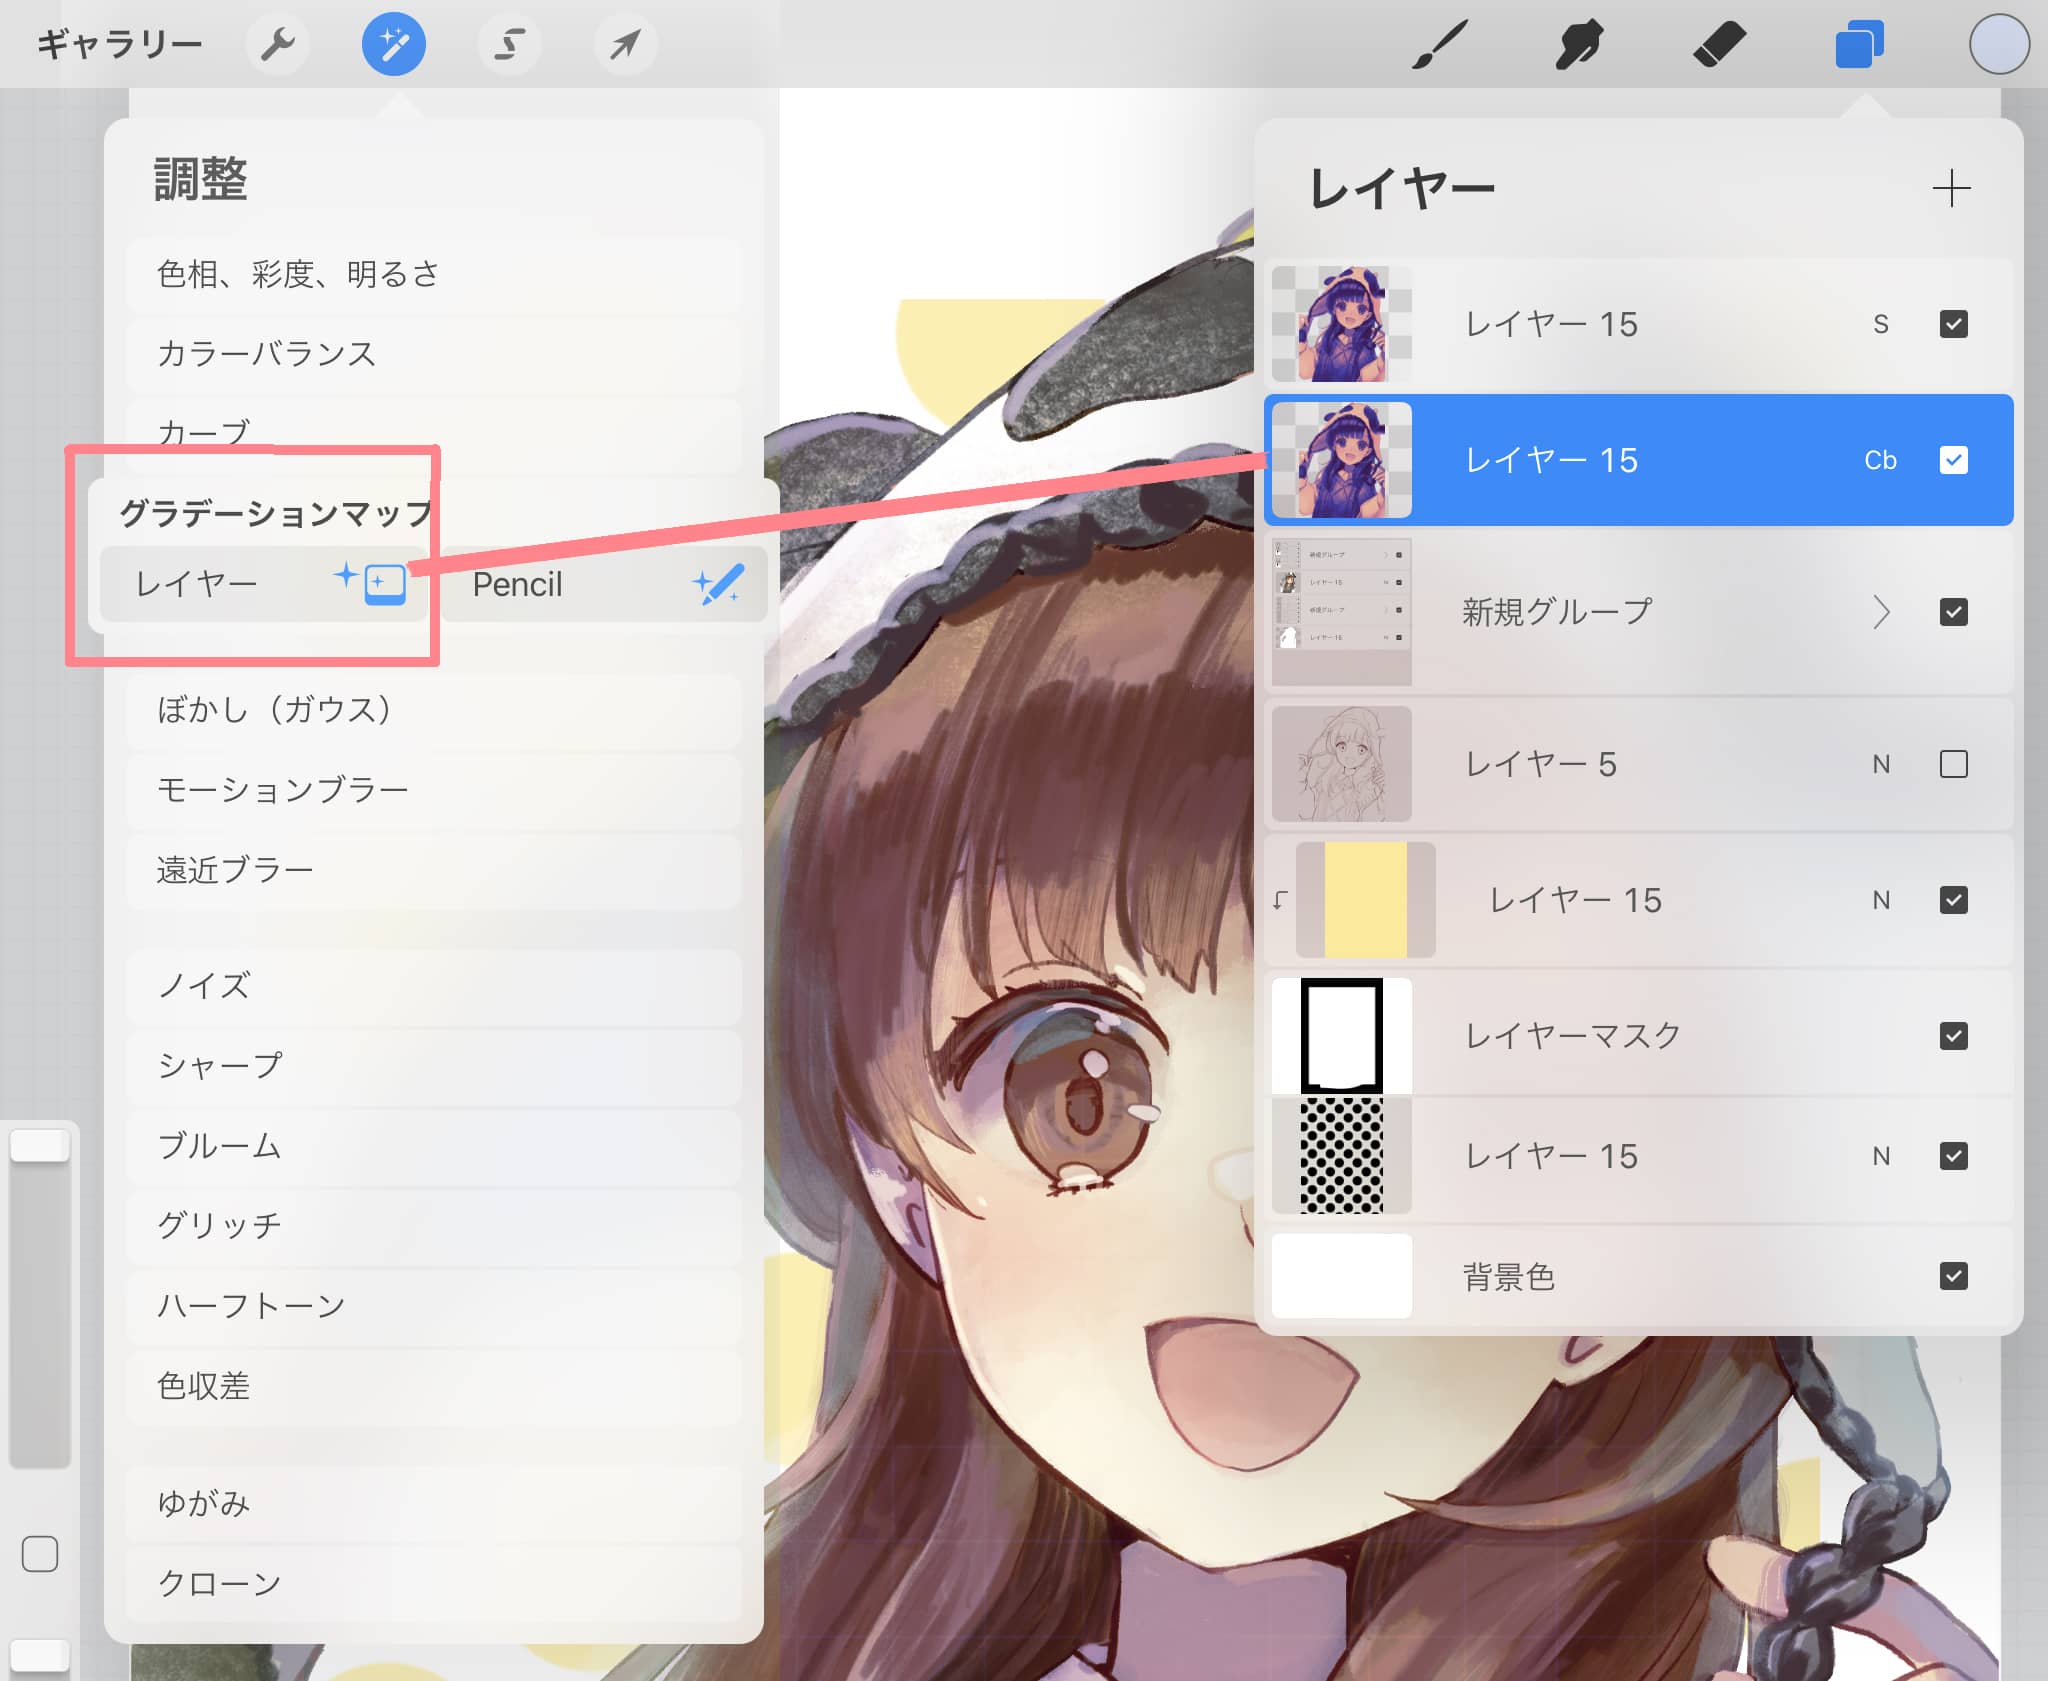
The final layer structure looks like the following image. You can select another layer mode or change the opacity of the layer by tapping on the text that indicates the layer mode.

(3)
At the top, I put a layer that I adjusted using Adjust → Gradient Map → Layers → Venice, and changed the opacity and layer mode. This is recommended because more colors = more details.
(4)
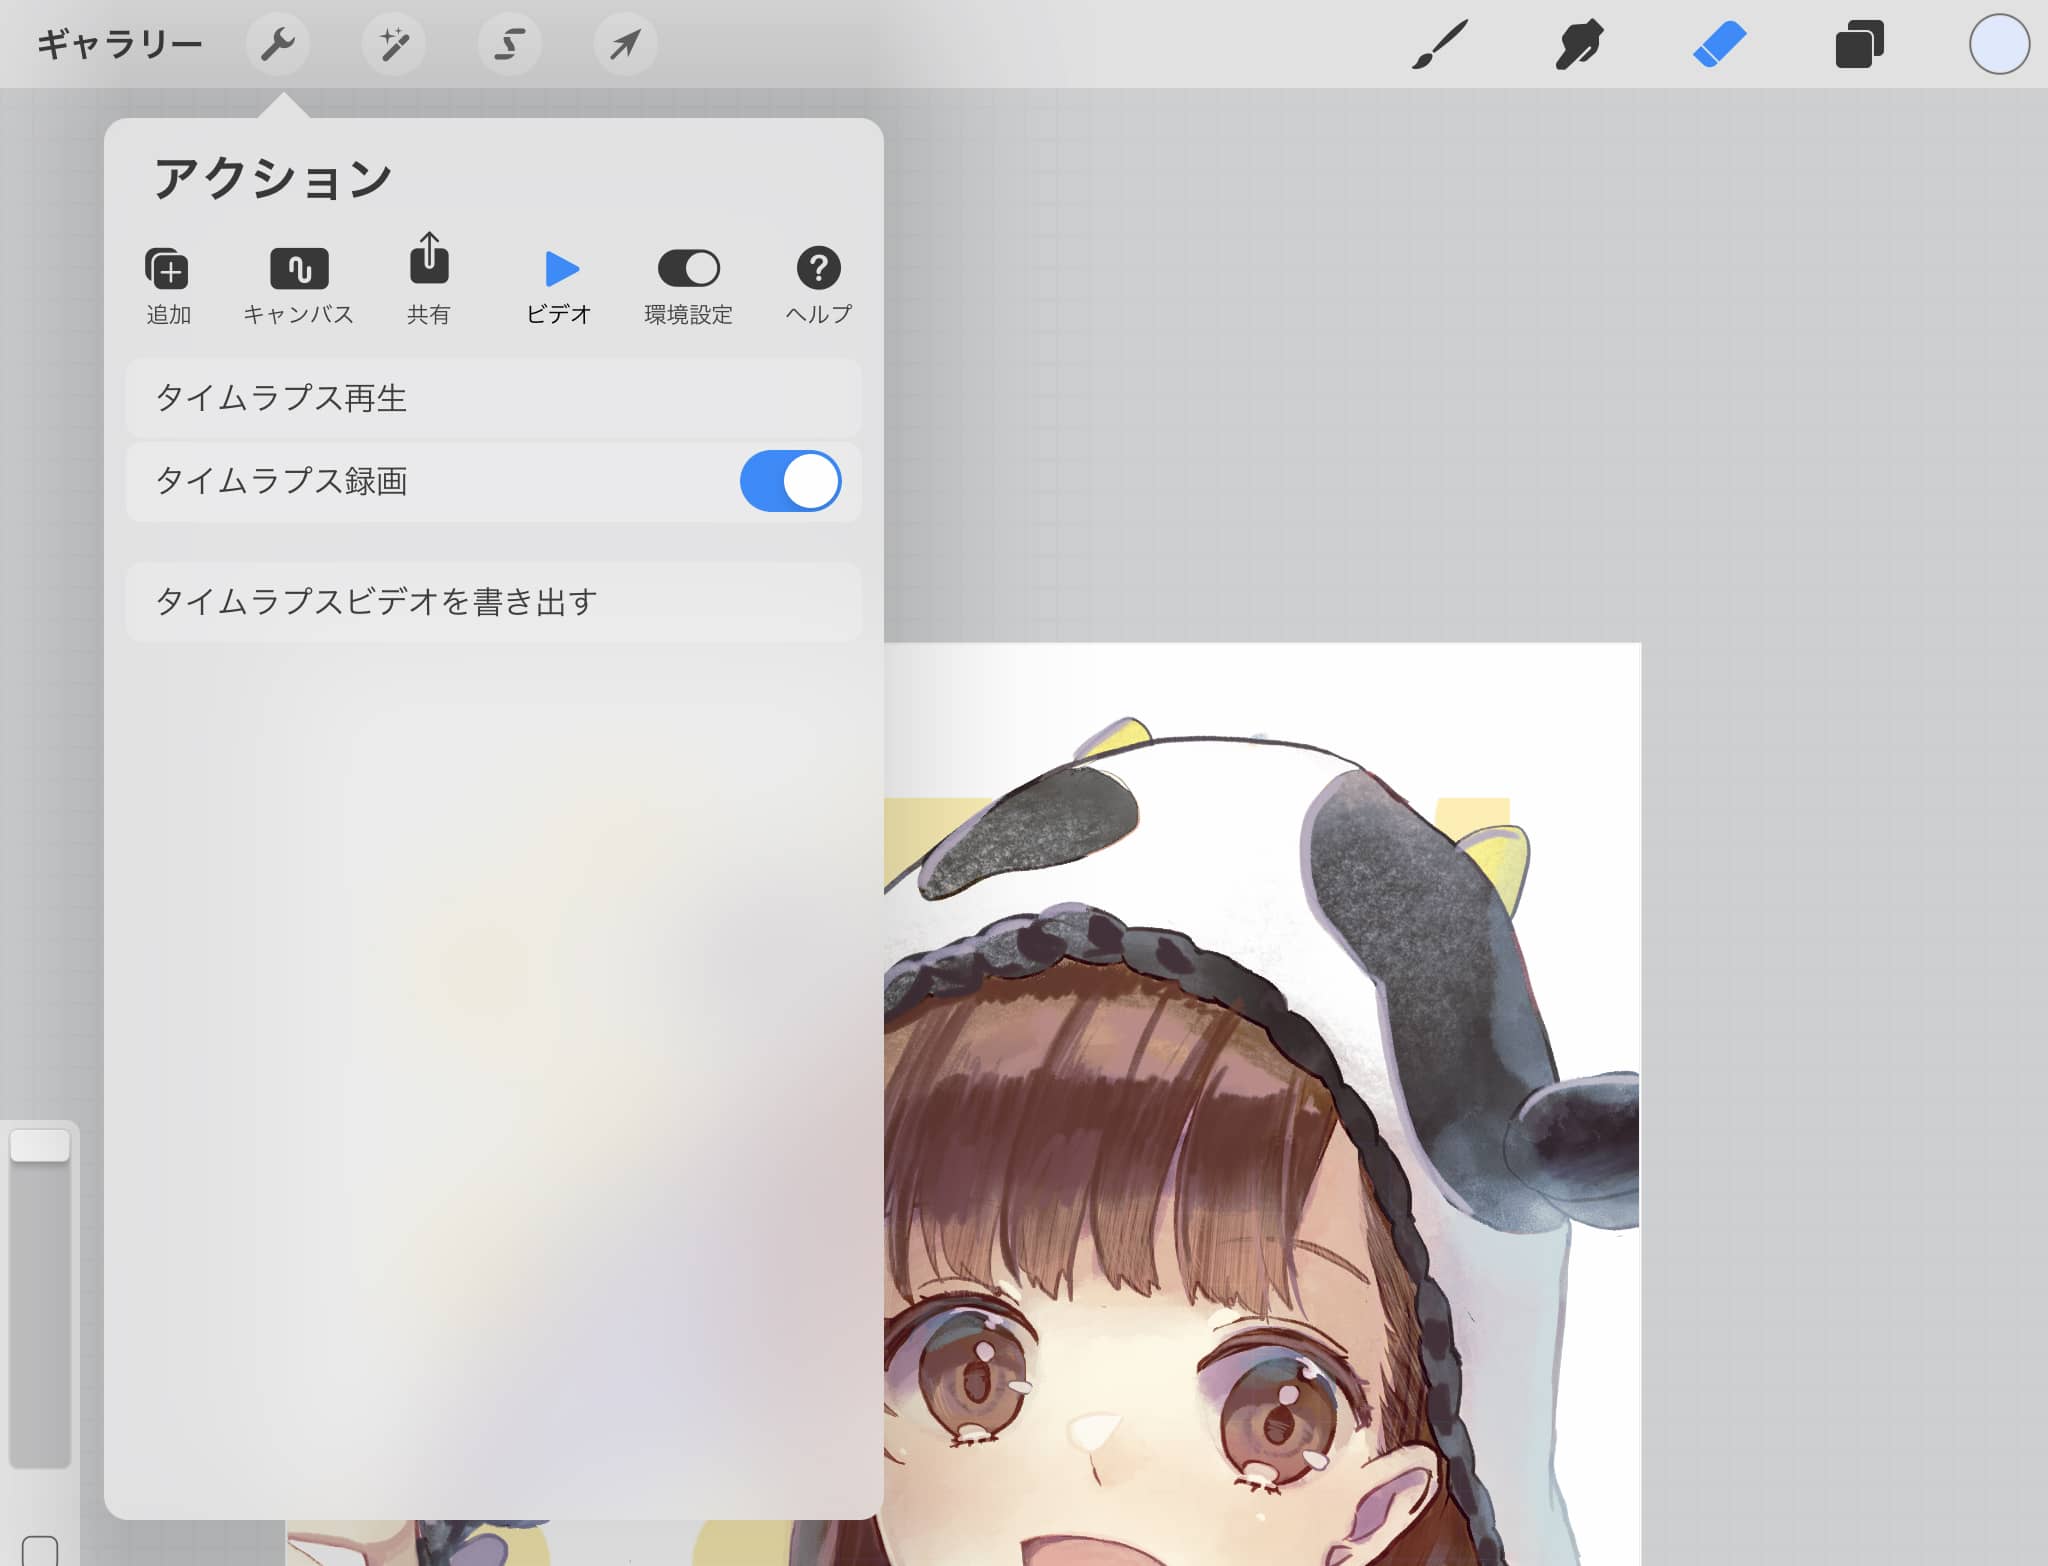
Add a simple background and you're done. At the end of the video, you can watch it back from the beginning by going to Action → Video → Time Lapse Playback!

Thank you for reading this article through to the end!
Click here for the collection: https://medibang.com/u/amrta/
twitter: https://twitter.com/suiccl
http://rabbit.tank.jp/


